About a year ago, in 2019, I realized that gluten and avenin (a similar protein in oats) were resulting in health complications. So, reluctantly, I cut foods containing those pesky proteins out (goodbye sourdough!). Around the same time, I also elected to switch from being vegetarian to being mostly vegan, which I hope to elaborate on in a later post! While both these decisions have improved my health overall, they have also change the way I cook for myself. And if I am being honest, at first it was really difficult!
Which is the reason I started this blog! To inform people like me how to nourish their body when it seems like an exhausting task. On this platform I hope to do a few things:
Provide some of my favorite recipes
Identify homemade and commercial substitutes
Review restaurants that offer both Gluten Free and vegan (or vegetarian) options
Inform on the impact food has on our health and the environement
I also tend to travel a bit, so I hope to review restaurants in cities outside my current home base, Saint Louis!
While the mission may seem very over arching, I am really hoping to be a one stop shop for the folks out there avoiding gluten and dairy! I also aim to ensure that all of the information I provide is well vetted and reliable.
Lastly, I am always open to suggestions as to how to make this thing work better. So please, don’t hesitate to reach out even if it’s just to suggest recipes or new restaurants! I am excited to start this journey under your watch, so please stay tuned!
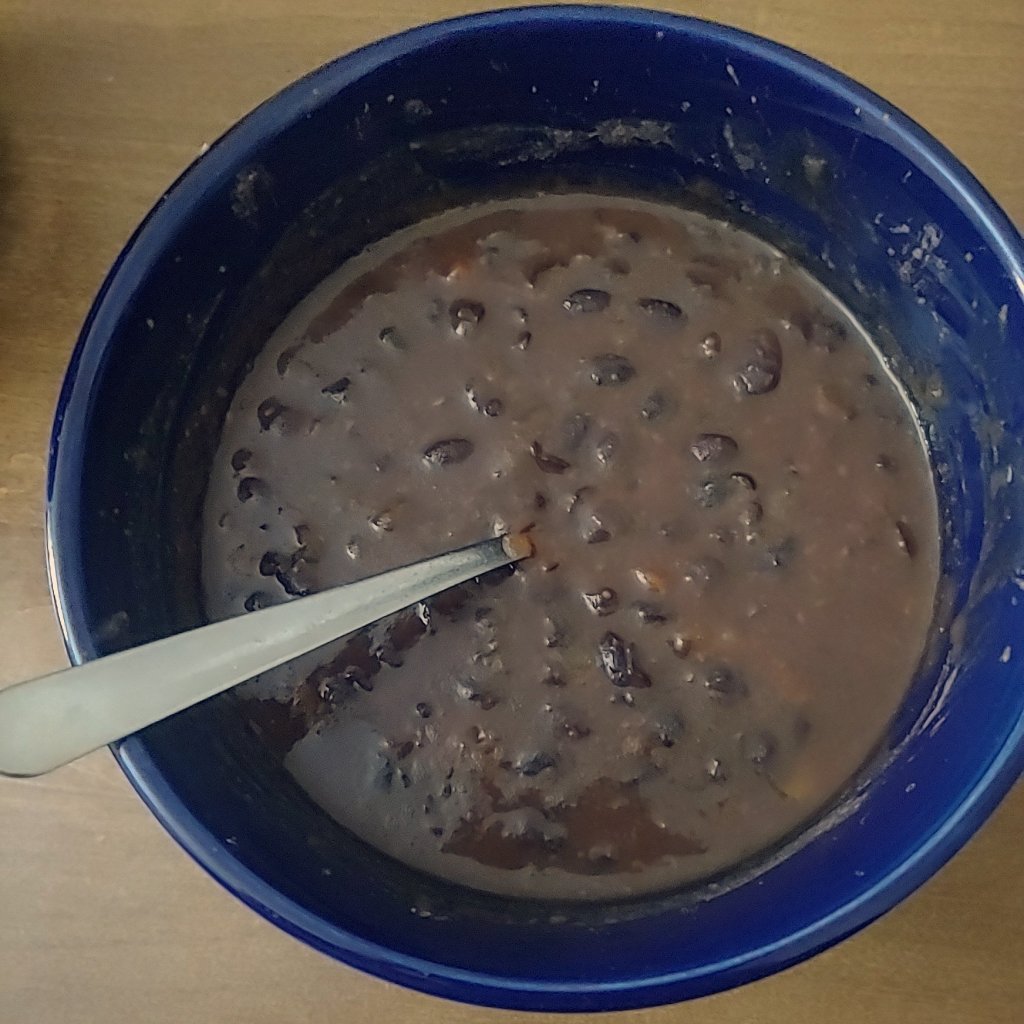
The soup saga continues with this delicious black bean soup. It is one I had been craving for a while, and whose simplicity is unmatched. Initially the soup seemed too thin so I had to adjust the recipe a bit to result in a thicker soup, but it all worked out in the end. The following recipe will leave you with something that is equal parts hearty, earthy, and spicy. There are a number of ways to eat this soup: as a side or a main dish, topped with lemon juice, cilantro or avocado, or alongside a quesadilla. It is also made in a pressure cooker so it comes together quick and easy.
Before we get to the recipe, I thought I’d provide a bit of bean history so skip ahead if you just want the recipe. Common bean (Latin name – Phaseolus vulgaris), the type that includes red, black, white, and kidney beans, originated in Mesoamerica. Common bean is the species I am currently researching as a part of my PhD. The specific domestication center, where beans were first cultivated in fields for food, is suspected to be in Oaxaca and/or Jalisco Mexico. From here they spread south through the rest of Mesoamerica into South America, facing further domestication in Peru and the Andes.
Beans have been an integral component of the diets of many cultures, especially those in Meso and South America. We see this in the various bean stews that come out of the region and the Americanized versions we eat today (think refried beans and even this black bean soup!). So many beautiful bean dishes are out there to explore that show case the numerous cultures and food ways that were responsible for domesticating them, but for now we will concern ourselves with this black bean soup. It makes about 6 -8 servings depending on how you eat it.
Ingredients
6 – 16oz cans of black beans
6 cups veggie stock
2 celery stalks – finely chopped
1 medium yellow onion – finely chopped
1 large carrot – finely chopped
1 jalapeno finely chopped
3 cloves garlic – minced
1 tbsp. salt
1.5 tsp. black pepper
1 tbsp. olive oil
2 tsp. smoked paprika
2 tsp. cumin
2 tsp. red chili powder
1 tsp. coriander
4 bay leaves
1 tsp. oregano
Toppings such as lemon juice, cilantro, hot sauce, tortilla strips, or avocado
Instructions
Set your instapot/ninja foodie to sauté on medium or heat your pressure cooker on the stove, add the oil, onions and a pinch of salt – cook until fragrant
Add in the garlic, jalapenos and spices, cooking for an additional 2 – 3 minutes
Stir in the remaining veggies and cook for 2 – 3 more minutes
Dump in the cans of beans, including the liquid. Add the veggie stock and bay leaves and place the lid on your pot.
Set it to high pressure for 10 minutes, allowing it to depressurize for another 10 minutes then release the remaining pressure.
Mash up some of the beans, or puree in a food processor and stir to combine. This is what will get the soup nice and thick. Add some hot sauce here if you like things a little more spicy.
Allow the soup to cool until safe to consume, then serve in bowls topped with whatever you like. We really enjoyed having some quesadillas/tortas along side it!
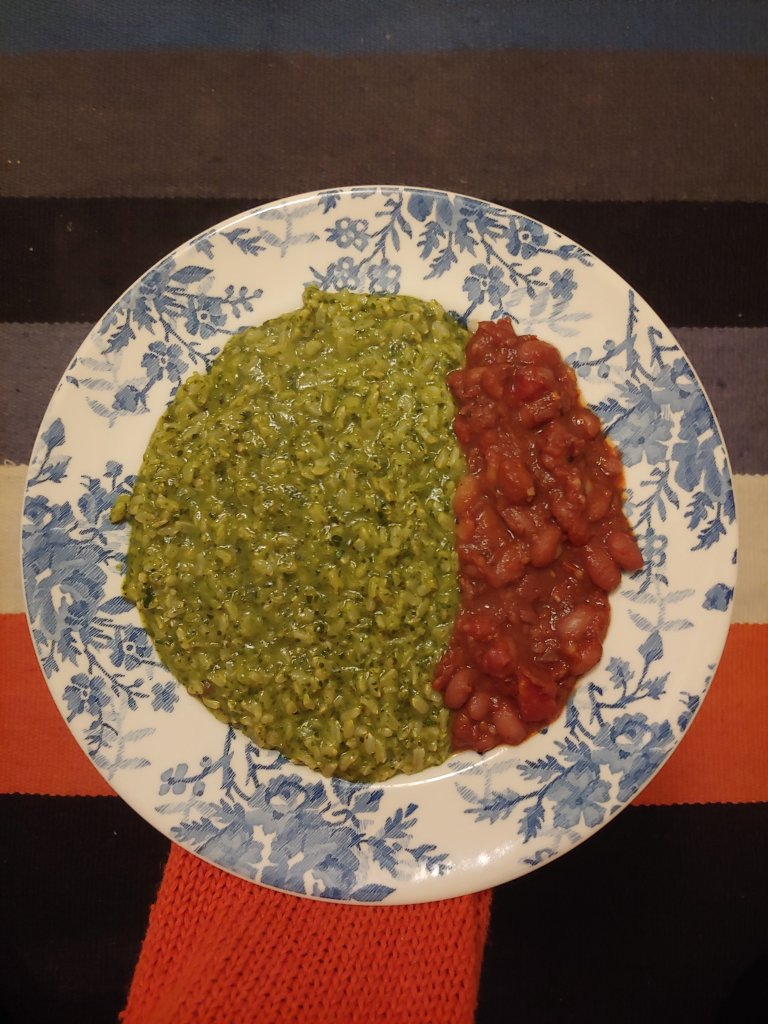
After a few weeks of eating rich heavy foods and buckets of cookies, I was personally feeling a bit over saturated. Whenever this happens I get quite grumpy and struggle to find foods something I enjoy. While some of this is rooted in old, disordered eating patterns, it is also my body begging me for something easy to digest yet nutrient rich. For me this usually takes the form of rice and beans, because honestly I cannot think of a better meal. After much searching and many dissatisfied groans, I settled on a stewed red beans with spinach rice.
In this recipe I draw on inspiration primarily from Indian, Creole, and Caribbean cuisines. This recipe is not, however, a traditional representation of any of these culture’s food ways. I encourage you to do some research into their traditional food ways to understand the cultural relevance. There are humans on Instagram who are doing really amazing things, check them out if you’re interested (@cafemamajuanavt, @indianvegan_experiment, @supriyaramankitchen and the blog Nish Kitchen).
I wanted to incorporate a lot of greenery and flavor in this to provide a delicious and nutritious meal. Spinach is balanced with the creamy coconut milk and bright cilantro and finished off with a hint of lemon and lime. These flavors pair wonderfully with hearty smoky beans. The recipe here makes around 6 servings so it is a nice family mean or meal prep for two!
Ingredients
Spinach Rice
1 lb fresh spinach
1 medium yellow onion
4 garlic cloves
1 ½ cups cilantro
Juice of 1 lemon
Juice of ½ lime
2 tsp. salt
½ tsp garam masala
1 ½ tsp. dried coriander
Pepper to taste
13 oz can of coconut milk
2 ¼ cups brown basmati rice
5 cups water
Stewed Red Beans
1 ½ cups dry red beans
6 cups water
1 tsp. baking powder
13 oz can fire roasted tomatoes
1 tsp. smoked paprika
Salt and pepper to taste
Instructions
Soak your beans at least 8 hourse ahead of cooking by combining with 3 ½ cups water, 1 tsp. baking powder and a healthy pinch of salt.
Soak rice 30 minutes before cooking and then rinse thorough until water runs clear.
Meanwhile drain beans and rinse with cold water. Add in 2 cups of water and return to a boil with a tsp. of salt. Boil until soft, about 15 minutes.
Drain beans. Add in tomatoes, paprika, and ½ cup water return to a simmer and cook until it begins to thicken up. I find it helpful to mash some of the bean to give it a more stew like texture.
Place rice in a large pot and salt well, bring to a boil for 5 minutes. Reduce heat and simmer covered for 20 minutes until all the water is absorbed. Stir occasionally.
At the same time, heat 1 tbsp. of oil over medium heat. Add in onions and saute unit translucent, add in the garlic cloves and cook until fragrant. Wilt ¼ of the spinach in the pan and then add all remaining ingredients into the bowl of a food processor. Puree until smooth.
Add the spinach mixture to the cooked rice and stir until combined. Adjust flavor as needed.
Serve beans on top of rice and garnish with a bit of cilantro.
Gingerbread cookies are a timeless Christmas classic, with motifs popping up in festive music, movies, and activities. There is even a national gingerbread house competition in America (find details here), in addition to a plethora of exhibits and local competitions. It truly is amazing how a cookie became a symbol of Christmas, parallel to Saint Nick himself. Which got me thinking about the history of gingerbread and how we all came to love it so much.
Ginger as we know it is the rhizome or root of the ginger plant (Zingiber officinale). It is believed that the species originated from South Asia and spread from there via trade routes to the Middle East and Europe in the first century or even earlier[1-3]. From there it was disseminated to the western hemisphere during colonialization [4]. Ginger is commonly revered in herbalism practices as a strong digestive aid and is referenced in traditional medicine practices including Ayurveda and Iranian Tradition Medicine [1,3] (disclaimer: I am not an herbalist, consult one before use of herbal medcines!!!!). The root is also the center of cuisine across it’s growing regions including the Mediterranean, India, South Asia and North Africa. The plant itself is also fascinating, as it reproduces not by flowers but through the rhizome which we eat!
Honestly, some of my favorite things are ginger based from crystalized ginger, to dansak curry, to gingerbreads! It is a plant that I treasure and will eventually try to propagate from bits of grocery store ginger (find out how here). But enough of me geeking out about plants, lets talk about cookies!
It is thought that gingerbread either originated in Greece in 2400 BC or was brought into Europe by an Armenian monk in the 9th century (AD) [5-8]. Regardless, the version of gingerbread consumed back then was drastically different than what we know and love today. According to Barbara Rolek’s A history of gingerbread the first gingerbread was made with a base of almond meal and breadcrumbs, which I imagine resulted in something reminiscent of a graham cracker with earlier forms possible near the plants origin [5,8]. Since then, gingerbread has taken many forms depending on where you are ranging from fluffy cakes to crispy cookies, with everything from the standard molasses to chocolate as add ins!
Across the following centuries, these delightful holiday snacks became very popular across Europe, so much so it is claimed that Queen Elizabeth I of England once had gingerbread cookies fashioned in the likeness of her guests [5,8]. The gingerbread house, however, didn’t become a prominent motif until the Brothers Grimm documented the fairytale of Hansel and Gretel [5-8]. Originally, gingerbread was a year round treat and it is unclear from my research when it became synonymous with Christmas!
Gingerbread is still very popular today, with many central European nations laying claim to some of the best gingerbread around[8]. I have personally visited a gingerbread shop in Prague and the place was booming, even in the middle of July! There is also an official gingerbread museum in Prague where you can see historical gingerbread artifacts (check it out here). Grasmere gingerbread is also quite popular in the lake district in the UK, where they serve a more cake like version. Gluten free gingerbread, however, can be very difficult to come by. When I visited the shop in Prague, I only lucked out with some non-gingery treats and some no bake gingerbread bites. Both, of course, were delicious but not quite the same.
With that in mind, most of us gluten intolerant folks find ourselves making our own gingerbread at the holidays. This year was quite a unique one, though, and it felt over the top to make two dozen gingerbread cookies for two humans! So I decided to craft my own small batch gingerbread cookies to have for years to come!
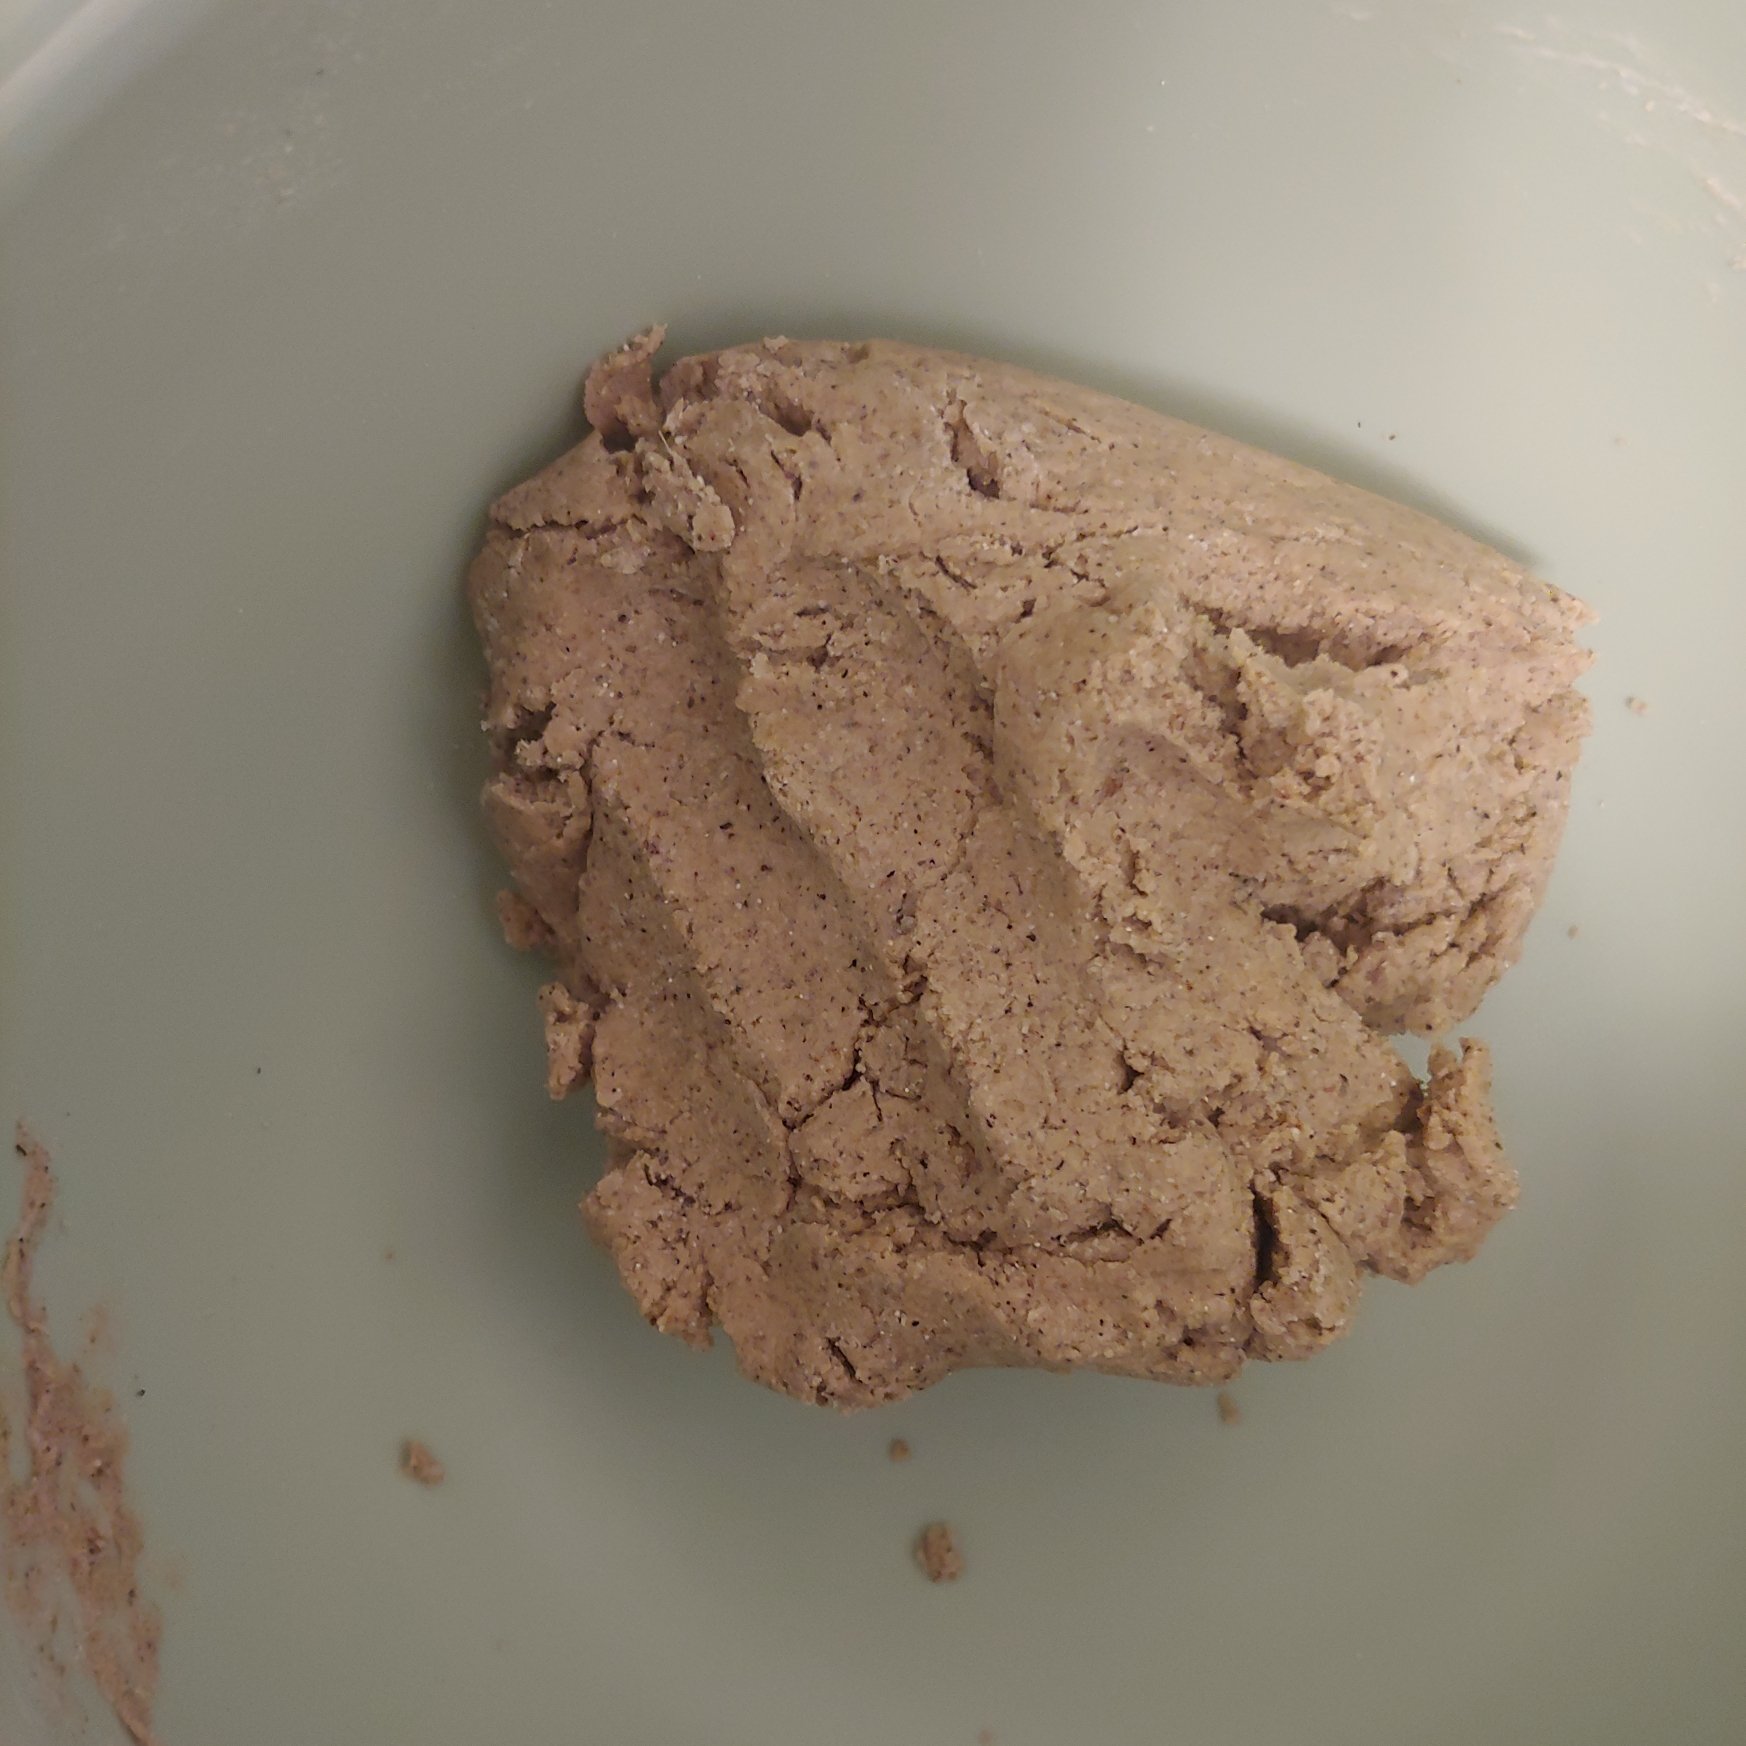
The recipe yields about 10 cookies that are the texture of soft American ginger bread and the flavor of gingery graham crackers. I used buckwheat flour to change up the texture a bit and I really enjoyed the way it pared with the molasses! I haven’t tested this recipe out for houses so if you do, let me know how it goes. For mine I used fun little molds but cookie cutters also works!
Ingredients:
2 tsp. ground flax
6 tsp. warm water
1/4 cup vegan butter – room temp
2 tbsp. white sugar
2 tbsp. brown sugar
1/2 tsp. fresh ginger
1/4 tsp. cinnamon
1/4 tsp. nutmeg
1 tbsp. molasses
3/4 cup buckwheat flour
1/4 cup cornstarch
1/2 tsp. baking powder
powdered sugar for rolling (if not using molds)
Instructions
Combine flaxseed and water and set aside to gel
Cream together sugars and butter until smooth and even through out
Stir in the gelled flax mixture, spices, and molasses – stirring until completely combined
Combine buckwheat flour, corn starch, and baking powder and fold in to the wet ingredients – the dough should be very thick and almost crumbly
Place the dough in the fridge to chill for at least 30 minutes, or overnight
Before you are ready to bake, preheat the oven to 375 F
Remove the dough from the fridge and grease molds or a cookie sheet – I used some old molds from my grandma!
If you are using molds simply press dough into the shapes until they are full and even. If you choose to use cookie cutters: sprinkle the counter tops with powdered sugar and roll our dough until 1/4 inch thick, use your favorite cookie cutters to make fun shapes.
Place pan(s) in the oven and bake for 9 – 12 minutes, or until they begin to brown at the edges. All ovens are different
Remove and allow to cool! You can top them with some fun royal icing decorations, eat them with a cup of hot chocolate, or simply enjoy them plan! They are sure to satisfy all the same.
Baba ganoush on a sandwich with cucumbers, sundried tomatoes, and kale
Baba Ganoush is one of the most underrated mezze plates in my opinion. It always play second fiddle to hummus and that seems really unfair. Don’t get me wrong, I love hummus and its beautiful versatility, but baba ganoush doesn’t get enough credit. It is also really easy to make! Which was lucky for me since I had a supreme craving after the farm’s kitchen had graciously included left over eggplant puree from the dinner series they are running in our staff lunch one day.
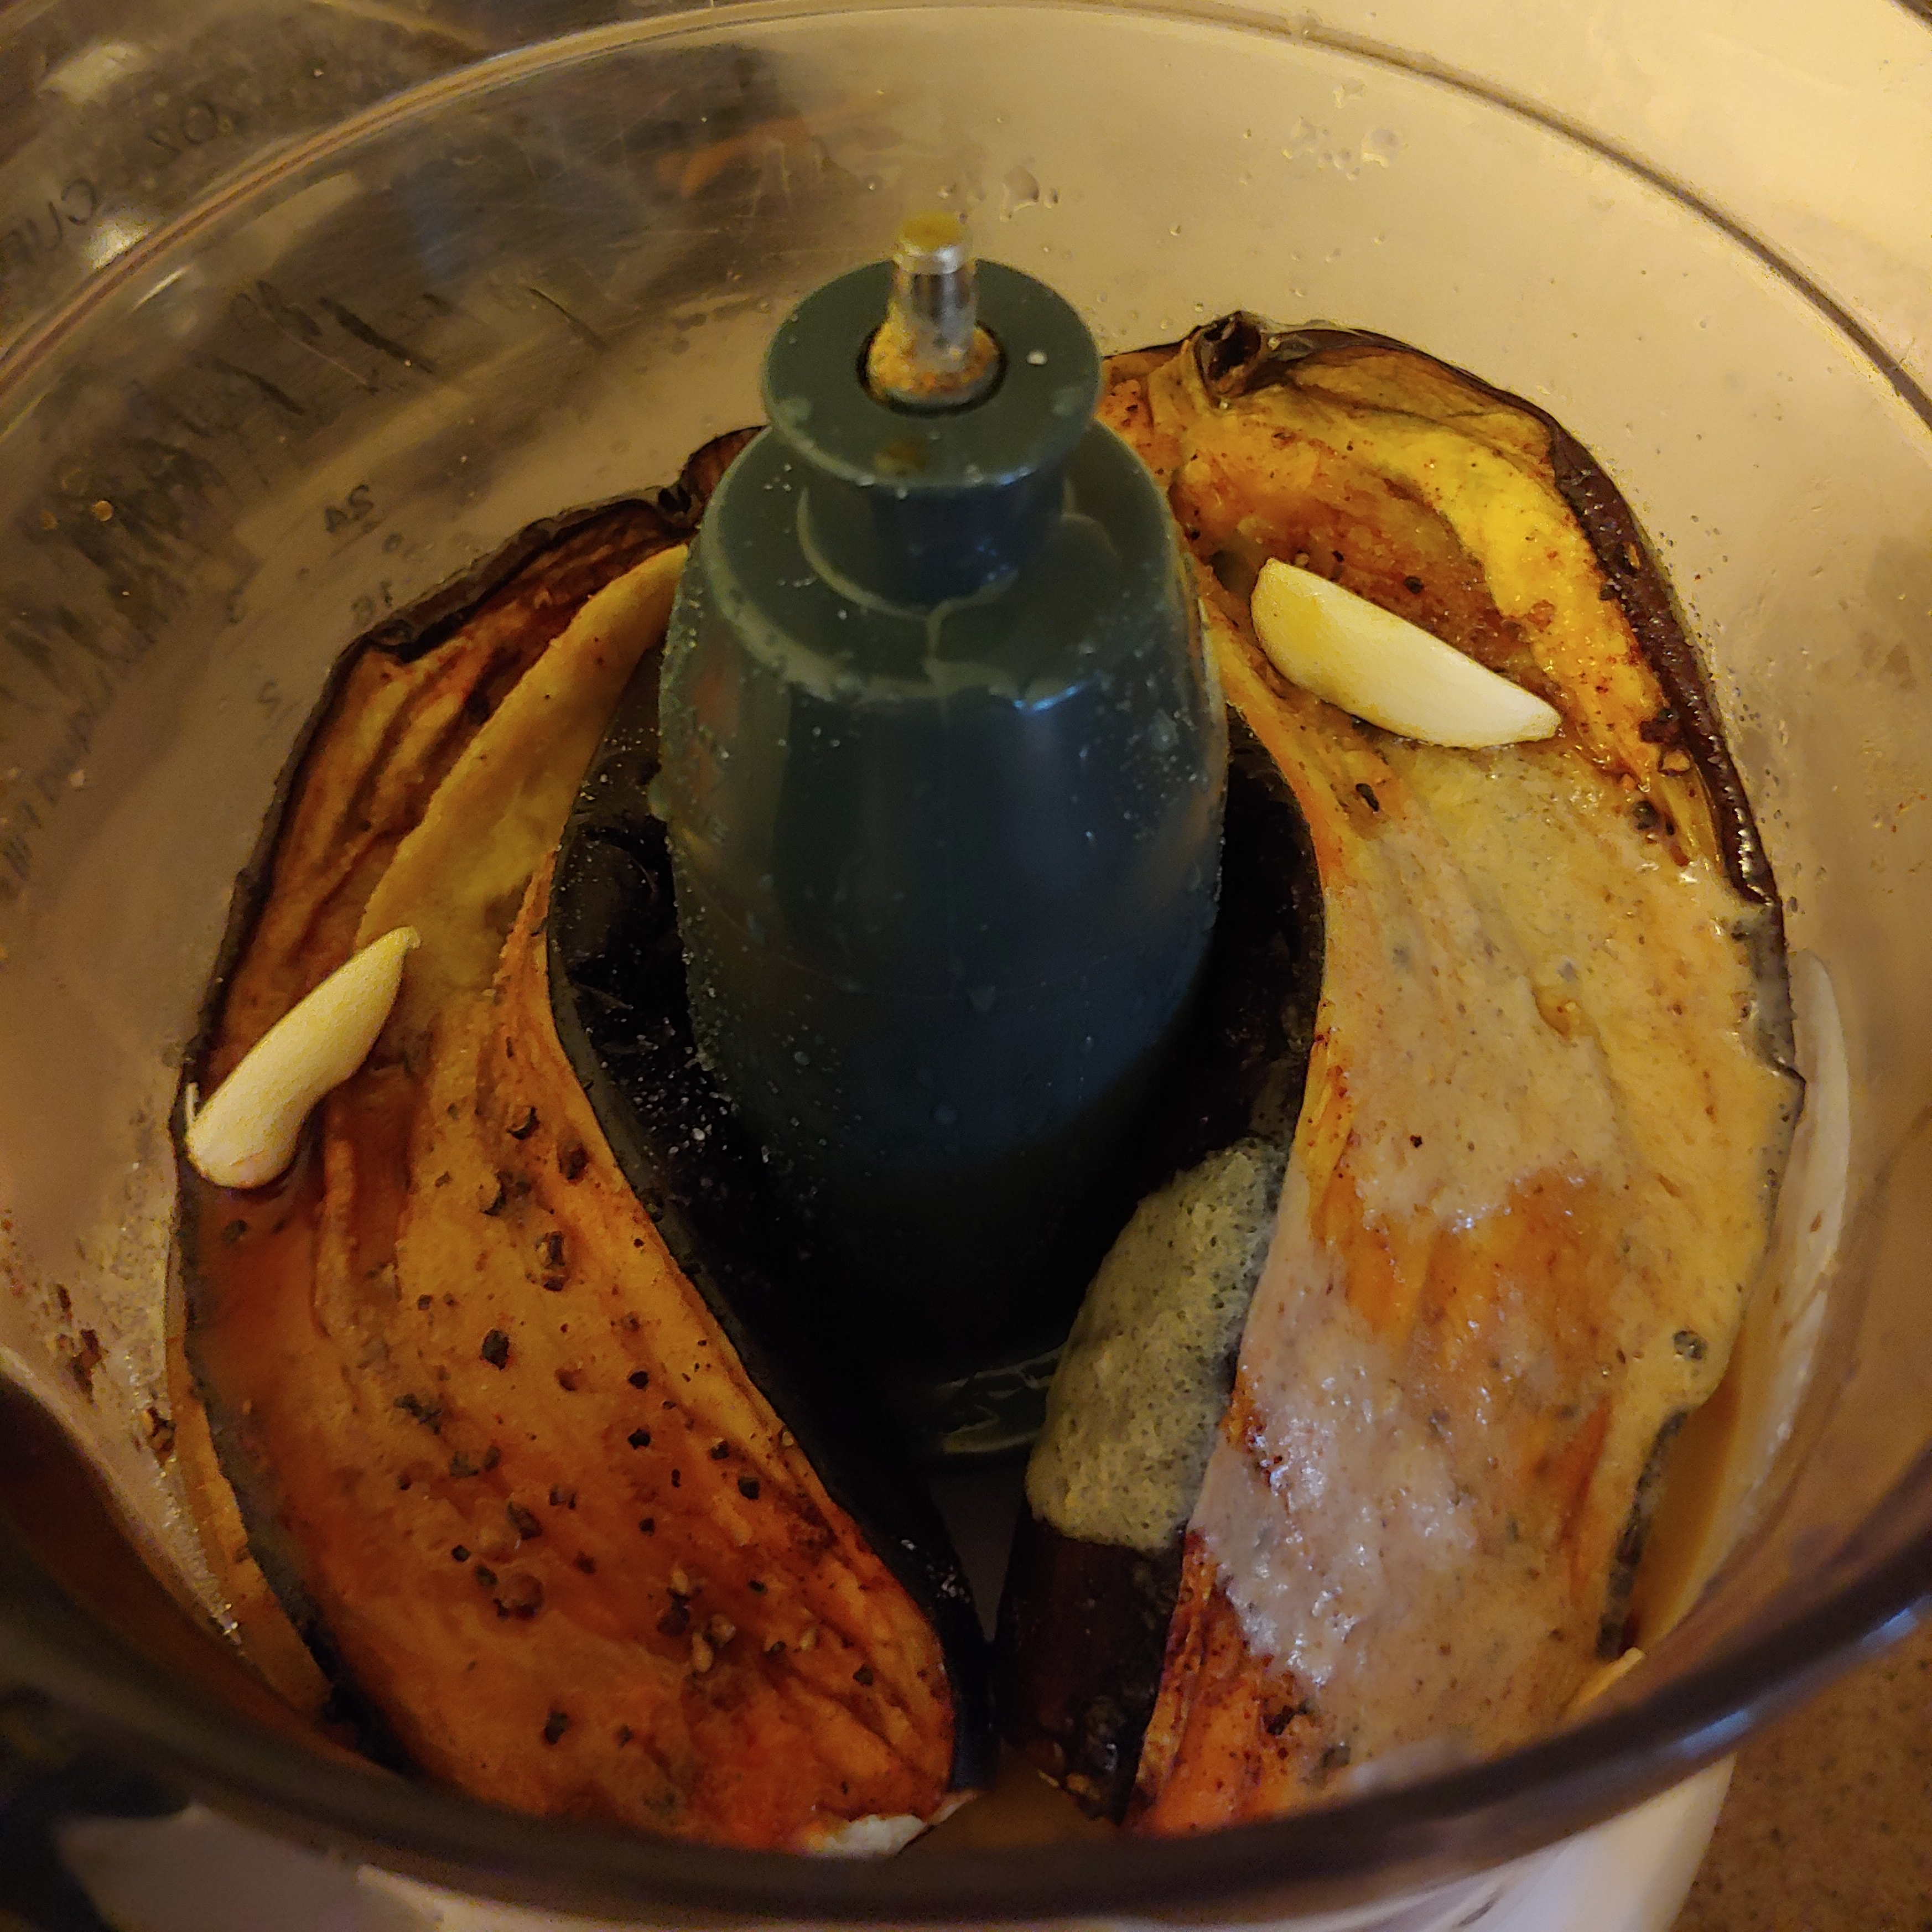
This recipe comes together fairly quickly. I don’t smoke my eggplant, mostly because I don’t have a smoker but also because it’s easier. Instead I roast it and add in some liquid smoke, which still provides a nice hearty flavor. A tip for roasting eggplant: salt it to extract the water and pat it dry. This will keep it from getting too mushy.
Baba ganoush can be served as a dip/appetizer, with charcuterie, or as an add on to sandwiches, salads, and tacos. I really like it with these chickpea crackers I make (recipe coming soon)!
Ingredients
1 large eggplant
1/2 tsp. liquid smoke
1 tsp. salt
2 cloves of garlic
2 tbsp. tahini
2 tbsp. lemon juice or other acid (ACV works well too)
1/2 tsp. smoked paprika
1/2 tsp. coriander
2 tbsp. olive oil
1 tsp. toasted sesame or sunflower oil
salt and pepper to taste
Instructions:
Preheat oven to 375 F
Slice eggplant and salt the flesh. Set aside for 1 -2 minutes until droplets form. Pat the flesh dry and repeat on the other side
Drizzle olive oil, salt and pepper over the eggplant. Rub into the flesh to evenly coat. Place on the top rack of the oven and back for 20 minutes
At 20 minutes, check for doneness. Eggplant should be fairly flimsy and tender. Switch the oven to broil.
Broil the eggplant for 2-3 minutes on each side. Or until it begins to become crispy and golden to brown.
Remove eggplant from oven and allow to cool. It is useful to transfer it to another surface for faster cooling.
Once cool transfer the eggplant to a food processor. Add in the remaining ingredients and process until you get a very smooth puree. If the mixture still has some chunks of skin that is ok – unless you are opposed to them then process for longer.
Transfer baba ganoush to a serving dish or sealable container if using later. Serve along side your favorite veggies or crackers!
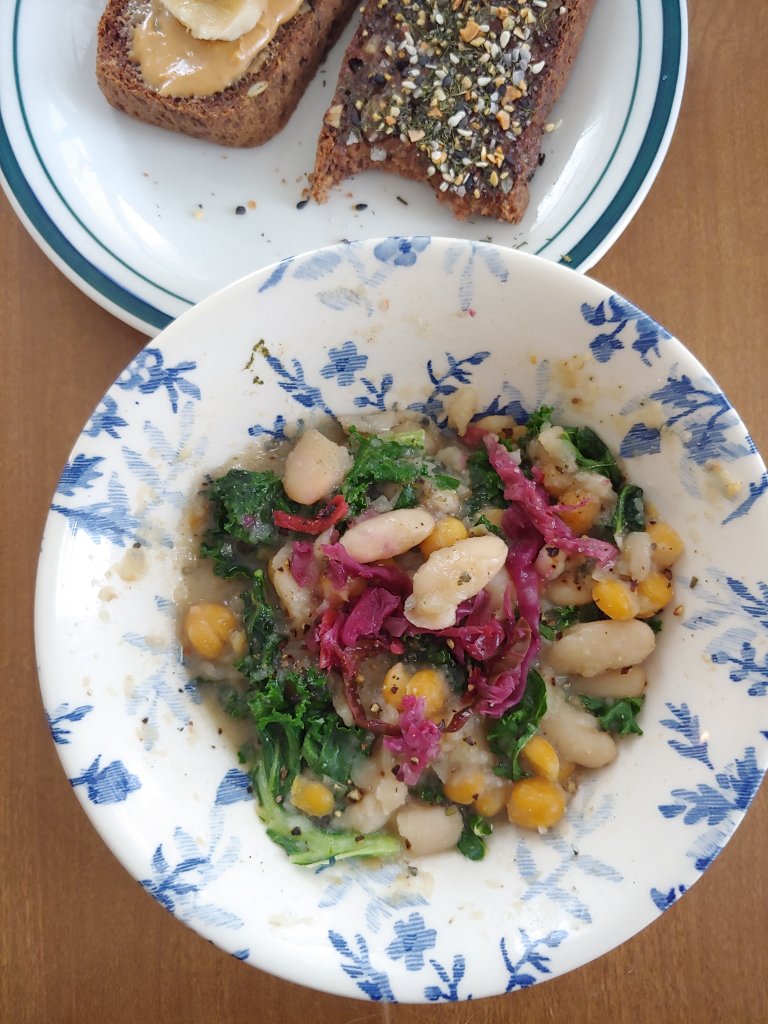
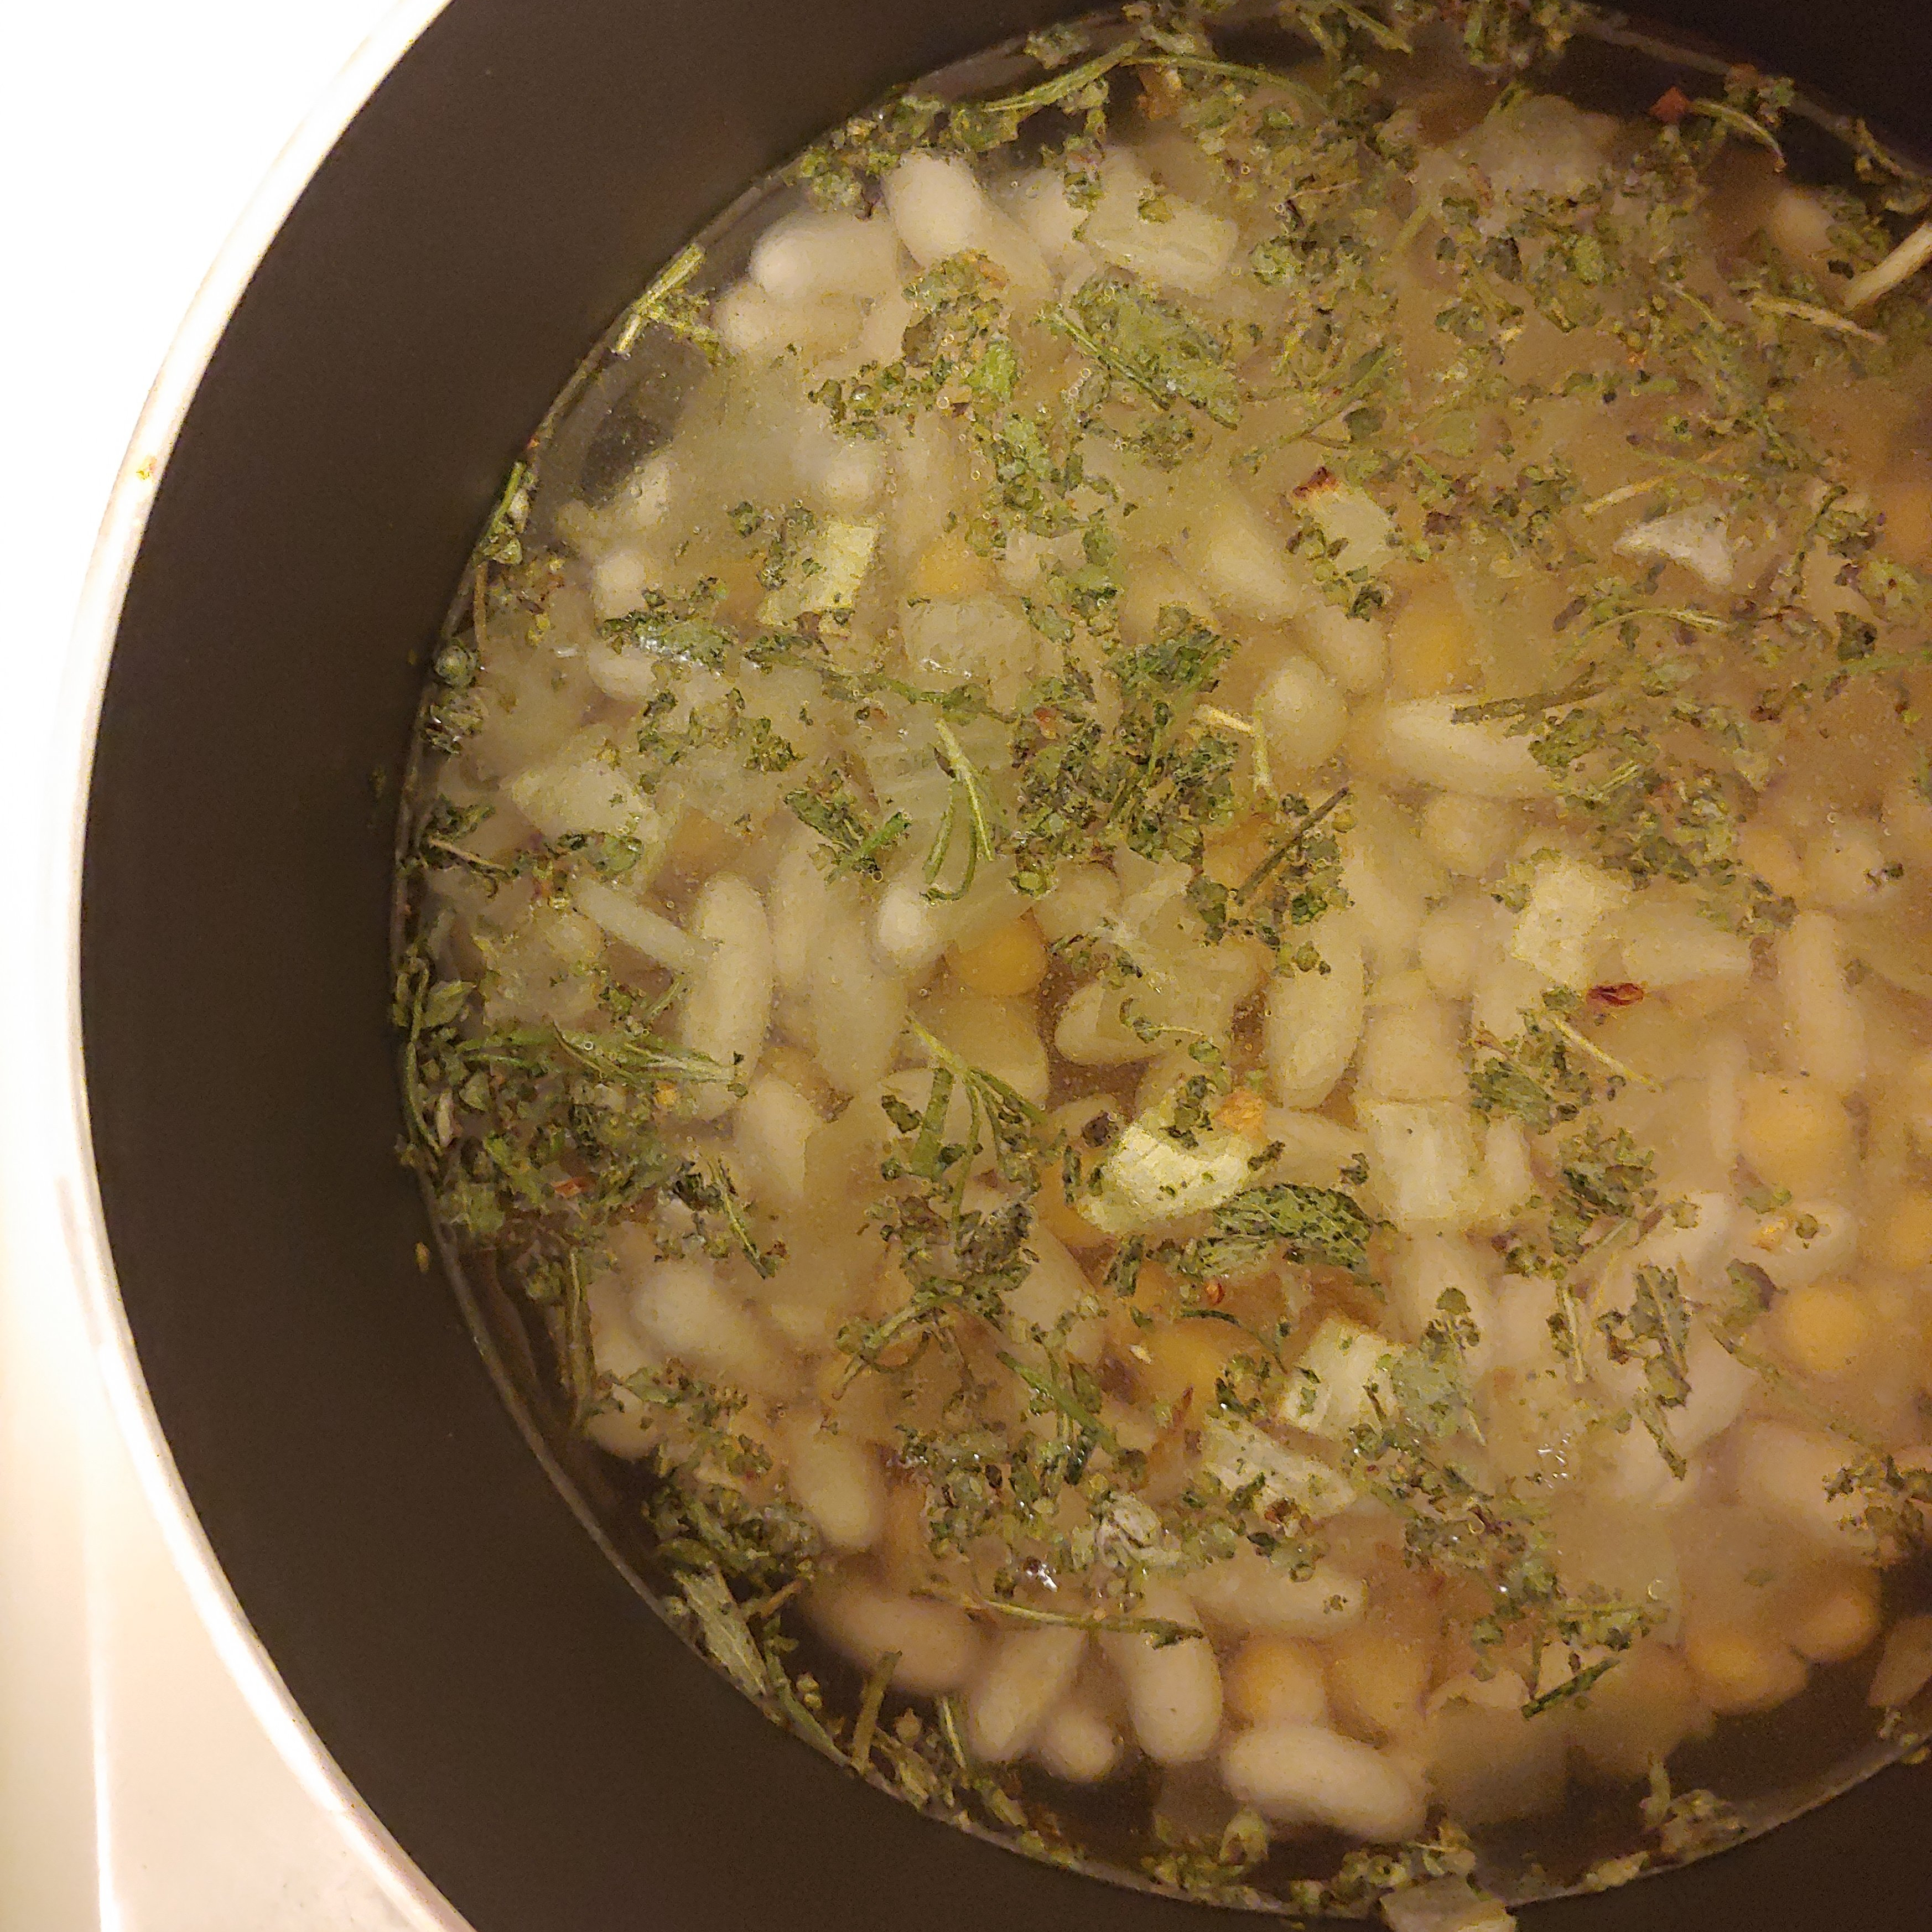
Soup season continues and so does my soup adventure! This weeks soup is a white bean and kale soup, inspired by a rosemary white bean soup I came across on budget bites. I happened to have a small amount of white beans in my pantry so thought it was as good a time as any to trial a new soup recipe! Spoiler: I was not disappointed.
In my mind when I see “rosemary” I almost immediately think of sage. They are the perfect pair, only made better by some a sprig of thyme. The thyme missed this soup, because I didn’t have any, but the flavoring was still very wintery! I snuck a secret potato in there that really ups the heartiness and helps the soup stick around a little longer.
The flavor is basic but still tasty. Plus this soup was just super easy, I basically put everything in the pot and set it to boil. It doesn’t make a massive amount, about 3 – 4 servings, so I recommend either doubling it or eating it alongside soups/sammies!
Ingredients:
1/2 cup dry white beans
1/4 cup dry chickpeas
7 cups water
1 tsp salt
1/2 tsp baking soda
1 tbsp. olive oil
1 small yellow onion, chopped
2 large garlic cloves, minced
1 tsp. dried sage
1 tsp. dried rosemary
1/2 tsp. marjoram
1 tsp. celery salt
1 russet potato
1/2 tsp. dijon mustard (optional)
salt and pepper to taste
Instructions:
Set chickpeas and white beans out to soak the night before by combining with 3 cups water, baking soda, and salt
When ready to cook, heat olive oil in a medium sauce pan over medium-low heat. Add in onions with a healthy pinch of salt, cooking until translucent (about 5 minutes)
Stir in garlic and cook until fragrant (about 2 minutes)
Drain and rinse chickpeas thoroughly with cold water, add to pot along with herbs, celery salt, and pepper to taste.
Add in 4 cups of water and bring to a boil for 5 minutes, reduce to a high simmer for another until beans are soft ~ another 15 minutes
Once beans are softened grate in your russet potato. I used a very fine grater and it basically dissolved into the soup and helped it thicken up.
Allow the mixture to return to it’s high simmer/light boil for about 5 minutes, until the soup begins to thicken.
Once soup is thick, add in dijon mustard if using and adjust flavors to your liking! Serve along side your favorite crusty bread, salad, or sammie!
We LOVE risotto. However, I rarely make it because it is so much work. Which is your advanced warning – this recipe takes time, but is ultimately worth it in the end. Risotto is also a once in a while dish to me since it is so rich and creamy. I like to give myself time to really miss in before I eat it again. Perhaps obviously, I was really missing it recently so I decided to make my favorite pea risotto.
This dish is so creamy from the magic of the Arborio rice, which is cut with a healthy amount of white wine and lemon juice. The cashew cream is really what brings the risotto to life though – it is heavily laced with dill which is rounded out with bright fresh parsley. The peas are the finishing touch, however, adding the perfect amount of sweetness and texture. Overall the dish can only be described as hearty and decadent.
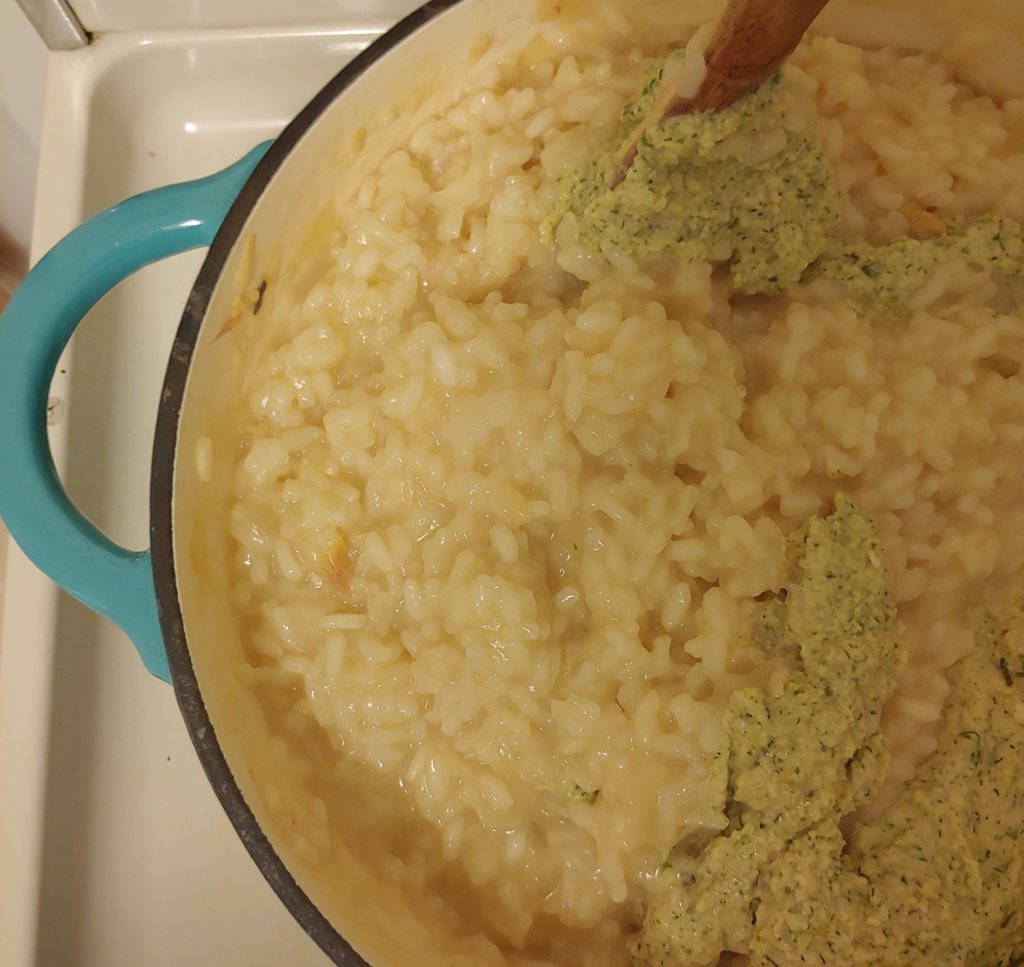
Toasting the rice
The amount here makes between 8 to 10 serving, so it is definitely family sized if that is what you are looking for! Like I said at the top, there is considerable time and patience involved in constructing this dish but I promise you won’t regret it!
Stirring in the cashew cream
A couple of technical notes before we start:
Use Arborio rice, it’s worth it. Do not rinse it – this helps to preserve as much of the starch as possible and is what makes it creamy
Toasting the rice before you add the liquid helps give the risotto a nuttier flavor
It is so, so important that you allow the liquid to fully cook in before adding more. This also helps the rice build up that creamy goodness*
Using a heavy/thick bottomed pot also helps enhance the creamy texture of the dish. I recommend a Dutch oven but any large pot will really work
Make sure to soak the chickpeas and cashews ahead of time. It gives them a better texture and makes the work go much smoother.
Alright! Let’s get to it!
Ingredients:
Dill Cashew Cream:
1/2 cup raw cashews
1 +1/4 cup hot water divided
1/2 cup fresh chopped parsley
2 -3 tsp. dry dill
1 tsp. rosemary
1 tsp. lemon zest
3 tbsp. lemon juice
1 tbsp. olive oil
1/4 nutritional yeast
1 tsp. garlic powder (or fresh minced)
1 tsp. ground mustard
1 tsp. salt plus more totaste
pepper to taste
Crispy Chickpeas:
3/4 cup dry chickpeas
1/2 tsp. baking soda
2 tsp. salt, divided
3 cups water
1 tbsp. olive oil
1/2 tsp. paprika
pepper to taste
The Risotto:
1 tbsp. olive oil
1 medium sweet yellow onion – diced
4 garlic cloves – minced
1/4 cup. white wine
3 1/2 cups Arborio rice
8 -10 cups of veggie stock and/or water**
1/2 cup frozen (or fresh) peas
1/4 cup nutritional yeast
salt and pepper to taste
Instructions:
Begin by soaking your chickpeas the night before. Combine the dry chickpeas, water, salt, and baking soda. Stir and set these aside.
A couple hours ahead of cooking combine the cashews with the cup of hot water and set aside to soak.
Just before cooking, drain the cashews and add the remaining ingredients into the bowl of a food processor. Puree this until smooth – I let mine run for about 3 minutes, scraped the sides and then again for another 2 minutes
When you are ready to start cooking, heat 1 tbsp. of olive oil in your pot over medium heat. Add in the onions and a healthy pinch of salt – cook until fragrant and translucent
Add in the minced garlic and cook for an additional 2 minutes until fragrant.
Deglaze the pan by adding in the white wine, stirring, and cooking down for ~ 1 minute
Pour the rice over the onions and stir to combine. Toast the rice for up to 5 minutes. You will want to stir it occasionally to get an even toast on all the rice.
At the same time you will want to begin cooking your chickpeas. Drain and rinse the chickpeas with cold water. Place them in a medium sauce pan and cover with water. Boil them until soft with little snap left in them. This should take ~ 15-20 minutes
Once the rice is sufficiently toasty, reduce the heat to medium low and add your first 2 cups of water. Allow this to cook down completely, stirring as needed to prevent sticking.
Once the liquid has cooked down, continue to add stock/water in 1/2 to 1 cup at a time, allowing the liquid to cook down completely between each addition
Once you run out of liquid and your rice is soft (you may need to add more liquid depending on your cooking temp, pot, etc.), stir in your peas, cashew cream, and additional nutritional yeast. Add salt and pepper to your liking.
Cover the pot and reduce the heat to the lowest setting (warm on my range).
While the risotto is resting and absorbing all of the fruits of your labor, drain and roast the chickpeas you boiled by combining them with 1 tsbp. olive oil and the seasonings. Bake in the oven at 425 F for 15 minutes.
Once the chickpeas are nice and crispy, you are ready to eat! Scoop you risotto into a shallow bowl and top with chickpeas. You may also wish to add fresh lemon juice, parsley or olive oil to give it a “plated” look!
Enjoy!
Notes: *The podcast Savor did a fabulous episode on Risotto that I highly recommend listening to while you make this! ** I used a mix of veggie stock and water, simply because I ran out of stock. The more stock you use the more intense the flavor of the rice will be
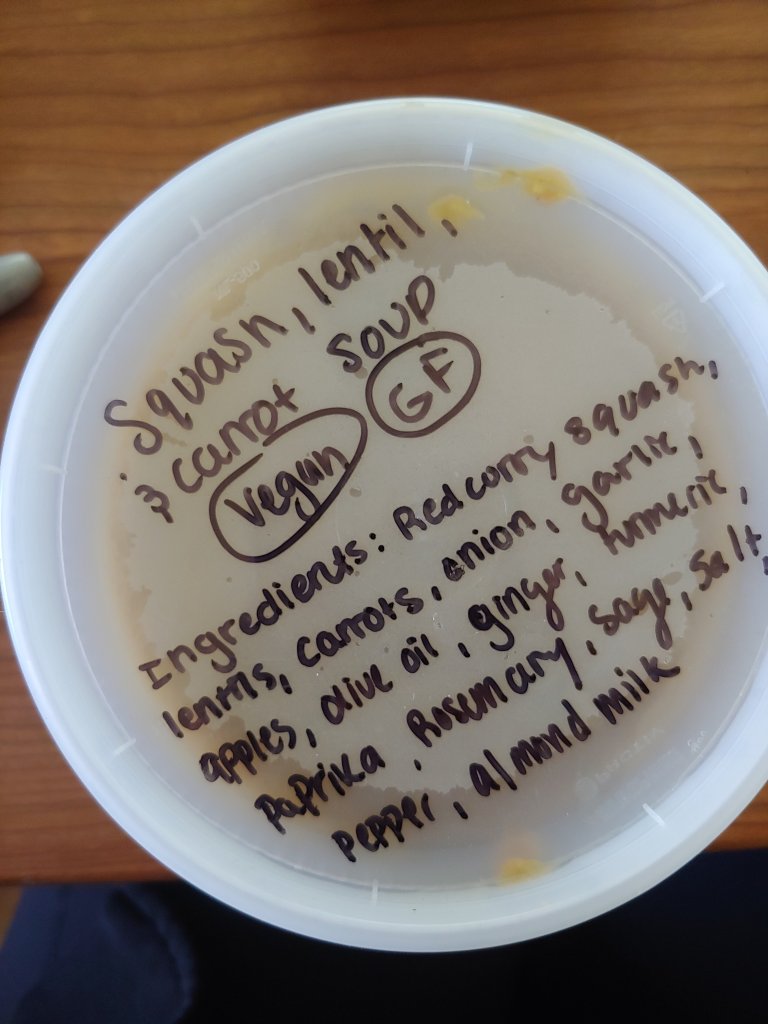
I have really been trying to step out of my soup comfort zone lately, which means wading into the waters of lentil soup. Lentil soup is always one I’ve avoided because when it’s bad, it’s real bad. Still I took the leap. I wanted something that was hearty and would warm me in the late days of fall but would also support digestion and immune health. To achieve that I paired the wonderful hearty green lentils with the sweetness of winter squash and carrots, the zing of turmeric and ginger, and the earthy savor of rosemary and sage.
What came together was a beautiful fall soup that filled my belly with joy and nutrition. This pairs well with flatbread like naan or a more crusty brown bread. It makes about 4 to 6 servings!
Ingredients:
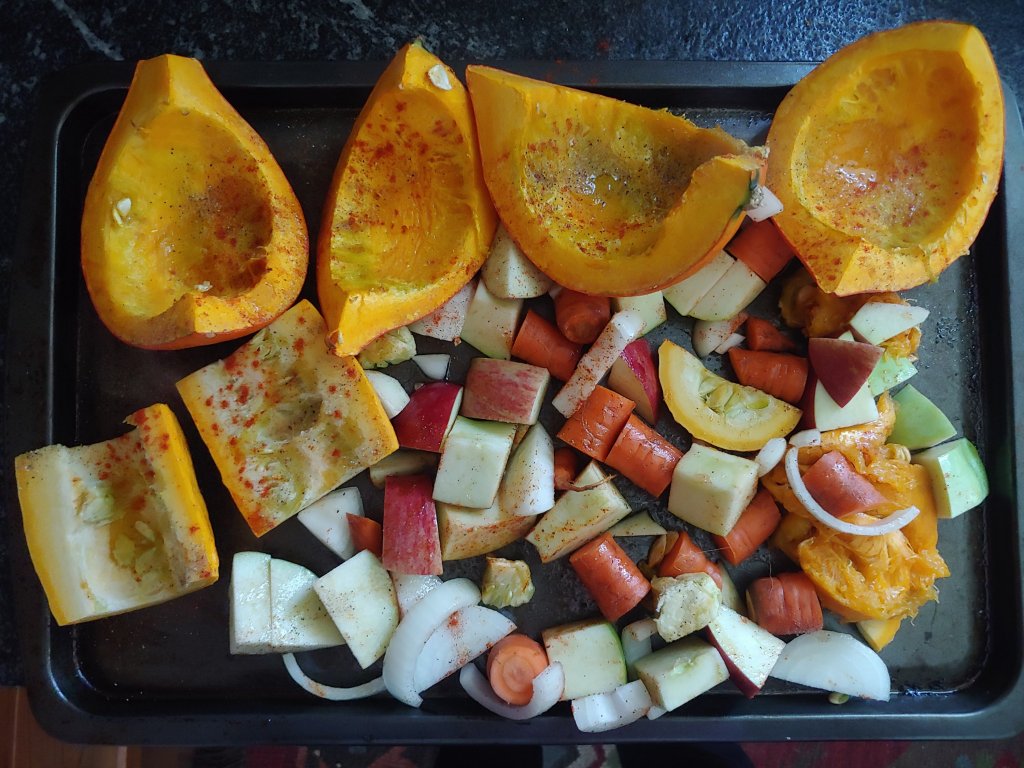
1 medium winter squash – deseeded and quartered*
1 large sweet onion – quartered
3 medium carrots – cut into 2 inch chunks and halved
1 large macintosh apple – quartered
4 cloves garlic
2 tbsp. olive oil
1 inch piece of turmeric**
1 thumb of ginger**
1 yellow onion
3/4 cup green lentils
1 1/2 cups water plus more as needed
1/2 tsp. rosemary
1/2 tsp. sage
1tsp. smoked paprika
2 tsp. salt (plus more to taste)
pepper to taste.
Instructions:
Pre-heat the oven to 375 F
Place the deseeded and quartered squash on a metal baking dish, drizzle with 1 tbsp olive oil and 1 tsp. salt – bake for 25 minutes
Add carrots, apple, onion, garlic, and remaining olive oil to the baking sheet. Stir and bake for an additional 15 minutes until everything is tender (think mashable)
Set vegetables aside to cool completely
Meanwhile combine lentils, salt and water in a medium sauce pan over high heat. Bring to a boil for 5 minutes then reduce to a simmer. Cook until tender, adding more water as needed.
Allow lentils to cool completely.
Transfer the lentils, vegetables and remaining ingredients into a food processor. Puree until smooth.
Transfer this mixture back to the stove and heat, adding water or almond milk as needed to get your desired consistency. Add salt and pepper to taste.
Serve with your favorite soup bread and maybe even a little fresh lemon juice!
Enjoy!
Notes: *I used a red curry squash originally, but most darker flesh sweet squashes will do (e.g. koginut, honeynut, butternut, etc.)
The Mexican food scene in Burlington is bleak at best. It has a very casual tex-mex vibe, with minimal gluten free and vegan options. While this works for some, it hasn’t for me. I miss greasy midwestern Mexican with endless baskets of chips and salsa (which I know is also not authentic). All this has left me with some mean cravings – particularly for Enchiladas.
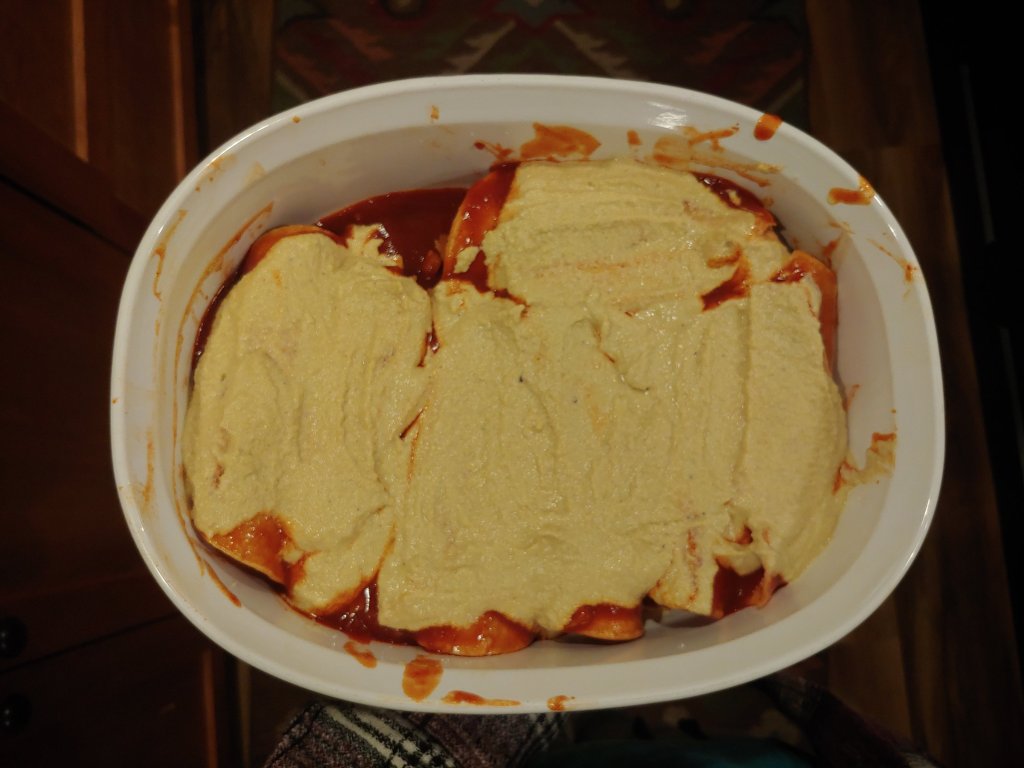
Enchiladas prebake
I rarely make enchiladas because I always struggle with the corn flour tortillas falling apart. My craving, however, was strong enough for me to brave this and I think I finally have developed a consistent technique. In the end, the hassle was worth it because these were delicious. I even made a cashew cheese sauce to go on top! (see note about cashew ethics*). They were pretty much a resounding success with some nice fall flavors mixed in with some of the usual suspects (hello black beans and jackfruit).
This definitely isn’t one of the “dump and go” recipes. It takes time and care, but in the end it will pay off and you will have food for the week plus some! I recommend undertaking this project on a Sunday (whatever that means to you) so you can reap the benefits when you have less time to cook!
Fill along one edge. The lower portion of the tortilla will wrap over then under the upper portion
Ingredients
Fillings and fixins‘
4 cups enchilada sauce – store bought or homemade
10 oz can of young green jackfruit* (prepared as done here)
1 medium butternut squash – skinned and cubbed
2 cups of your favorite beans (I used black beans and chickpeas) **
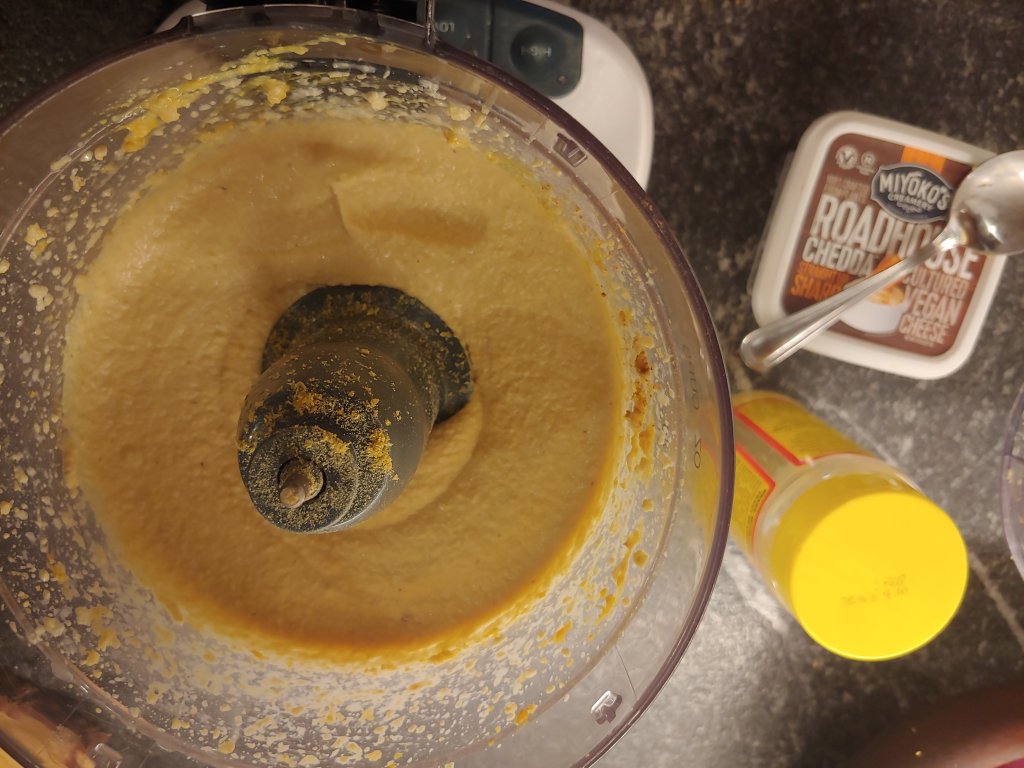
My cashew cheese sauce, still a tad grainy hut delicious
Instructions:
At the start of your day, combine 1 cup of cashews with 1 1/2 cups of hot water and set aside to soak until ready to cook
Preheat your oven to 375F/190C
Place your skinned butternut squash on a baking sheet and toss with 1 tbsp. olive oil nutmeg, liquid smoke, apple cider vinegar, cumin, coriander and salt and pepper to taste. Roast in the oven until tender, around 30 minutes.
Meanwhile, add your soaked beans to a medium sauce pot with 1 1/2 cups water and bring to a boil – cook until tender and drain. (Skip if using canned beans)
Return the beans to the pot and mix in 1 tbsp. olive oil, 1 tbsp. water, and 2 tbsp. cheesy taco seasoning, bring to a simmer for 5 minutes just to heat.
It’s probably now time to remove the squash from the oven. Allow it to cool completely while you prepare the remaining ingredients.
Prepare your jackfruit as I do in the carnitas jackfruit recipe. Alternatively you can steam the drained jackfruit in a covered pan for ~ 10 minutes until tender. Shred the jackfruit then add 2 – 3 tbsp. of enchilada sauce for a flavor boost.
While the jackfruit finishes cooking drain your cashews and combine with all other ingredients in the bowl of the food processor. Blend until the mixture is completely smooth, this may take a few minutes. It may still be a bit grainy, but that is just fine!
Mash up your cooled squash until it is smoother and easier to work with.
Place the enchilada sauce in a medium sauce pot and bring to a boil. Once boiling remove from heat and place at your staging station along with all your other fillings and toppings.
The last thing to do before assembling is to steam the tortillas. Wrap 2 – 3 corn tortillas in a damp bread towel or damp paper towels. Microwave for 30 seconds and then immediately submerge in enchilada sauce to soak. This is the technique I use to prevent them from breaking and flaking. Doing this in small batches helps reduce flaking as well.
Remove a tortilla from the pot and place in a well oiled baking dish. Add your fillings close to the edge of the tortilla (see above). I layered starting with squash, then beans, and finally jackfruit. Be careful not to overfill or they will fall apart.
The rolling technique will take practice. Roll the empty end of the tortilla towards the full end. Carefully and quickly tuck the edge under and around the other and slide toward the edge of the pan.
Continue this process until you have exhausted all of your ingredients, moving to a second baking dish if necessary. Cover in the remaining enchilada sauce, the goal is for them to be smothered in sauce.
Spread the cashew cheese sauce evenly among the enchiladas.
Bake in the oven at 375F/190C for 15 to 20 minutes. Once the sauce around the edges is bubbly and the cashew cheese becomes golden they are ready to come out.
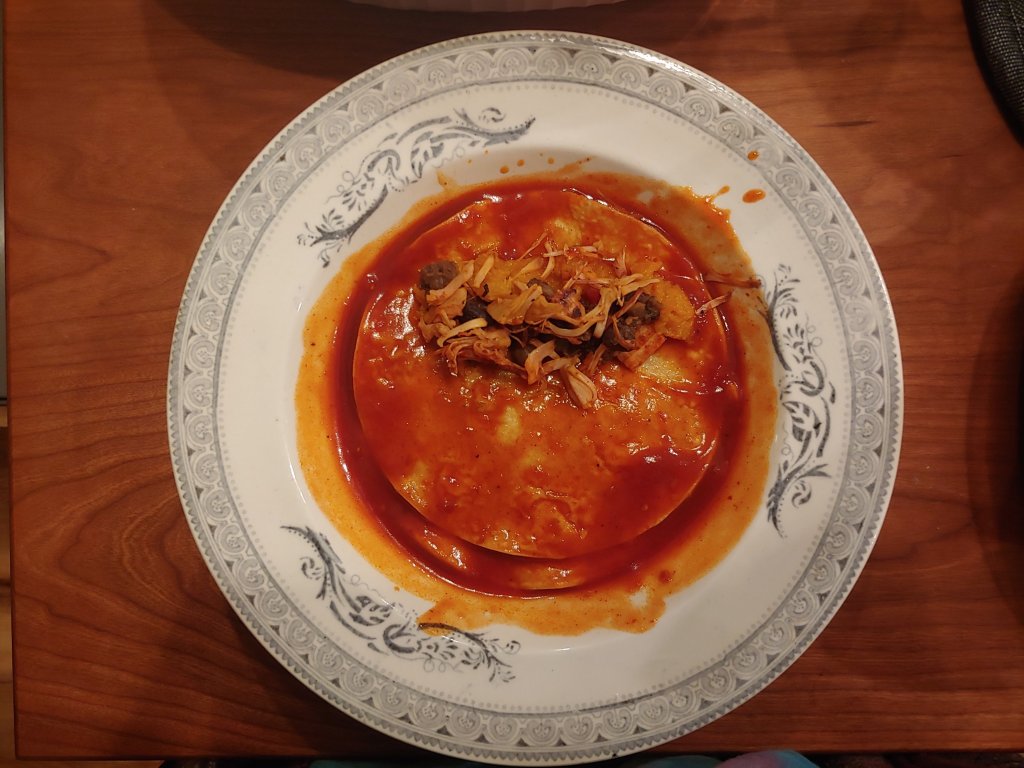
Allow to cool slightly before serving and top with any and all of your favorites.
Enjoy!
*I aim to avoid using resource intensive ingredients like jackfruit, cashews, and avocado. However, I sometimes make the exception but try to keep it infrequent. If you want to read more about this you can do so here. ** I do beans from dry almost exclusively now because it is easier for me to customize bean ratios. You can, of course use tinned beans if you prefer. All up to the user! *** Miyokos is the BEST vegan cheese and they are palm oil free which is pretty amazing in my opinion. The products can be pricy but last a while and are absolutely delicious
It’s soup season in Vermont y’all!!!! We are set to have highs in the 50s and 60s this week and I couldn’t be happier. I have been waiting for this for weeks. I don’t mean to kiss summer goodbye so quickly, I know winter’s icy breathe is just around the next corner and I am not ready for that. I am, however, so ready to make all of the soups I have been dreaming up all summer long. We happen to have a TON of cabbage coming out our garden right now, so the timing was perfect to make my grandma’s cabbage soup! (Which happens to be accidentally vegan).
Her soup is the ultimate comfort in the dead of winter and we often eat it with buttered bread or croutons. There is a special way this soup makes me feel that is difficult to describe. Sitting down to it feels like warmth and safety, like I am apart of something that is generations in the making. And when it hits my lips, within myself I am home. Most of the time I don’t even have to think much when I make it, my hands have learned all the steps and my brain can sit back. It helps, of course, that it is so simple to make.
When I made it this past week I coincidentally had all the ingredients I needed, and whipped it up in a pinch. While I love my grandmas plain version, which we spice individually, I decided to change up the seasoning a bit. A Baileaf twist on a family classic! It was magic. The cumin and coriander married perfectly with the ripe tomatoes resulting in a rich and pungent flavor that still provided all my familiar comforts.
The batch I made below is HUGE, making about 5 or 6 quarts of soup. I suggest sharing this with friends or family, even if you make less soup than I call for here.
Ingredients:
1 tbsp. olive oil
2 heads of cabbage – cut into medium size chunks
2 cups diced tomatoes (~4-5)*
1 cup sliced carrots (~2 medium)
1 cup sliced celery (~ 2-3 stalks)
1 medium yellow onion – diced
3 cloves garlic – minced
1 hot pepper (optional) – sliced
12 cups vegetable stock (3 quarts)**
1 tbsp. ACV or lemon juice
1 tbsp. salt
1 tsp. black pepper
1 1/2 tsp. cumin
1 tsp. paprika
1 tsp. coriander
1/2 tsp. chili powder
Instructions
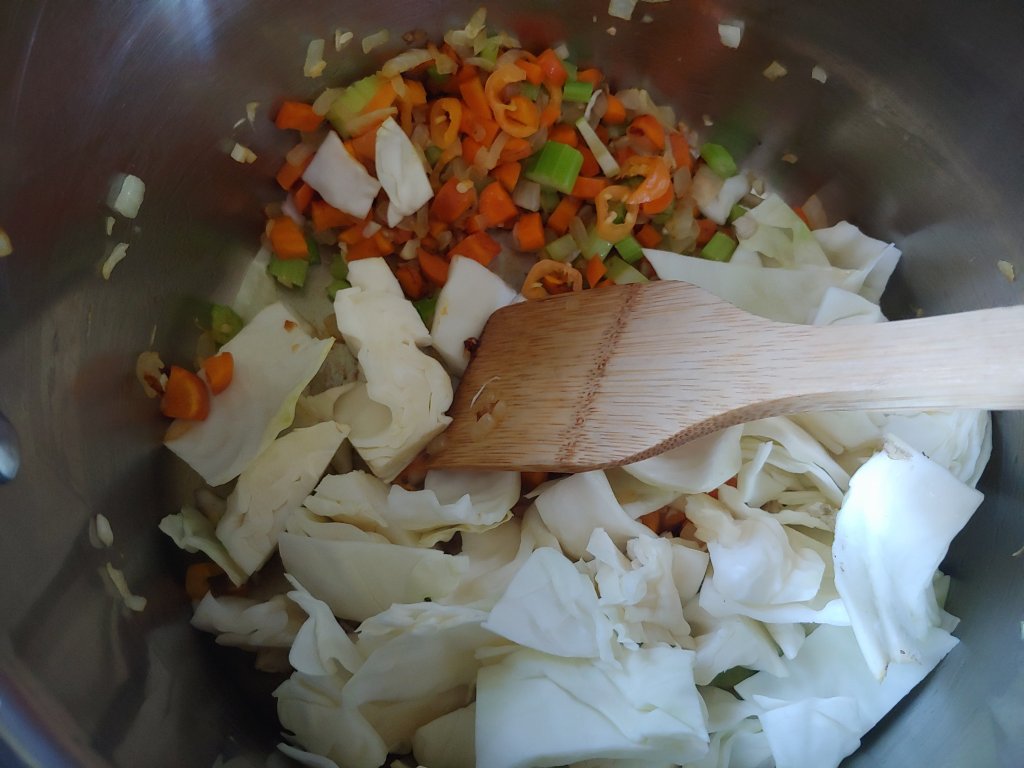
Heat olive oil over medium heat in a large stock pot. Add onions and salt generously to make then “sweat” (release water to improve cooking. Reduce heat to medium-low and cook until fragrant and softening (5 minutes)
Add in garlic, carrots, and celery. Cook for an additional 7 minutes until things begin to soften and caramelize.
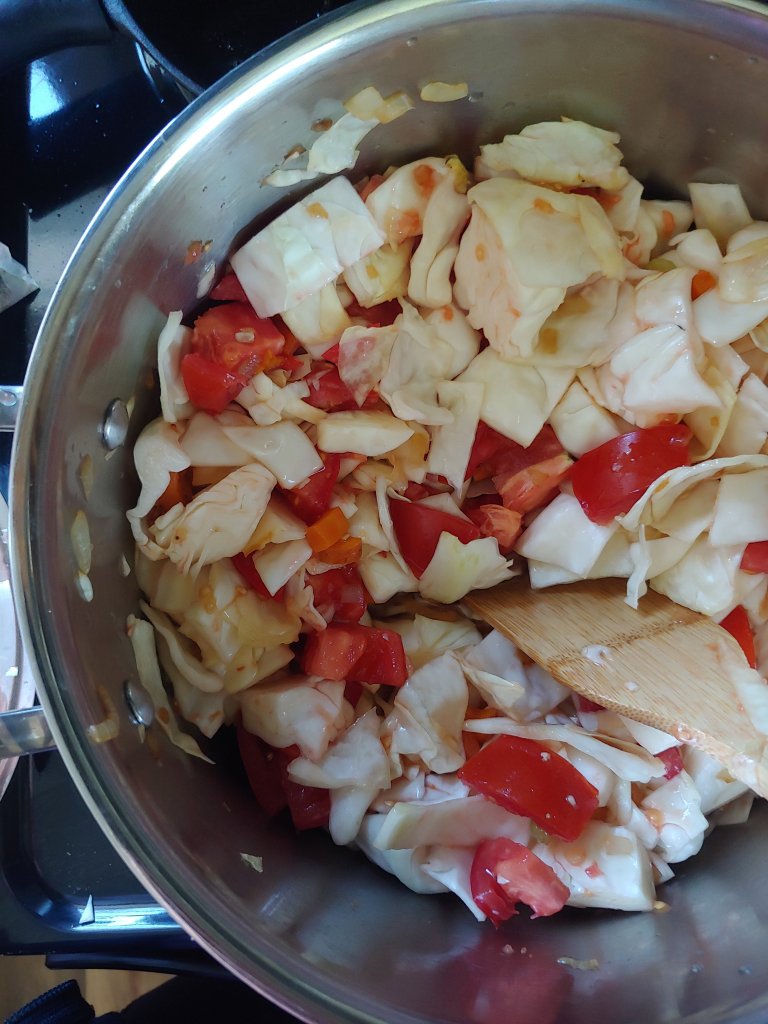
Stir in tomatoes, cabbage, and hot pepper. You may wish to add a tablespoon or two of water to prevent sticking/burning. Stir and cover, cooking on medium-low for 10 minutes.
Once the cabbage has started to wilt and the tomatoes are falling apart, stir in the spices, water/stock**, and ACV. Increase heat and bring to a boil
Boil for 5 minutes, stirring to prevent sticking. Reduce to a simmer and cover. Allow this to cook for 15 to 20 minutes, stirring occasionally. The cabbage should be very soft and tender. It will be rather translucent, this is how you know it is done.
Taste for seasoning and adjust as you please. Serve to friends in need of a warmed heart along side a hunk of buttered bread.
Enjoy!
Notes:
*I used fresh tomatoes because they give the best flavor, but you can use a 32 oz can of chopped tomatoes if that what you are feeling ** I almost exclusive use stock paste. It is much more convenient and lasts way longer. If this is what you choose to do, I recommend 2 -3 tsp. paste for the 3 quarts of water.
I am maybe possibly, slightly, a little obsessed with corn. It is just so sweet and delicious and the way it bursts in your mouth. Amazing. Plus you can make it in so many different ways…. maybe I will do a whole corn series… but that’s another thing entirely.
Corn is a staple grain that has been (and still is) integral to many cultures across time and space and that is in turn reflected in the variety of ways it can be prepared. From Venezuelan arepas, to Mexican elote, and Italian polenta, corn has spread far and wide and is often a critical component of both human and animal diets (although the later is entrenched in a number of environmental issues). As the summer draws to a close, sweet corn is in abundance; every farm stand and grocery store is featuring corn front and center. Which is great for me, and has lead me to be inspired!
I decided to design my own cornbread/cornbread muffin recipe – which helps out future me (my thanksgiving stuffing uses cornbread) and present you (who may be craving cornbread). It came together somehow seamlessly. I guess my baker’s intuition is improving. And overall it is pretty quick and easy, taking about 30 minutes from start to finish if you are organized.
This recipe makes about 6 cornbread muffins, or one 8 inch pan of cornbread. It has a nice gritty texture and is held together by the other flours, while the yogurt provides some moisture. The flour blend I use is the only option – you can see substitution options in the notes!
Ingredients:
¾ cup coarse ground cornmeal
½ cup stone ground cornmeal
¼ cup quinoa flour **
¼ cup cassava flour **
¼ cup brown rice flour **
2 tbsp corn starch
2 tsp baking powder
½ tsp baking soda
1 tsp salt
1 – 2 tbsp maple syrup (depending on how sweet you like it)
¼ cup dairy free yogurt
1 tbsp flax meal
2 tsp apple cider vinegar
½ cup dairy free milk
½ cup water
Instructions
Preheat oven to 375 F
Combine flax and yogurt and set aside
Whisk together all dry ingredients in a medium sized bowl
Once flax/yogurt mixture has set (it will be between jelly and eggs), stir in the maple syrup and ACV
Combine yogurt mixture, water and milk with the dry ingredients and stir to combine. The texture will be very coarse and seem wet – this is how it is meant to be
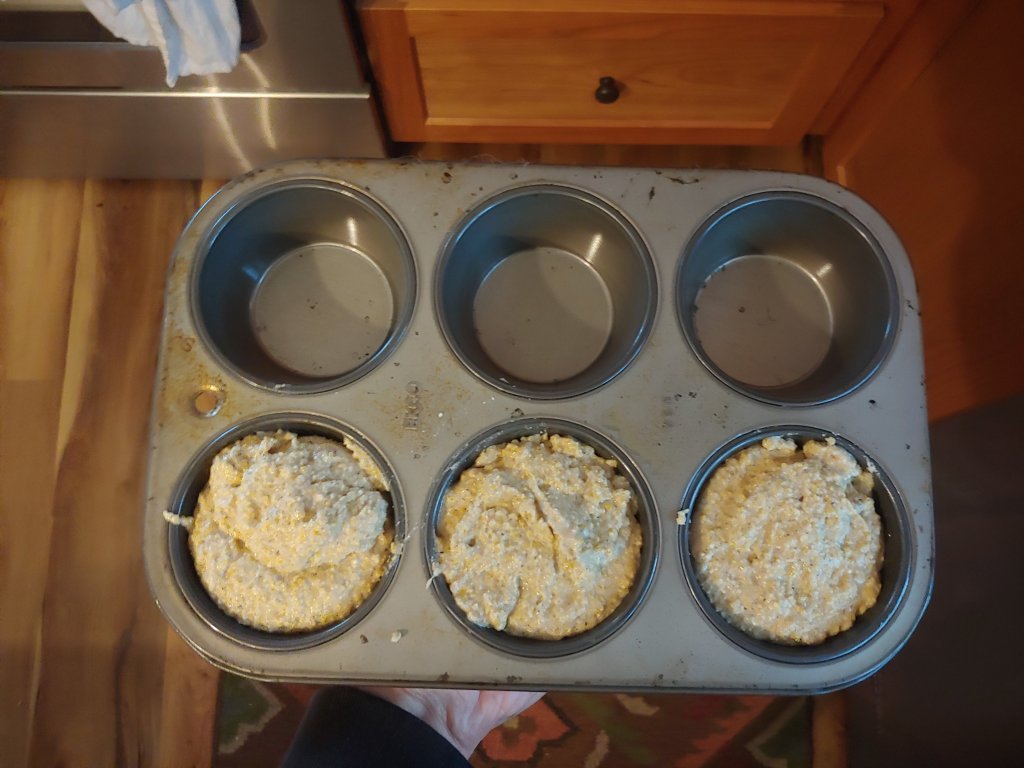
Grease a muffin pan and place about ¼ to 1/3 cup of the batter into each – they will fluff up in the oven
Bake for 10 – 15 minutes. Allow them to stand for 5 minutes after coming out of the oven then transfer them to a cooling rack or plate
I enjoy these with butter and jam, peanut butter and honey, with chili, or as a bread side for any meal really!
Enjoy!
Notes:
**this can be subbed for a 1:1 gluten free flour blend, or buckwheat flour. I really like the texture buckwheat flour gives to them but you definitely risk them drying out more!