Lemon Lavender Cookies

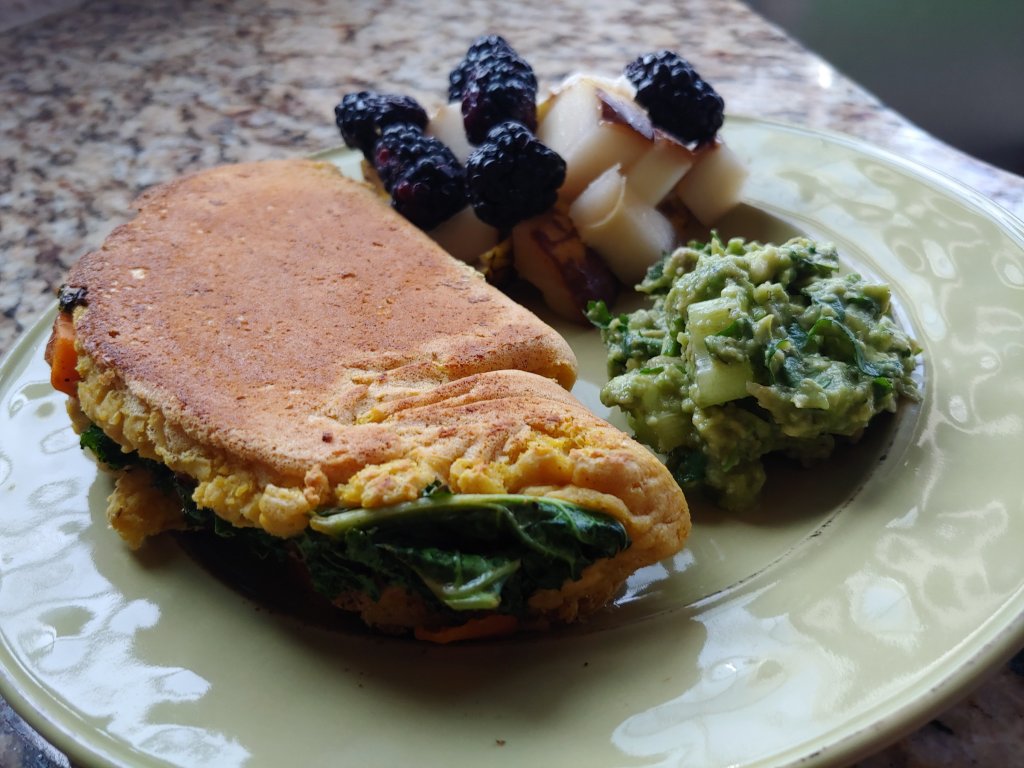
As soon as April/May rolls around I am craving floral flavored everything. I usually use May Day (May 1) as an excuse to make a festive floral dessert – and it is almost always these cookies. They are a combination of bright and fragrant with a melt in your mouth yet fluffy texture. I have a very hard time not eating them honestly. Anytime I make them people ask for the recipe, so now I am releasing it to the world!

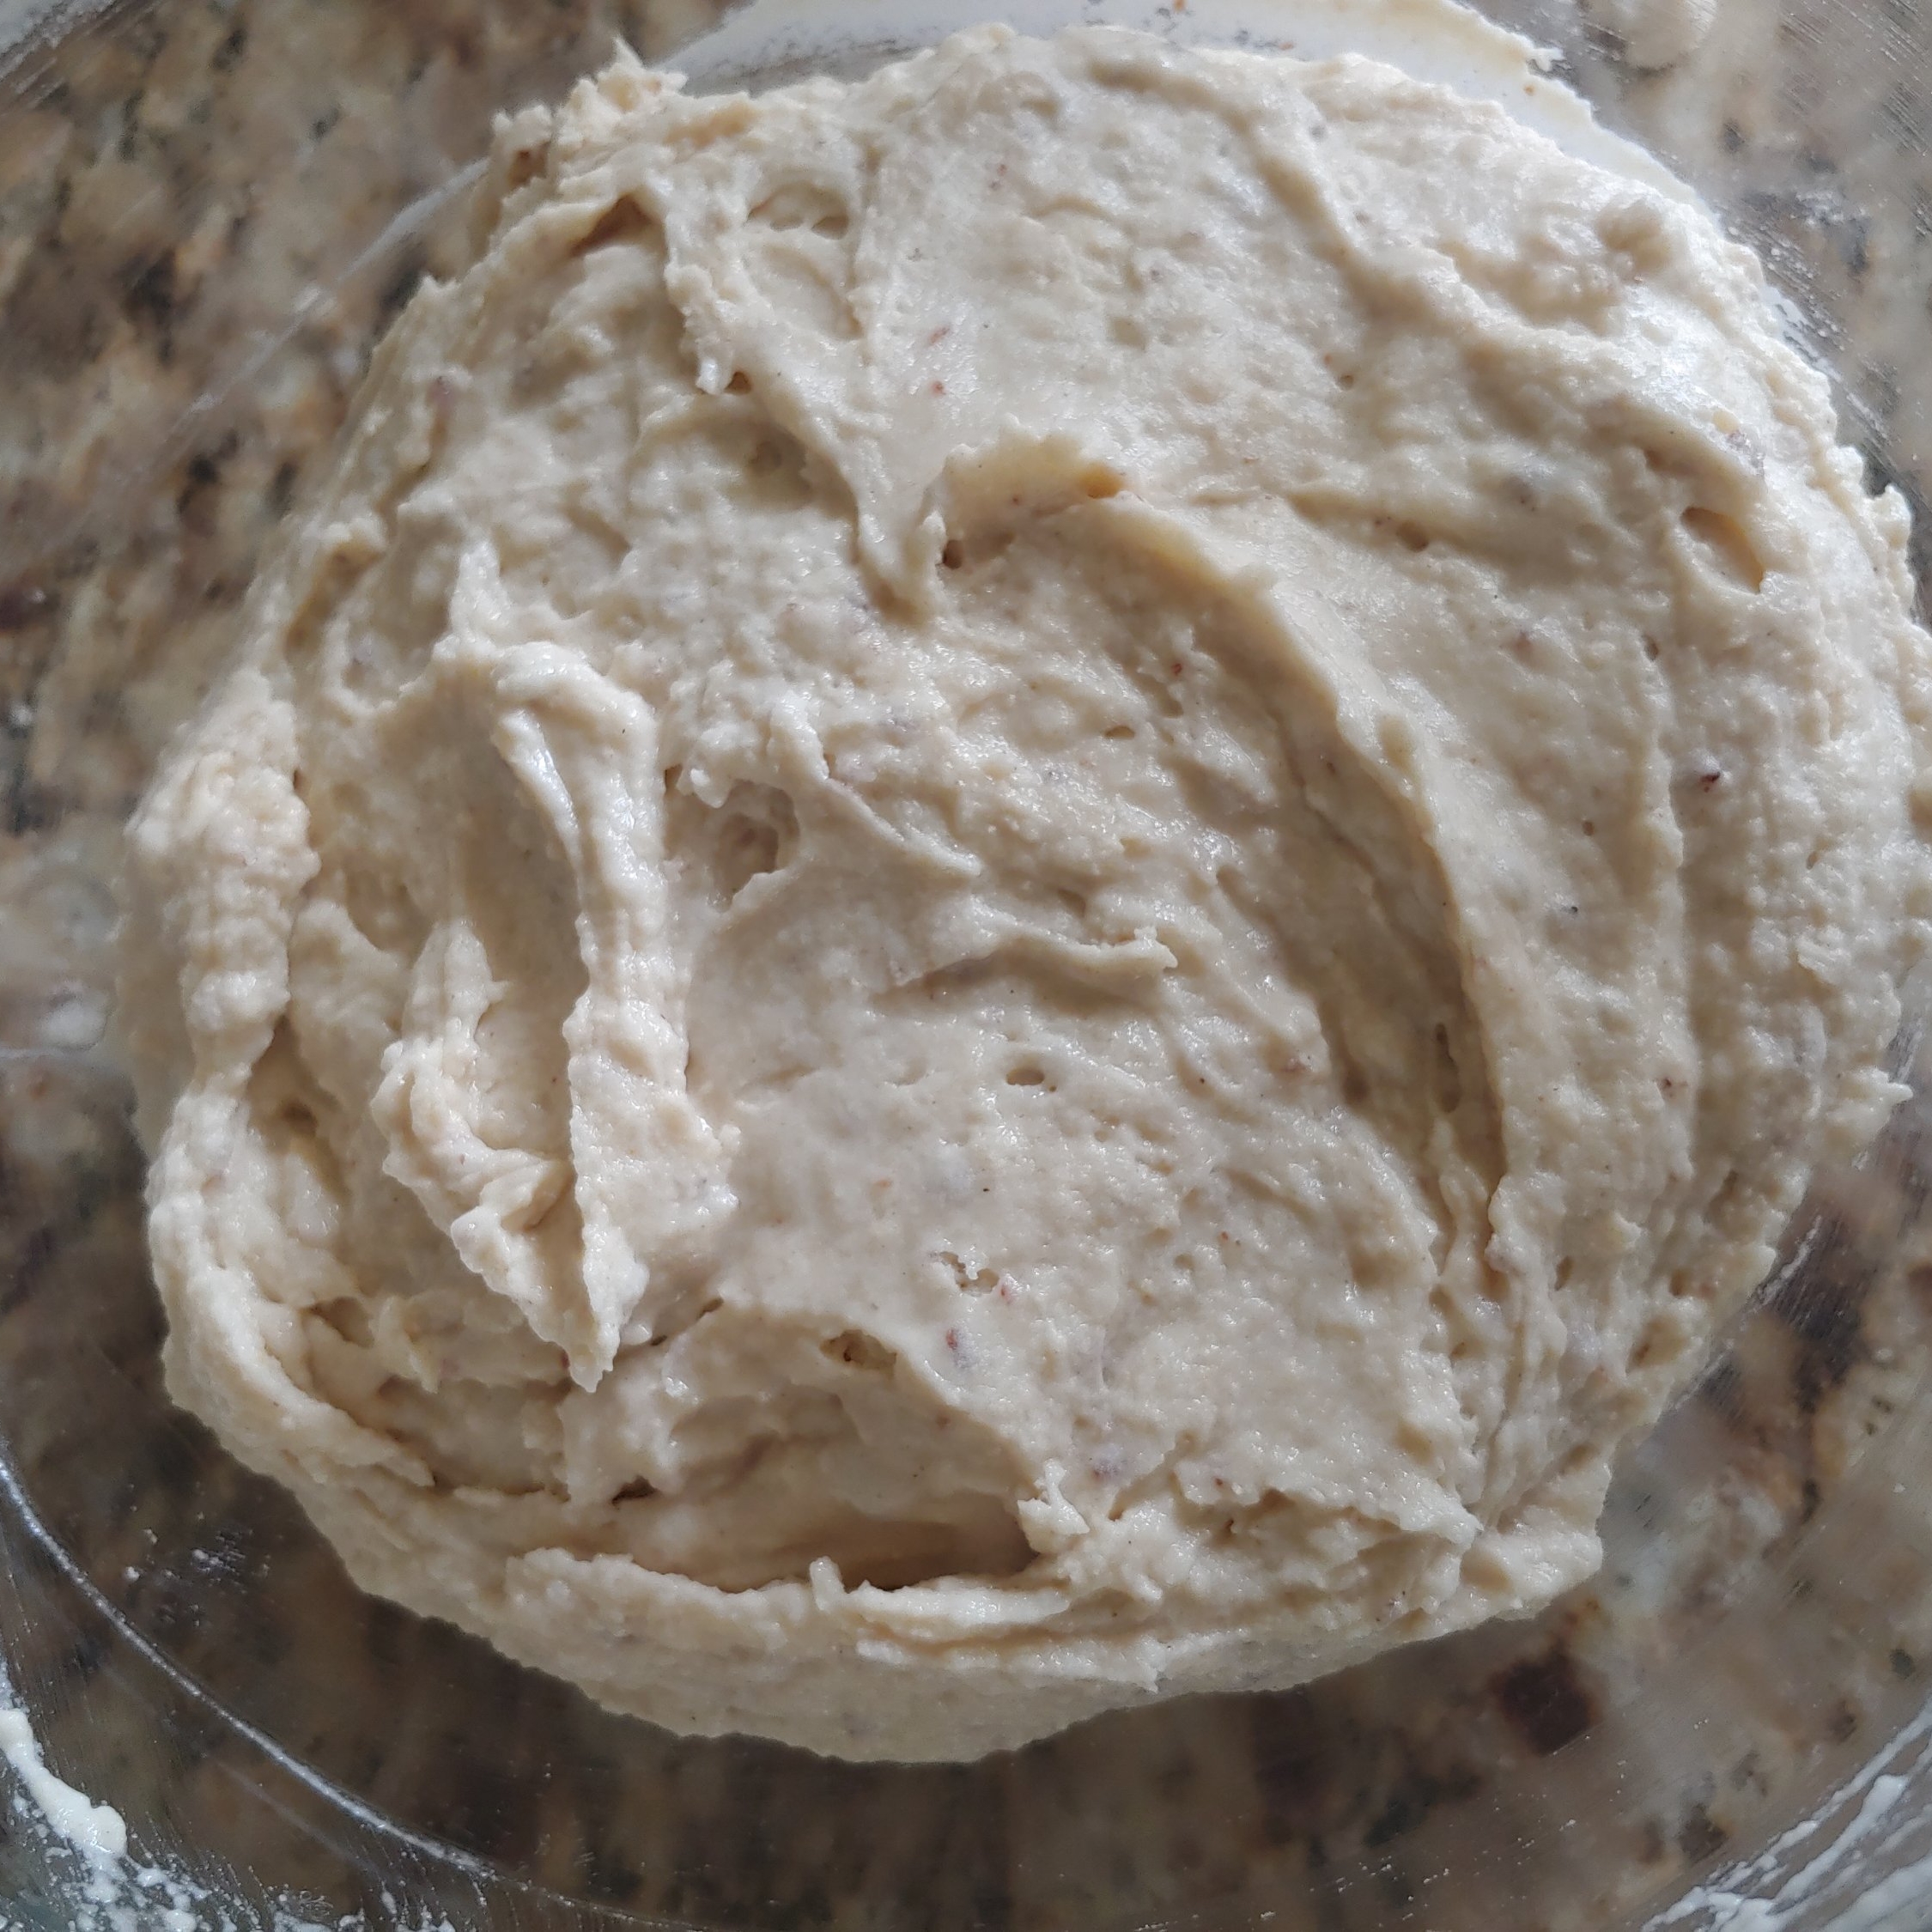
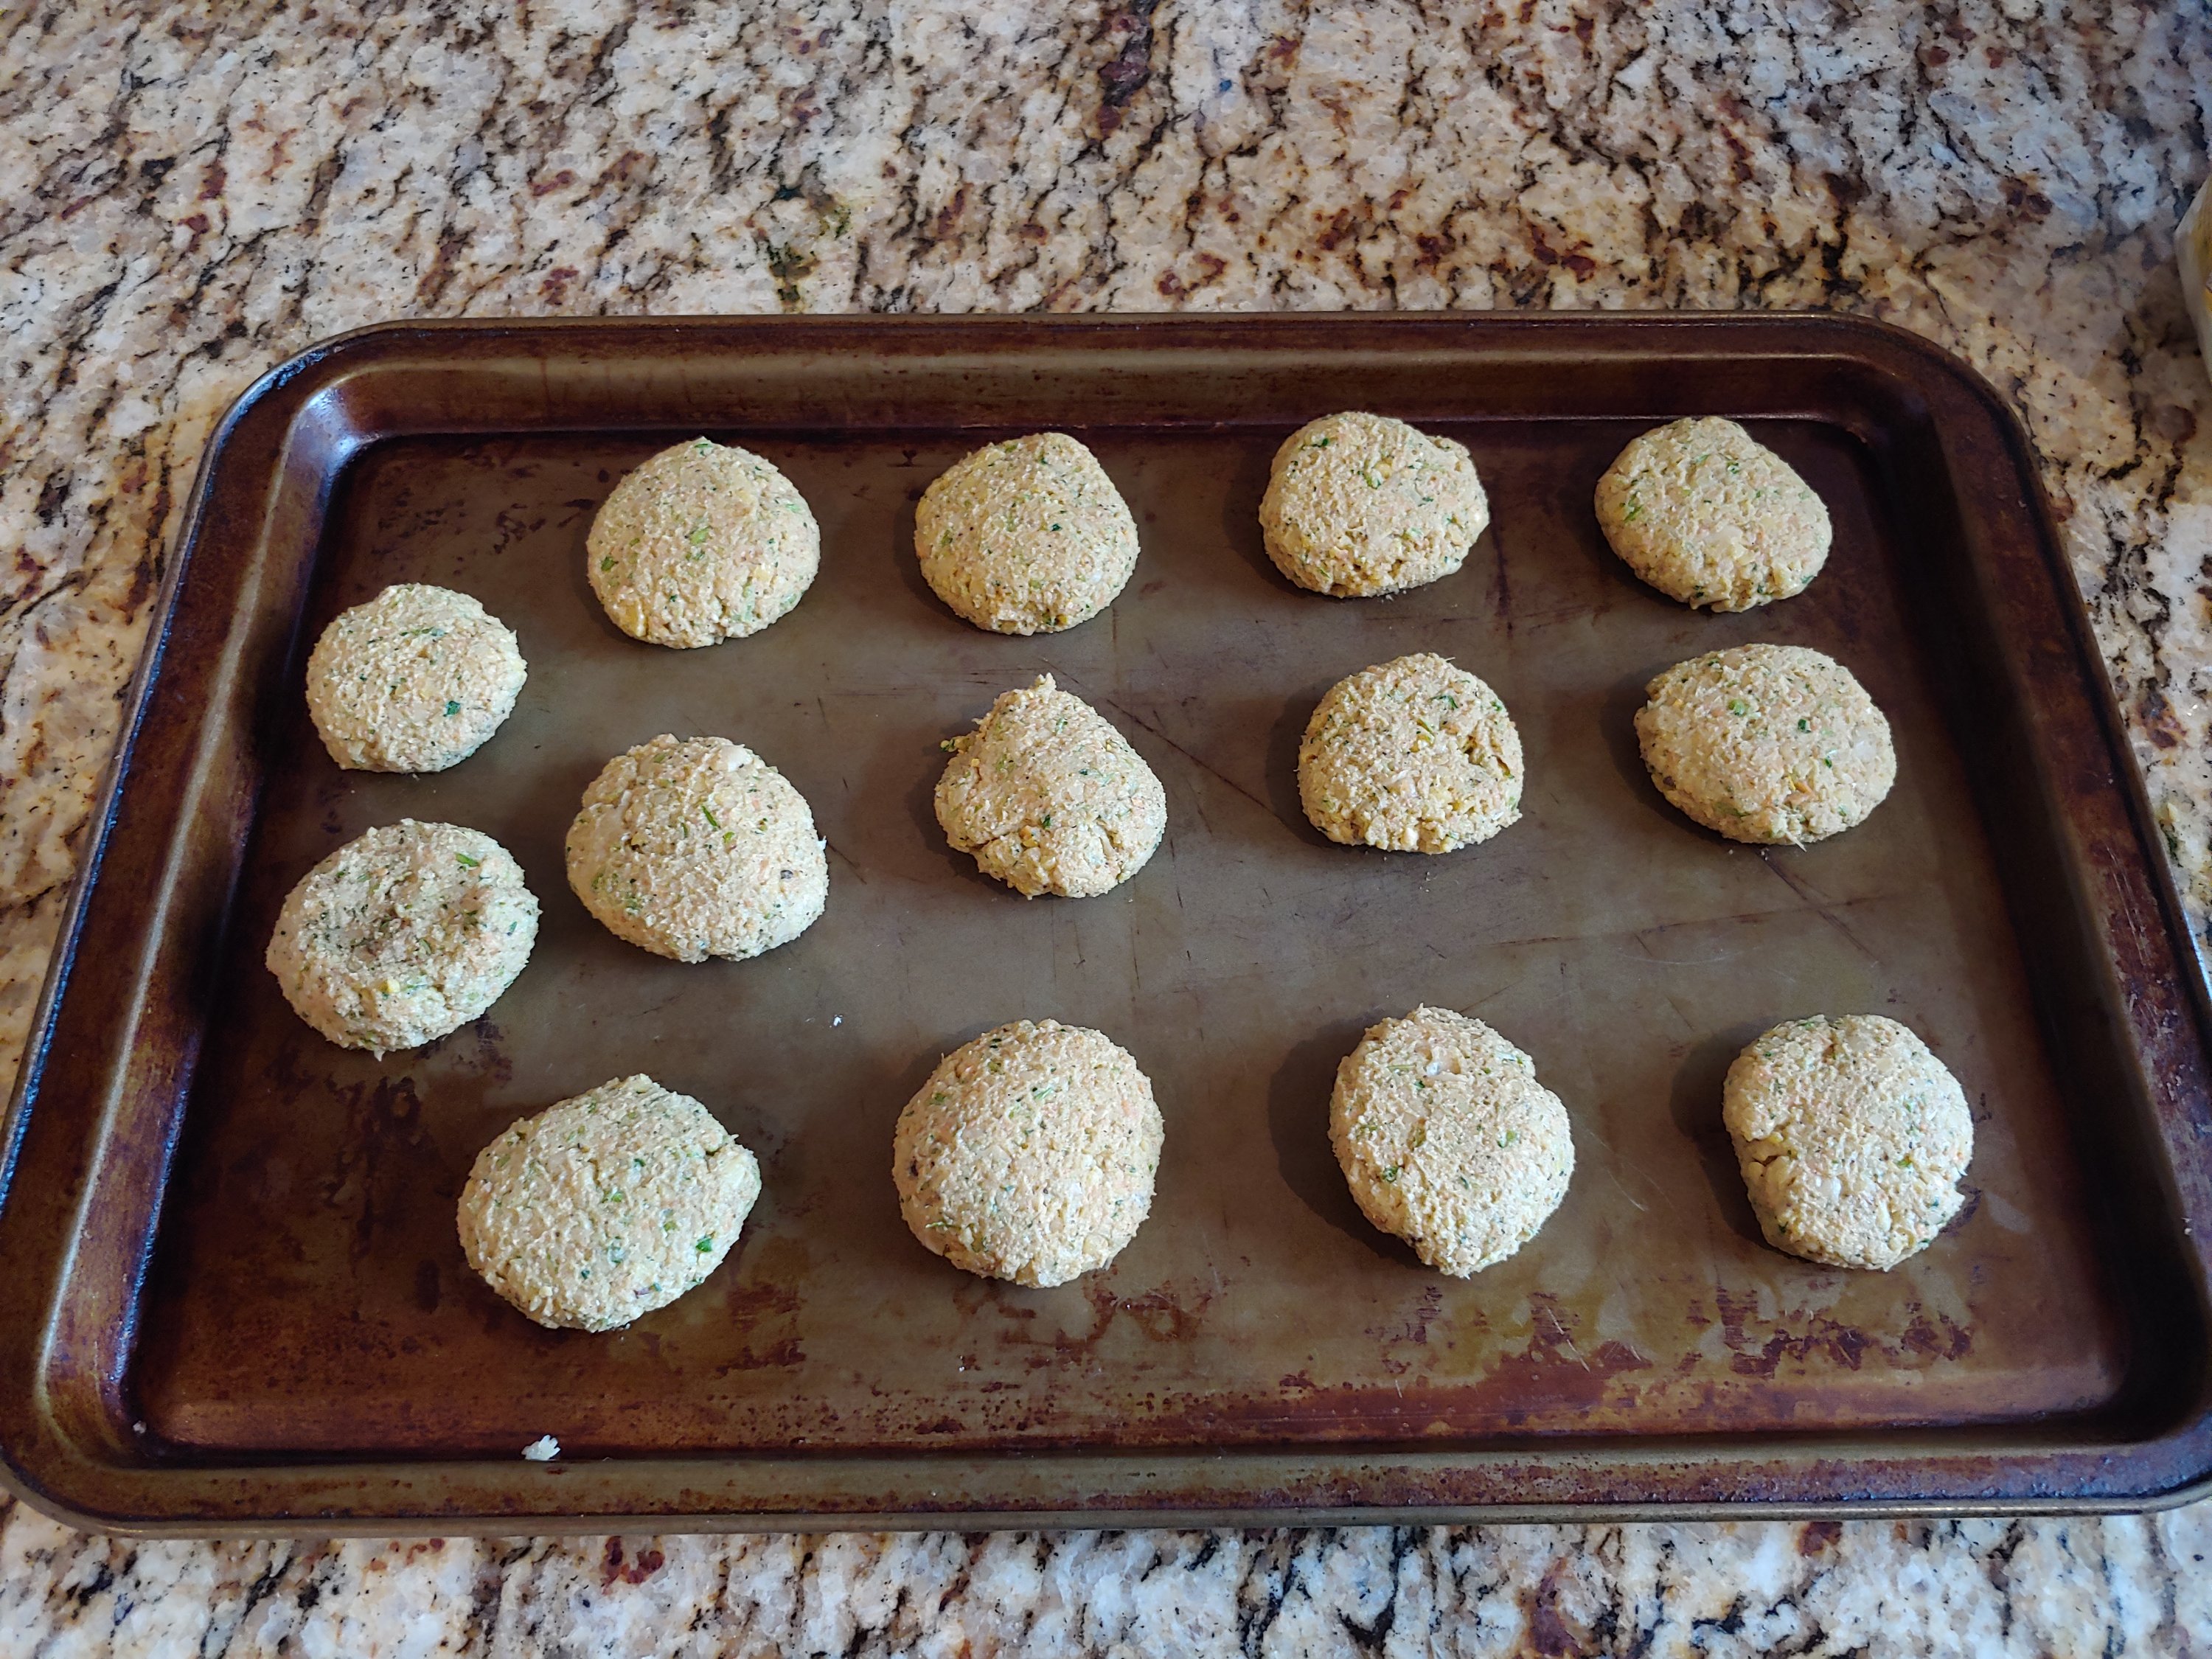
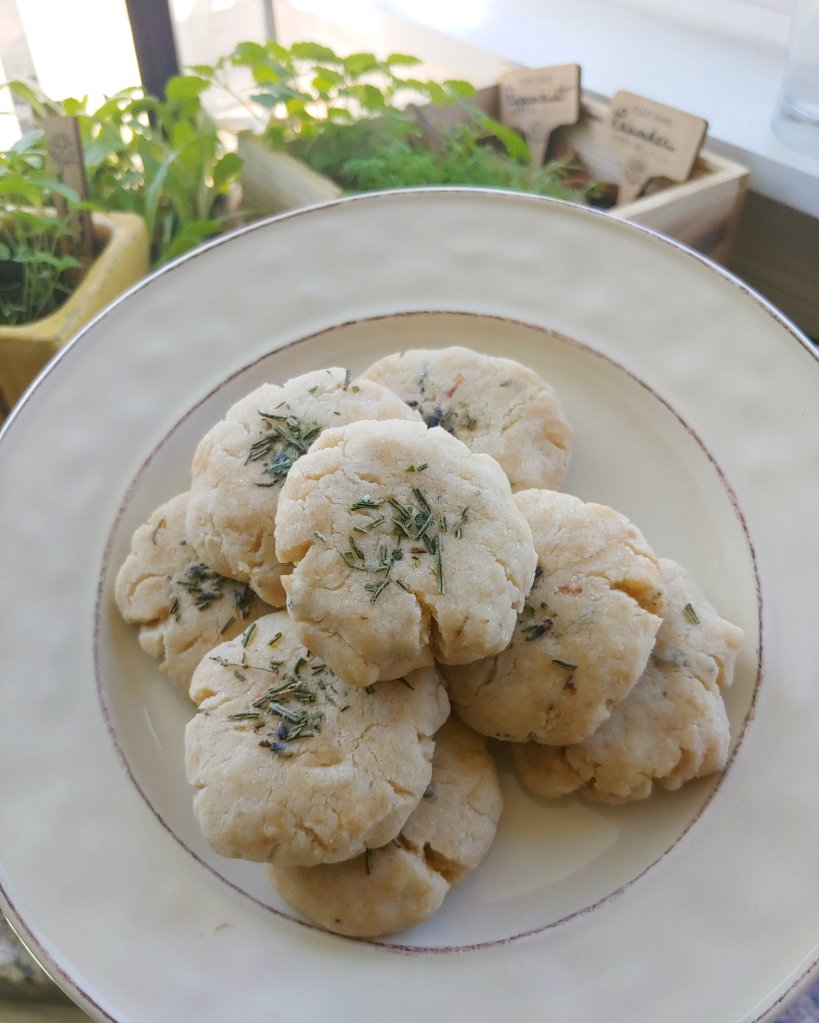
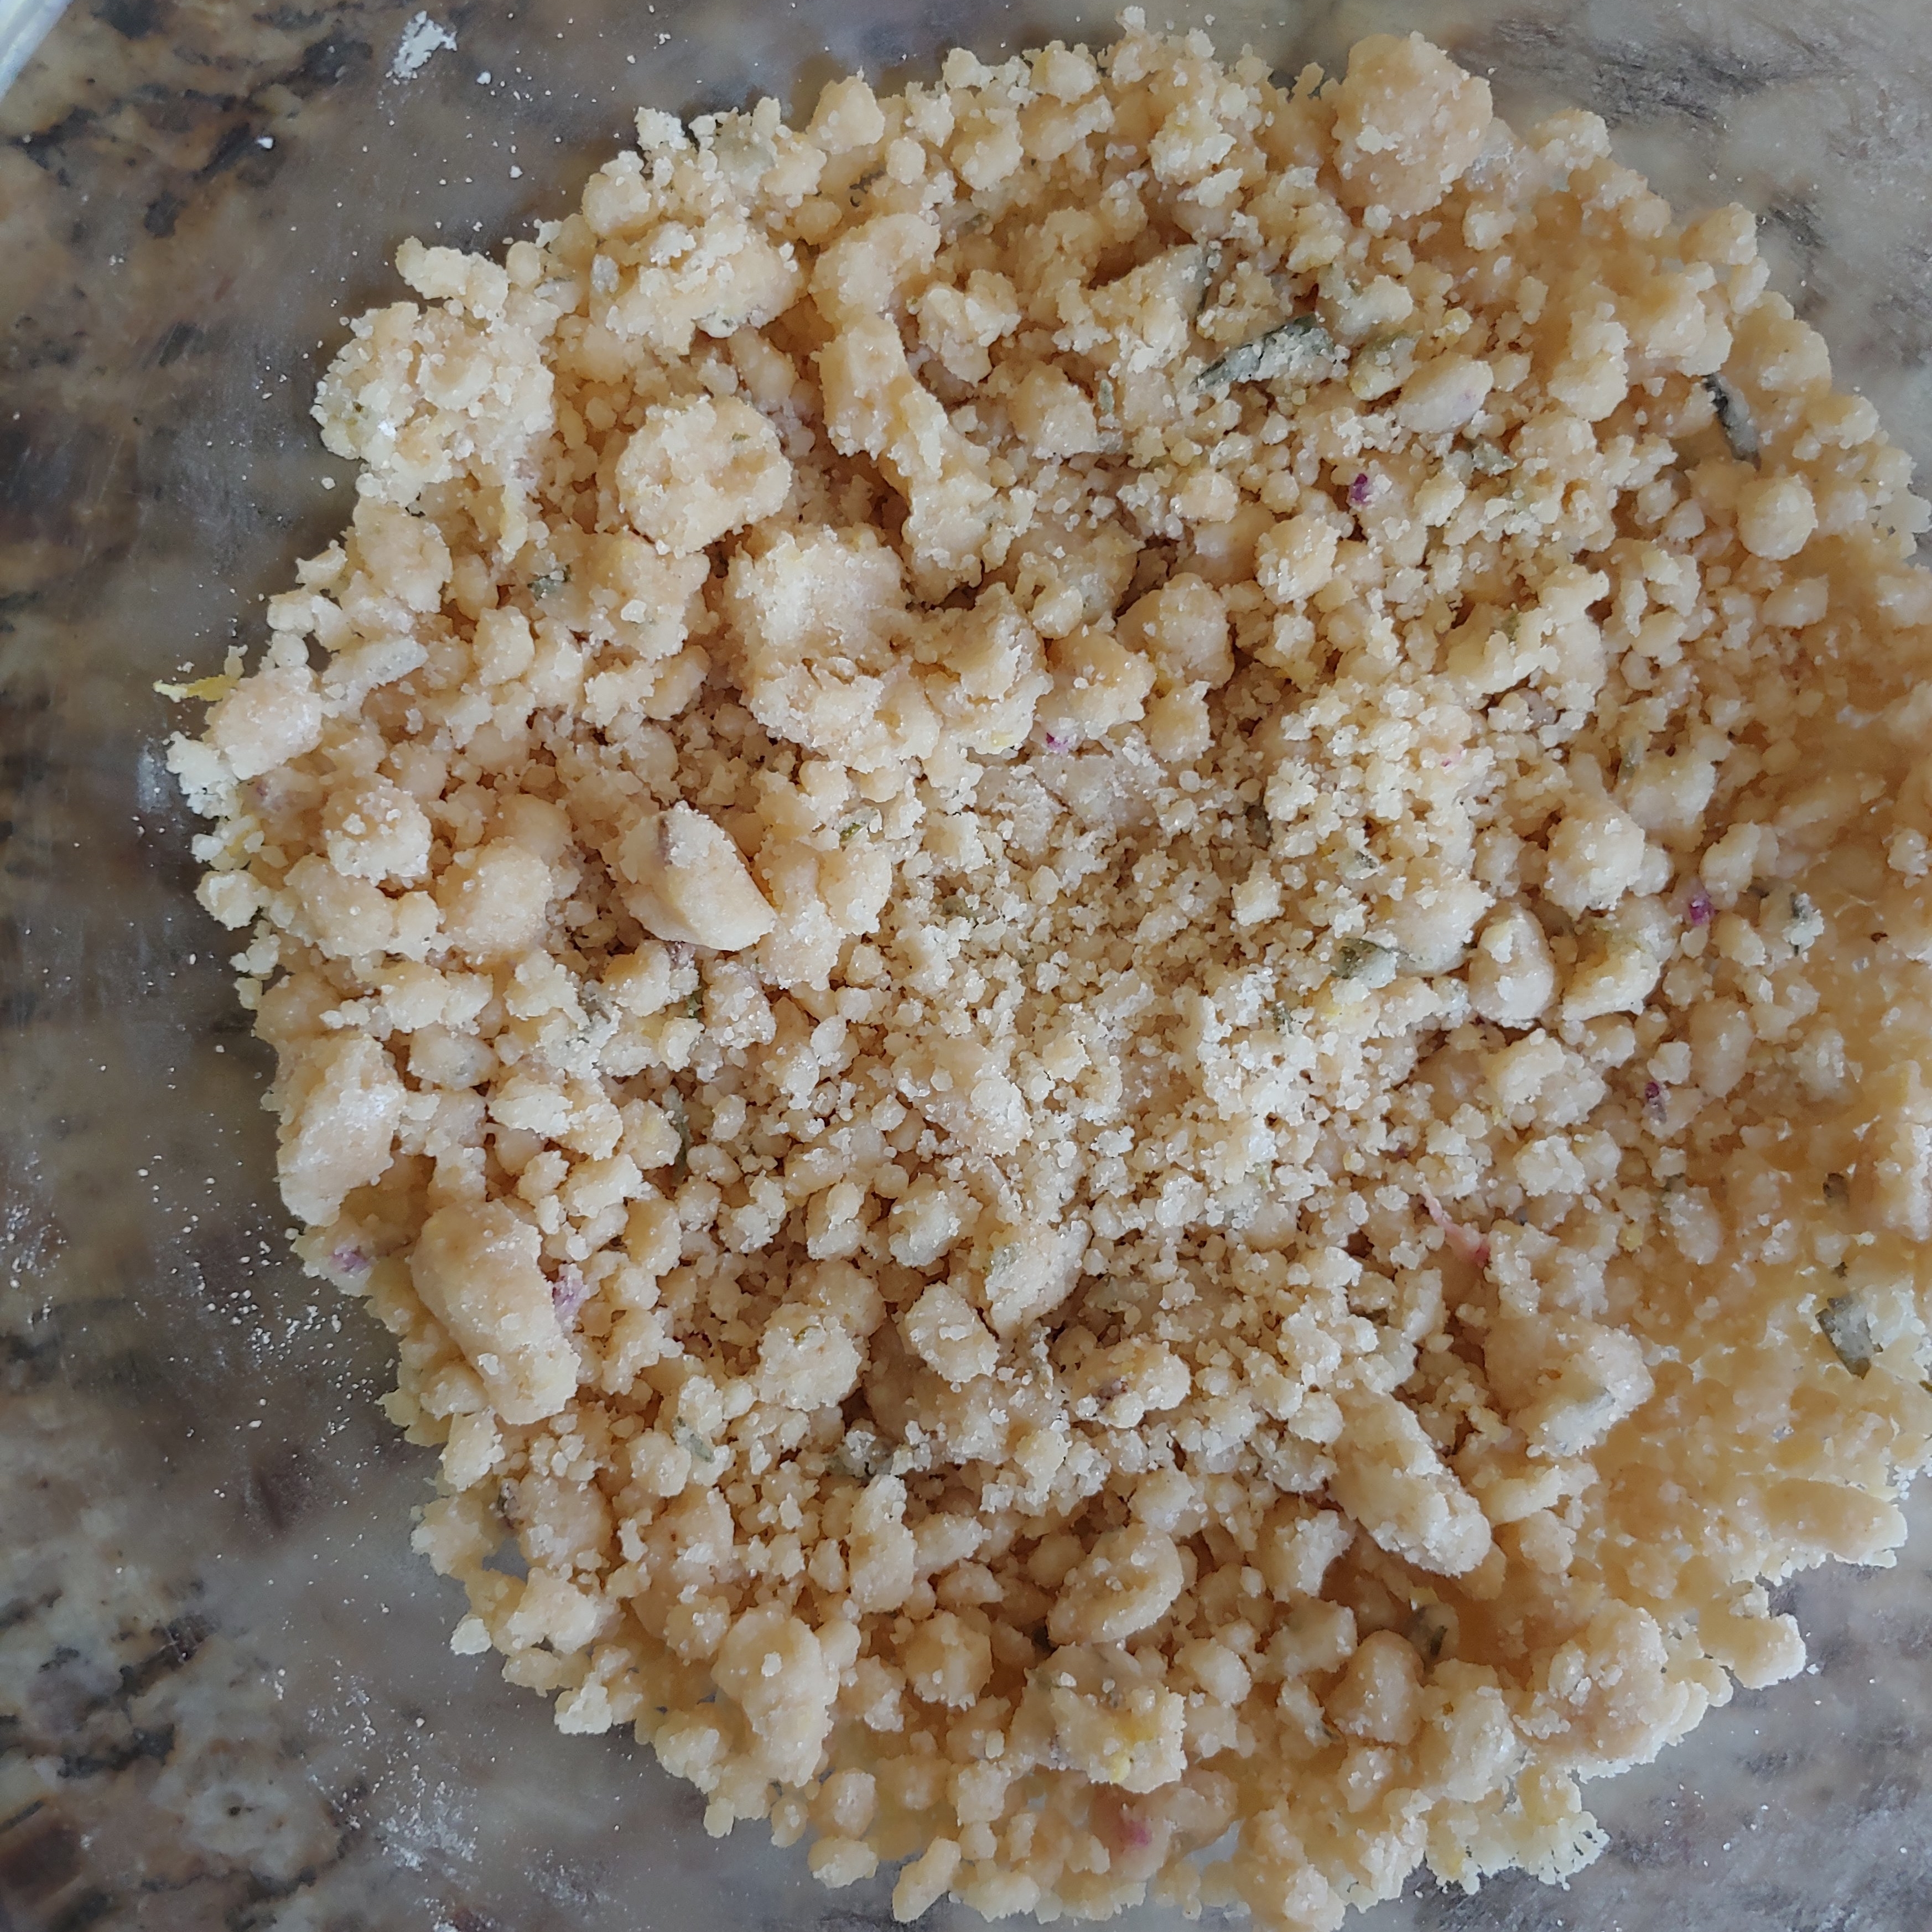
Making these delicious little morsels is pretty simple – it’s honestly really similar to shortbread! Two things I’d like to stress though – 1) let you lavender lemon mixture cool before adding it in 2) the coconut oil can be subbed for vegan butter (or regular) – regardless make sure it is soft/at room temp. The dough will be fairly crumbly when it is done – this is normal and will sort itself out when you shape the cookies! See my picture below for reference.

Ingredients:

  • 1/2 cup white sugar or coconut sugar
  • 2 tbsp brown sugar or unrefined sugar cane
  • 1/2 cup + 1 tbsp. coconut oil/vegan butter (just softened)
  • 1tbsp lemon zest (about 1 lemon)
  • 1 heaping tsp lavender
  • 1 tbsp. lemon juice (about 1 lemon)
  • 4 to 5 tbsp. agave
  • 2 cups gluten free flour
  • 1 tsp baking powder
  • 1/2 tsp salt

Instructions

1) preheat oven to 350 F/ 175 C and prepare a baking sheet by greasing or lining with parchment/silicone mat

2) Combine lemon juice and lavender in a small microwaveable dish. Heat for 20 seconds to steep lavender and release flavor. The lavender should be slightly fragrant. Be mindful not to over heat and allow to cool to room temperature

3) “cream” together coconut oil and both sugars, add in lemon mixture and agave

4) combine dry ingredients in a separate bowl (flour, baking soda, salt)

5) mix dry ingredients into the wet gradually, you may want to use your hands as the dough becomes like a short bread but a hand mixer should do the trick

6) roll dough into balls and flatten into pucks on baking sheet, they should be about 1/4 to 1/2 inch thick, you may wish to press some lavender into the top or roll them in sugar

7) bake for 12 to 15 minutes or until slightly golden at the edges

8) let cool before removing from the baking sheey as they need time to stiffen

Enjoy!

Lentil Cauliflower Taco “meat”

I eat tacos at least once a week. They are in my top 5 favorite foods, particularly because tacos are incredibly diverse. I could eat tacos for breakfast, lunch, and dinner and have a different flavor experience each time. However, this lentil quinoa taco “meat” is one of my absolute favorite fillings. It pairs easily with a variety of other toppings, and can also be used as a ground beef sub in other recipes like enchiladas or chickpea omelette.

Nachos with the taco “meat”

It took me a while to get the flavor and texture of this stuff right. After combing through similar recipes I finally settled on blend of cauliflower, quinoa and lentils. Green lentils are preferred, but red work as well – the mix will just have a more peppery taste with the red. The “meaty” flavor is derived from the sauce, which is a combination of liquid smoke, sesame oil and liquid aminos.

The texture of the mixture should look roughly like this

The lentils and quinoa should be soaked for about 8 hours before cooking; this allows them to soften before they are ground in the food processor with the cauliflower. When you reach this step, it is important not to over processor the ingredients, they should still be coarse. The ingredients then need steamed and crisped to give that browned beef look to the mix. It is a timely but straight forward process with unfussy ingredients, which is what I love most about it.

The recipe below makes enough for 9 to 12 tacos, approximately 3 to 5 servings!

Ingredients

  • 1/2 cup dry green lentils
  • 1/3 cup dry quinoa
  • 1/2 cup cauliflower florets
  • 1 1/2 cups + 2 tbsp. water
  • 1/2 tsp. Liquid smoke (I used hickory flavor)
  • 2 tbsp. Liquid aminos
  • 1/4 tsp. Sesame oil
  • 2 tbsp. Taco seasoning (recipe here, or use your own)

Instructions

  1. At least 8 hours before you plan to make your taco “meat” soak the lentils and quinoa in a mason jar or bowl with 1 1/2 cup of water
  2. When you are ready to make the tacos, drain the lentils and quinoa in a sieve and rinse – place these in a food processor with the cauliflower florets and pulse until a course texture is achieved. Do not process for too long, you still want the mixture fairly textured
  3. Place the mixture from the food processor into a large skillet with the 2 tbsp. of water. Set the temperature at medium and allow the components to steam and soften with the lid on – about 7 minutes.
  4. Once the mixture has softened add in the remaining ingredients and stir to coat. Turn up the heat to medium high to brown the “meat”
  5. Serve anyway you would like – I imagine it could be re-seasoned to mix into gravy even! I like mine on top of tacos with refried beans and roasted veggies!

Enjoy!

No Knead Gluten Free Sandwich Bread

I have been struggling to find a bread recipe that is vegan, gluten free, and actually works. I figured I had enough experience making bread at this point that I could give it a go myself, and surprisingly it worked??? I was shocked to be honest. I was expecting a brick instead of the fluffy yet crispy loaf I got. In the past, the thing I struggled with was getting the airy-ness you experience in normal sandwich bread – the trick was aquafaba! I used it as if it were egg whites and it worked spectacularly, allowing maximum expansion of the dough. The aquafaba has to be reduced by heating it on the stove before it can be whipped into a meringue of sorts – it’s really magical to watch so be prepared!

Other crucial components of the dough were the chickpea flour (crispy crust), brown rice flour (proper texture) and flax seeds (keeping the loaf together). The baking powder + ACV also helps to give it a bit of a lift! These components really cannot be swapped out, nothing else can really fill their shoes.

Ingredients

  • 2 cups gf baking flour with xanthan gum
  • 1/4 cup chickpea flour
  • 1/2 cup brown rice flour
  • 1 cup warm water
  • 2 tbsp sugar
  • Aquafaba from 1 can chickpeas
  • 1/2 tsp salt
  • 2 tsp baking powder
  • 1/4 cup neutral oil
  • 1 cup plant milk
  • 1 tbsp. Apple cider vinegar
  • 1 tbsp flax seeds

Instructions

  1. Bring aquafaba to a boil in a small sauce pan – lower heat and simmer until reduced to about 1/3 cup (2 to 3 minutes). Remove from heat and set aside
  2. Meanwhile combine flours, salt, baking powder, and flax seeds into a large mixing bowl
  3. Place warm water, yeast, and 1 tbsp. sugar in a small bowl – stir and set aside until it blooms (foam forms on the top – about 5 minutes)
  4. Transfer aquafaba to a clean medium sized mixing bowl – beat with a hand mixer for 2 minutes until very frothy
  5. Add 1 tbsp. of sugar to aquafaba and beat for another 5 to 7 minutes until it stiffens up like a meringue (see picture below) – set aside
  6. Make a well in the dry mixture and pour in the yeast mixture, plant milk, oil, and ACV – mix just until combined
  7. Carefully fold in whipped aquafaba – you don’t want to beat out the air so just fold until it is mixed in
  8. Cover with a clean towel and place in a warm draft free area for an hour to rise, transfer to a greased bread pan and allow to rest for another 30 minutes
  9. Preheat oven to 350 F
  10. Cover loaf with foil and 20 minutes, remove foil and bake for an additional 40 minutes – check and rotate about half way
  11. Remove from oven and allow to cool. To store I slice the loaf and place it in the freezer. When I want a slice I pop it in the toaster to warm it!

Enjoy!

This is what the Aquafaba should look like before you fold it in to the dough
The dough isn’t tacky like a typical gluteny bread – it’s ok if it’s a bit sticky
This is what the loaf looked like once it came out of the oven – nice and crispy on top!

Nut free vegan cheez sauce

Alas! A vegan cheese sauce without nuts! Nuts are expensive and I rarely have the ones required of the myriad of vegan cheese sauces on hand (generally cashews). I do however frequently have an assortment of root vegetable in my pantry that are desperate for my attention. Those are the key here: Root vegetables typically have a lot of starch as they serve as often serve as storage organs. The starch in these soil dwelling foods helps to thicken up the sauce and give it an elasticity that mimics a real cheese sauce. Potatoes and carrots are essential in the sauce, but I also add in parsnips for an added peppery flavor.

I find this to be fairly easy as far as cheese sauces go – you boil veggies, throw ’em in a food processor with the other ingredients, whiz and voila! Cheese sauce!

The sauce can go on anything from mac and cheese, to tacos, cheesy potato casserole, or chili cheese fries! The recipe as it is here makes about a cup and a half of cheese sauce, so double it if you expect to need more! (and you will need more)

  • 1 medium russet potato – peeled and chunked
  • 1 parsnip – peeled and chunked
  • 1 medium carrot – peeled and chunked
  • 1/2 cup nutritional yeast
  • 1/2 tsp. Turmeric
  • 1 tbsp. Lemon juice
  • 2 tsp. Liquid aminos
  • 1/2 tsp paprika
  • 2 tsp. Mustard
  • 1/8 tsp. White pepper
  • 1/3 cup reserved starch water (from boiling)
  • Salt and pepper to taste

Instructions

  1. Bring a medium pot of water to bowl, add the chopped veggies and cook until soft
  2. Drain veggies and reserve water – allow to cool and transfer to a food processor
  3. Add the remaining ingredients and pulse on high until smooth and gooey – about 3 to 5 minutes. You may need to scrape down the sides
  4. Remove from food processor into a airtight container. Heat to serve, it’s best hot!

Roasted Beet Hummus

Beets are a wonderful vegetable. My sister always says “you can’t beat and beet”. They have a nice earthy yet sweet flavor that can really up to depth of a dish. However, they really do need to be cooked the right way. I find if they are not I have a hard time eating them. I think it’s because they can taste too earthy (basically like dirt) when they don’t have something acidic or savory to complement that taste. We made some roasted with carrots recently that I wasn’t crazy about, so the sat in the fridge. I didn’t want them to go to waste (cause food waste sucks, eat your leftovers people) so I made them into hummus!

The tahini and chickpeas along with tomato past and lemon juice helped to provide the afformentions savor and acid needed to round down the beets flavor. One hitch with this recipe is roasting the beets, ’cause that can take forever. To help with that, quarter your beets and stab them a few times before wrapping them in foil.

–A side note: Wash and peel your beets REALLY WELL whenever you use them. I’m talking 20 minute salt soak, scrub, peel and rinse just to make sure they are super clean so you’re tasting the beets earthiness and not that of the soil.–

Ingredients

  • 1 15 oz can chickpean
  • 1 large beet – washed, peeled, and quartered
  • 1 large carrot – cut into chunks
  • 2 tbsp. tomato paste
  • 2 tbsp. tahini
  • 1 tsp. cumin
  • 1 tsp. corriander
  • 1/2 tsp. smoked paprika
  • 3 tbsp. + 1 tsp. olive oil
  • 3 cloves garlic
  • juice of 1 large lemon (about 1/4 cup)
  • 1/2 tsp. your favorite hot sauce
  • salt and pepper to taste

Instructions

  1. Pre-heat oven to 400 F
  2. Toss beets and carrots with 1 tsp. of olive oil and salt – wrap in foil and roast in oven for 20 to 30 minutes, or until tender
  3. Combine all ingredients into the bowl of a food processor and whiz until smooth!
  4. Serve with veggies, tortilla chip, on a sandwich, with tacos, however you see fit!

Enjoy!

Spicy Black Bean Burgers

It has been alarmingly warm for February/March this week. Suspicions aside, warmer weather never fails to make me crave a good veggie burger. I set out to make a vegan black bean burger that actually held up on a grill pan, and alas! I succeeded. The corn meal and flax seeds did most of the work in the binding department, which the smoked paprika lent a deep and flavorful patty.

The beautiful thing about this recipe is that the beans and spices can be subbed to make a whole new burger! Chickpeas, red beans, adzuki beans, you name it! The black bean burger it’s self is also versatile and can be paired with a variety of toppings. I highly recommend guacamole and spicy sauerkraut with a vegan chipotle ranch. I also recommend using the Schar ciabatta buns (accidentally vegan). Schar is my favorite gluten free brand, and the Ciabatta buns are nice and airy but also crisp up well! Plus this recipe makes 4 patties and the pack contains 4 buns… so it’s basically a perfect match!

Ingredients

  • 15 oz can black beans
  • 1tbsp flax seeds
  • 2.5 tbsp. warm water
  • 2 tbsp. Tomato paste
  • 1/2 tsp. Cumin
  • 1/2 tsp. Coriander
  • 1/2 tsp. Smoked paprika
  • 1/4 cup fine corn meal
  • 1/2 cup gf flour plus extra for dusting
  • 2 garlic cloves
  • 4 pack Schar ciabatta buns
  • Your favorite toppings and sides

Instructions

  1. Combine all ingredient into the bowl of a food processor and pulse until black beans are chopped but not obliterated – you still want some chunks
  2. Remove the blade from the food processor and stir the dough to ensure all of the ingredients are well combined
  3. Line a small cookie sheet with parchment paper and flour it well
  4. Divide the dough into 4 to 5 balls. Take each ball in your hand and add 1 to 2 tsp. GF flour. Lightly knead the balls in your hand – do not mash them, you just want coat the outer layer
  5. Flatten each ball into a disk and place on the prepared cookie sheet. Place the cookie sheet in the freezer for at least 10 minutes prior to cooking – you may also choose to make them in advance and freeze them until needed.
  6. Fire up you grill or heat up your stove top grill pan to a medium heat. Place the burger on the cooking surface and cook 4 – 5 minutes on each side.
  7. Just before the burgers are finished, place the buns slice side down on the grill to get them a bit crispy. Remove and top and serve with all your cook out favorites!

Enjoy!

Warm Peanut Kale and Rice Salad

Salads are a perfect food. They have so many forms and are generally pretty refreshing and healthy. I typically associate salads with a nice cool crisp lettuce or pasta salad, but there are warm salads too! Warm salads are much better for the cooler months when you want something hot and hearty. They are generally pretty easy to prep as you can cook all the components before had, mix ’em all together in a bowl and pop that sucker in the microwave when you’re ready. The recipe here makes about 4 portions of salad so is a nice lunch prep for the week, if that is what you are looking for.

I tried to make the flavors a nice balance of sweet and smoky. The Thai peanut sauce the kale is baked in provides a nice sweet and fatty flavor to the dish. Meanwile, the sweet potatoes are seasoned with smoked paprika to provide a nice earthy savor that pairs perfectly with the rice and chickpeas. I really love this salad, so I hope you do too!

Ingredients

  • 2 large sweet potatoes – cubed
  • 8 cups packed kale (equivalent to 1 large bag or bundle) – chopped
  • 1/3 cup long grain brown rice
  • 1 cup water
  • 1 can of chickpeas, drained
  • 4 tbsp. peanut butter
  • 2 tbsp. water
  • 8 tsp. rice vinegar
  • 4 tsp. liquid aminos
  • 2 tsp. agave
  • 1 tsp. smoked paprika
  • 1 tsp. garlic powder
  • 3 tbsp. olive oil
  • salt and pepper to taste

Instructions

  1. Preheat oven to 375 F
  2. Bring 1 cup of water to boil in a small pot and salt well. Add in rice and return to a boil for 5 minute. Reduce to a simmer for 20 minutes, or until water is absorbed
  3. Toss sweet potatoes with 1 tbsp. olive oil, smoked paprika, and salt and pepper to taste. Bake on a metal baking sheet for 20 minutes, stirring halfway through.
  4. Toss chickpeas with 1 tbsp. olive oil garlic powder and salt and pepper to taste. Bake in over in a metal baking dish for 15 to 20 minutes, or until crispy. Stir halfway.
  5. Mix together the peanut butter, agave, 2 tbsp. water, rice vinegar, and liquid aminos. The mixture will be very thin.
  6. Combine the kale and the peanut sauce and spread onto a metal baking sheet. Bake in the oven for 10 minutes, just until wilted
  7. To serve place 1/4 of the kale on a plate, top with 1/2 cup sweet potato, 1/4 cup of rice, and 1/4 cup of chickpeas. Add any salt and pepper to taste.

Enjoy!

Vegan Chickpea Omelet

Some days I REALLY miss eggs. I stay strong because I know that they’ll make me feel like a human rubbish bin, and then opt for an alternative. Chickpea flour has a nice hearty flavor and can be dressed up to have that familiar eggy taste – although it’s not perfect. Still it’s as close as I can get to eggs without a stomach ache, so I settle.

It is astonishingly easy to pull these little beauties together, and only requires a hand full of ingredients that are mostly kitchen staples. Side bar: I consider chickpea flour to be a kitchen staple… but maybe that is just me. Anywho, the recipe here is for a single omelet but could be scaled up to feed a crowd. You could even do a Spanish omelet type of deal.. Maybe I’ll tinker with that. The fillings and spices are really up to your preference. I really like dill in my eggs so I normally work that in somehow. I once filled mine with broken apart leftover falafel, and it was divine. Sweet potatoes and Kale are also a personal favorite. Just get creative, or go with whatever your classic is!

I also think these go great with some guac and hot sauce, but that’s most foods for me so…

The omelet should look like this before you fill it. Dry and bubbly.

Ingredients

  • 1/4 cup chickpea flour – I use Bob’s Red Mill
  • 1/4 stone ground corn meal – Again, Bob’s Red Mill
  • 1 tbsp. corn starch
  • 1 tsp. baking powder
  • 1 tsp. apple cider vinegar
  • 1 tsp. liquid aminos or tamari
  • 1/4 tsp. ground turmeric
  • 2 tsp. Dijon mustard
  • 1/4 to 1/2 cup dairy free milk (water works in a pinch)
  • 2 tbsp. nutritional yeast
  • salt, pepper, and other spices to taste
  • Oil for the pan
  • 1/4 to 1/2 cup of your favorite toppings
  • sauces to serve it with

Instructions

  1. Whisk all dry ingredients together in a small bowl including salt, pepper and spices
  2. Add in 1/4 cup of DF milk, ACV, liquid aminos, and mustard and stir to combine. The mixture will likely be rather thick – that’s not what we want. Add the remaining 1/4 cup of milk in tablespoon increments until a runny but not watery consistency is achieved (it should be between pancake and crepe batter)
  3. Heat the oil over medium heat in a small (omelet sized) skillet. Once warm pour in batter. Cook for 7 – 10 minutes, the batter should puff up and bubble like a pancake might (see photo above)
  4. Sprinkle the 2 tbsp. of nutritional yeast over the top of the omelet then add your fillings – you can press down on them to help keep them in place.
  5. Fold the omelet in half and cook for an additional 1 – 2 minutes, just to make sure your fillings are heated through.
  6. Remove from the pan and serve with you favorite sauces!

Enjoy!

Falafel with Tzatziki and Tahini Sauce

Falafel is a fried chickpea fritter of sorts that hails from the middle east. It is a vegetarian staple at most Mediterranean restaurants, and is pretty high on my list of favorite foods. My family loves when I make falafel, as I am the only one who ever learned how to make it. So I guess I am the designated falafel maker in my house. If you are still unsure if falafel is for you hear this: My Bacon Loving, Condiment Refusing Best Friend likes it, so it’s at least worth a try right?

I highly recommend a food processor for this recipe. You could use a mortar and pestle, but the motorized route is simply more efficient and delivers the same results. I recommend using dry chickpeas as I think the texture is better, but you can also use well drained canned chickpeas. The spicing is up to you discretion, but I have found that adding turmeric really ups the flavor. I also recommend using fresh herbs because they both add more flavor and help moisten the dough. The recipe requires baking soda in order to keep the falafel soft in the center, and also holds it together. I use chickpea and almond flour to thicken the dough, as I feel like they detract from the flavor less than an all purpose GF flour would.

I serve these bad boys up with some tzatziki, which is a dill heavy cucumber and yogurt sauce (side note: my mom hates cucumber but loves this??). It adds a nice freshness to the crispy fritters. The fritters can be fried or bakes, although they are more prone to drying out in the oven. You may chose to serve your falafel on top of salad or with some pickled veg. It truly is so versatile, and I hope you enjoy!

The veggies and spices should be finely chopped before adding the remaining ingredients
2 step addition
The texture of the dough should be sticky but still a bit chunky
They should look like little pucks!
Soon to be crispy little fritters of goodness!

Ingredients

Falafel

  • 1 16 oz can chickpeas (or 16 oz soaked chickpeas)
  • 1 celery stalk – cut into 1 inch pieces
  • 1 medium carrot (or 4-5 baby) -cut into i inch pieces
  • 1/4 cup cilantro
  • 1/4 green onions
  • 2 cloves of garlic
  • 1 tsp. fresh grated turmeric
  • 1/4 tsp. cardamom seeds
  • 1 tsp. ground cumin
  • 1 tsp. ground corriander
  • 1/4 tsp. allspice
  • 1/4 tsp. cinnamon
  • 1 tsp. salt (plus more to taste)
  • 1/2 tsp. black pepper (plus more to taste)
  • 1 tsp. baking soda
  • 1/4 cup almond flour
  • 1/4 – 1/2 cup chickpea flour (or gram flour)

Tzatziki Sauce

  • 1/2 cup dairy free yogurt
  • 1/2 fresh cucumber or dill pickle (either works)
  • 2 tbsp. lemon juice
  • 2 tbsp. fresh dill (or 2 tsp. dry) – petit diced
  • 1 – 2 cloves of garlic minced
  • salt and pepper to taste

Tahini Sauce

  • 2 tbsp. tahini
  • 2 tsp. lemon juice
  • 2 tsp. olive or peanut oil
  • 3 tbsp. water
  • salt to taste

Instructions

  1. If using dry chickpeas – soak for at least 8 hours (over night)
  2. Place celery, carrots, cilantro, green onion, garlic, and spices into the bowl of a food processor and blend until everything is very finely chopped. You may need to scrap down the sides. Doing this step before the chickpeas makes sure you don’t get big celery chunks in your falafel
  3. Add the remaining ingredients (flours, chickpeas, and baking soda) to the food processor and blend/pulse until the chickpeas are well chopped but not pasty. If it goes to long it will become humus and won’t hold up as well in the fryer. At this stage the dough should hold itself together well. If it seems too dry/wet add water/flour to adjust.
  4. Prepare a baking tray with parchment paper. Roll spoonfuls of falafel dough into balls and then flatten into disks – place these in the freezer for at least 1 hour. Freezing helps them hold up in the fryer.
  5. Meanwhile prepare the sauces by mixing all of their respective ingredients together in separate bowls
  6. Heat a pan with a hefty amount of oil over medium high heat (I used a cast iron skillet with 1/2 -1 inch of oil up the side of the pan). The oil is ready when a drop of water sputters when dripped into the pan.
  7. Remove the falafel from the freezer and drop into the oil – cook for 2 – 3 minutes on each side. Place falafel on a drip pan or paper towels
  8. Serve with your favorite side and the sauces! Or honestly anyway you choose.

Enjoy!

Avocado and Pineapple Spring Rolls

Spring Rolls are a wonderful tasty summer treat, yet I have found myself craving them in the middle of summer. I also found rice paper wraps on sale, so it seemed destined to be. If I was going to have Summer in February, I wanted to do it right. I gathered some of my most favorite summery ingredients and planned to roll them all up in a rice paper wrap! The filling ended up being smashed avocado and cilantro with ginger marinated carrots and pineapple. The ginger added a little zest to the sweet and sour pineapple, with the carrot adding subtle sweetness, and the avocado lending some creamy fatty goodness. I also made a peanut dipping sauce to accompany them, which wasn’t needed but was indeed welcomed.

Peanut sauce with chunky peanut butter (oops!)
Avocado filling
Ginger marinated carrots and pineapple

The trickiest part about these is honestly the wrap, cause it is fragile and sticky. You’ll want to soak the one at a time in a shallow bowl or deep plate with water for around 30 seconds. When you submerge them make sure to push them all the way into the water. If you simply lay them on top of the water they will push off the water and curl up. After you soak them carefully remove them to a clean plate and fill towards one end. You will then fold the sides in and then the bottom flap and roll the rest of the way (see pictures below). They need to dry a bit after to stiffen up so transfer them to another clean surface and let dry for 1 to 2 minutes on each side. They are then ready to be devoured! you may choose to do a pretty garnish with some edible flours or rice noodles, but this is up to you!

When soaking rice paper – submerge completely!
Fill near one edge of the wrapper
Flip up bottom and turn in sides, roll up the rest of the way

The following recipe yield 6 to 8 spring rolls and is therefore good for a few lunches or as a part appetizer!

Ingredients

  • 2 medium carrots – matchstick cut
  • 2 avocados
  • 1/4 cup cilantro – chopped
  • 2 cloves garlic
  • 1/2 cup pineapple – sliced and cut into 1 inch pieces
  • 2 tsp. fresh grated ginger
  • Juice of 1 lime
  • 1/4 cup rice vinegar
  • 1 tsp. salt
  • 6 to 8 rice spring roll wraps (depending on how much filling you use
  • 3 tbsp. creamy peanut butter (I used crunch here – but it doesn’t stir in as nice)
  • 1 tbsp. liquid aminos
  • 1 tsp. sriracha
  • 1/2 tsp. agave

Instructions

  1. Combine carrots and pineapple in a small bowl with rice vinegar, 1/2 teaspoon of salt, and ginger – set aside
  2. Mash avocado with lime juice, 1/2 teaspoon of salt, cilantro, and garlic in a medium sized bowl with a fork (alternatively, use a mortar and pestle) – set aside
  3. Fill a deep plate with water and soak a single sheet of rice paper for 30 second. Remove and transfer to a clean plate
  4. Spread 1 – 2 tablespoon of avocado mixture in a line about 1 inch from the edge of the rice paper wrap (see pictures above)
  5. Layer carrots and then pineapple on top of avocado – save the rice vinegar and ginger mixture
  6. Fold in the sides of the rice paper and then the bottom over the top of the filling. Roll them up the rest of the length of the wrap
  7. Transfer the rolls to a clean surface and allow to dry for 1 to 2 minutes on each side
  8. Mix the remaining rice vinegar and ginger with the peanut butter, liquid aminos, sriracha, and agave. Serve this sauce with the dried spring rolls and garnish as you see fit!

Enjoy!