Maple BBQ chickpeas

I have had an obnoxiously difficult time finding baked beans since moving to Vermont. Which for me is, frankly, quite bothersome. I have grown quite accustomed to having a tin of baked beans in my pantry as a fail safe. They are a perfectly well rounded meal alone, and can easily be paired with a number of other things from baked potatoes to jackfruit. I will honestly combine them with any savory meal or even eat them straight out of the can. So you can see why not having this option for the past three months has been trying.

In order to provide myself with a fraction of this ease, I decided to make some as a part of my Sunday cooking extravaganza. It has carried me through nearly 4 meals, each one a little bit different than the last. I recommend adding these to your weekly prep if you are keen on not eating the same thing all week. Plus they are easy: the recipe requires you to make the sauce and then dump in the chickpeas (unless you are doing the chickpeas from dry).

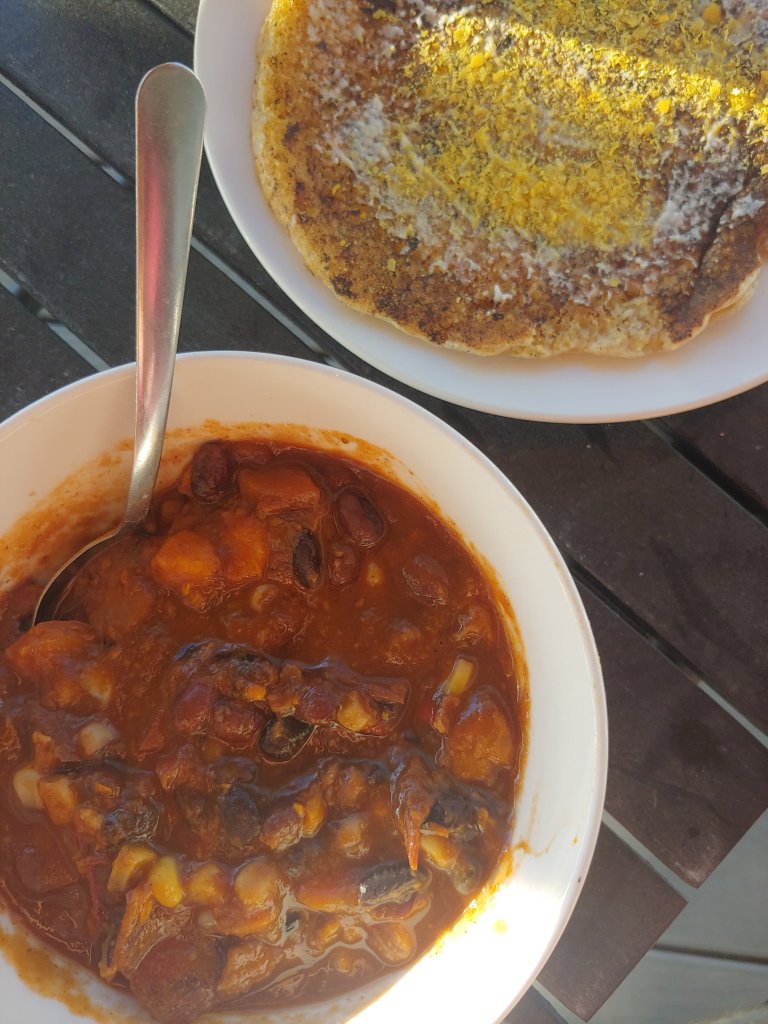
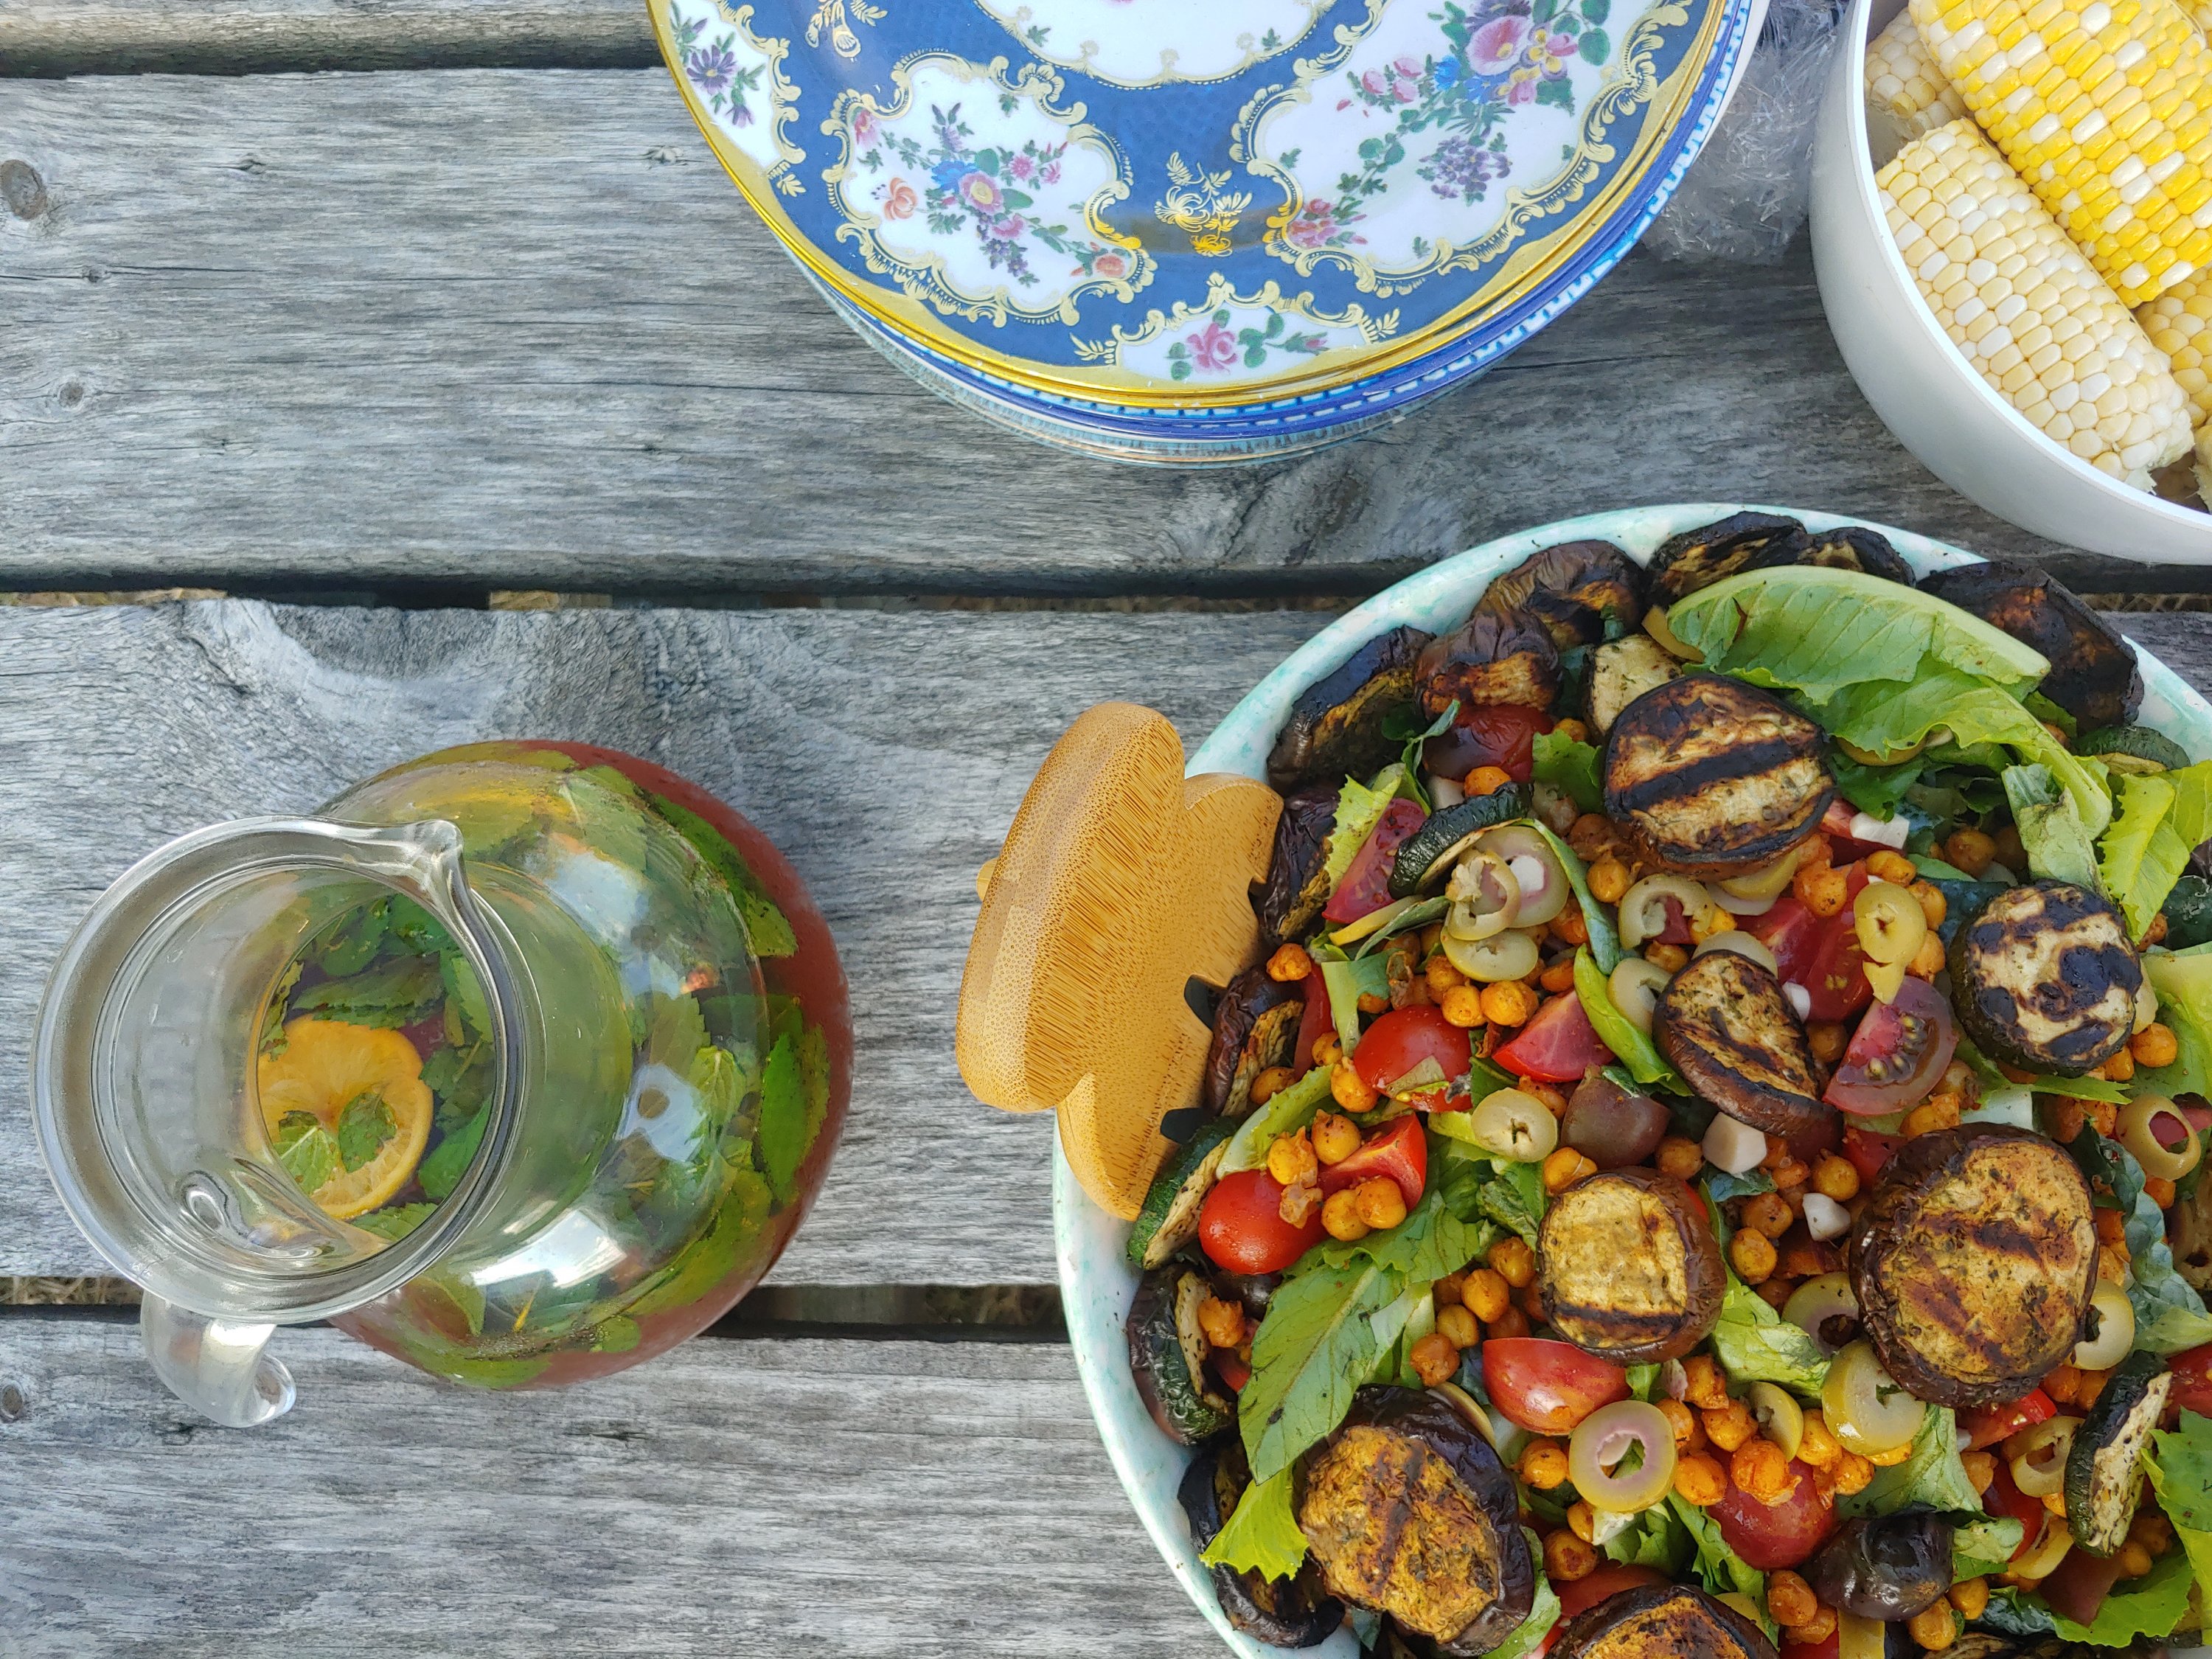
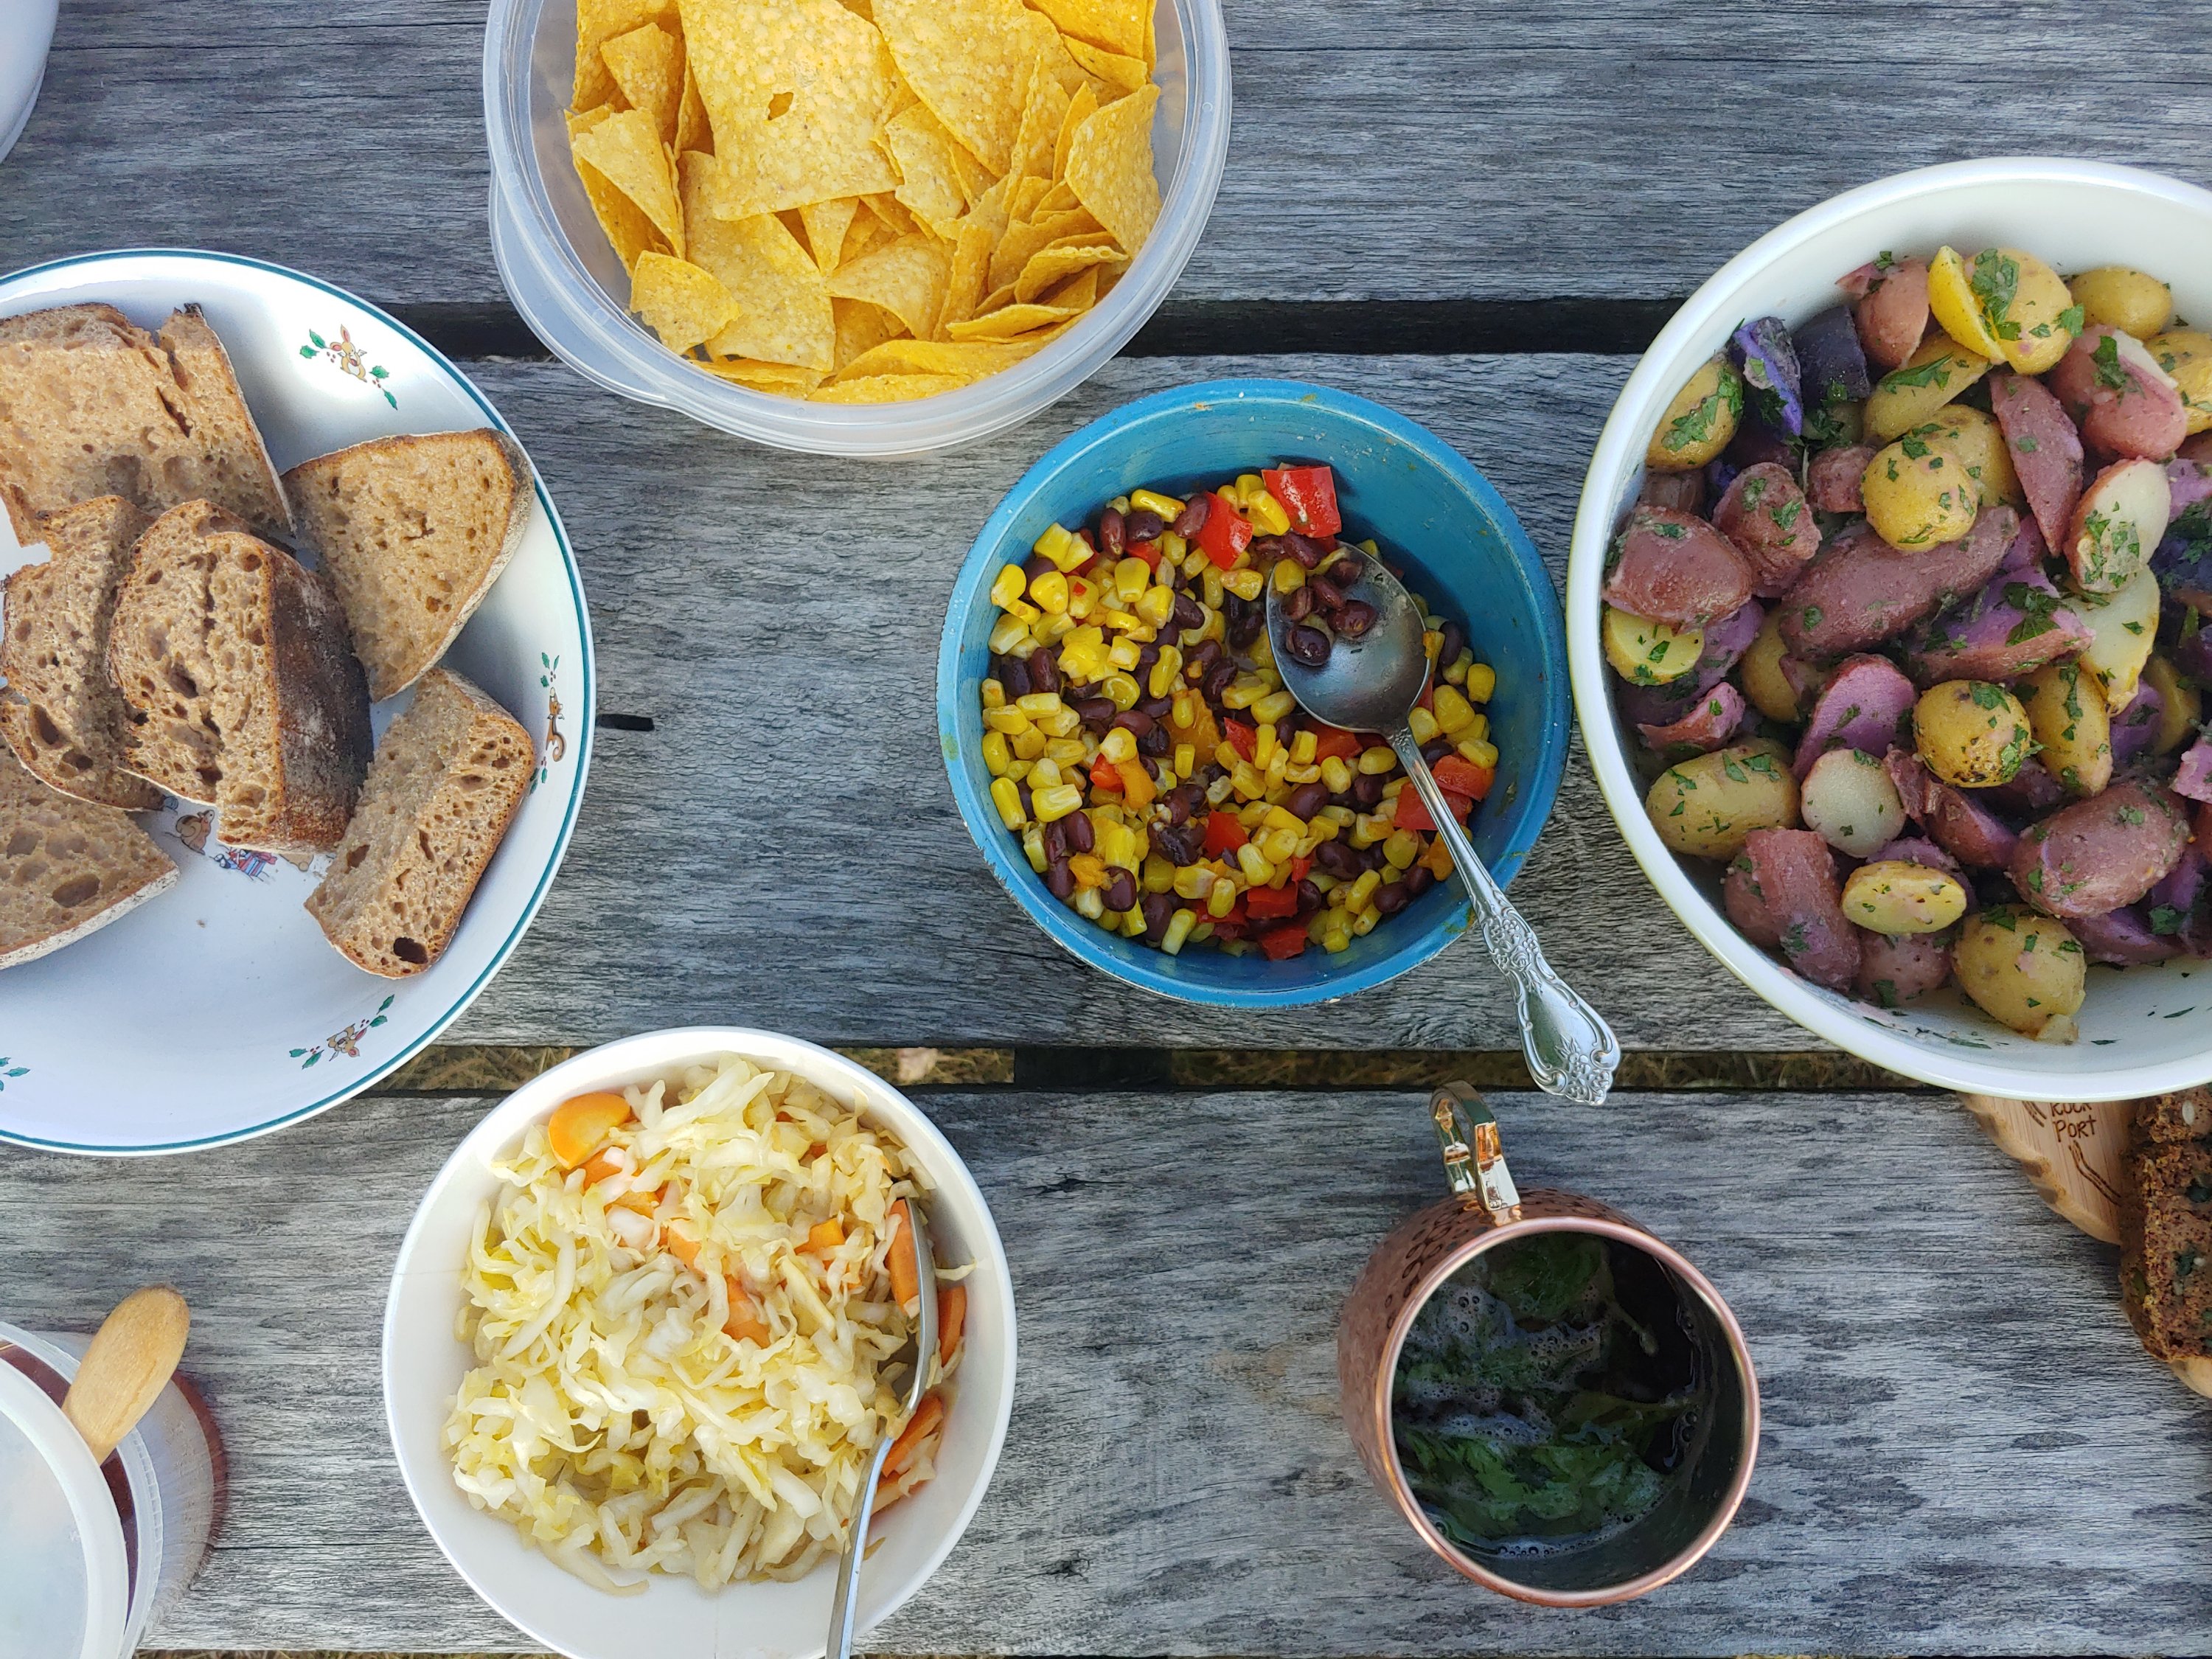
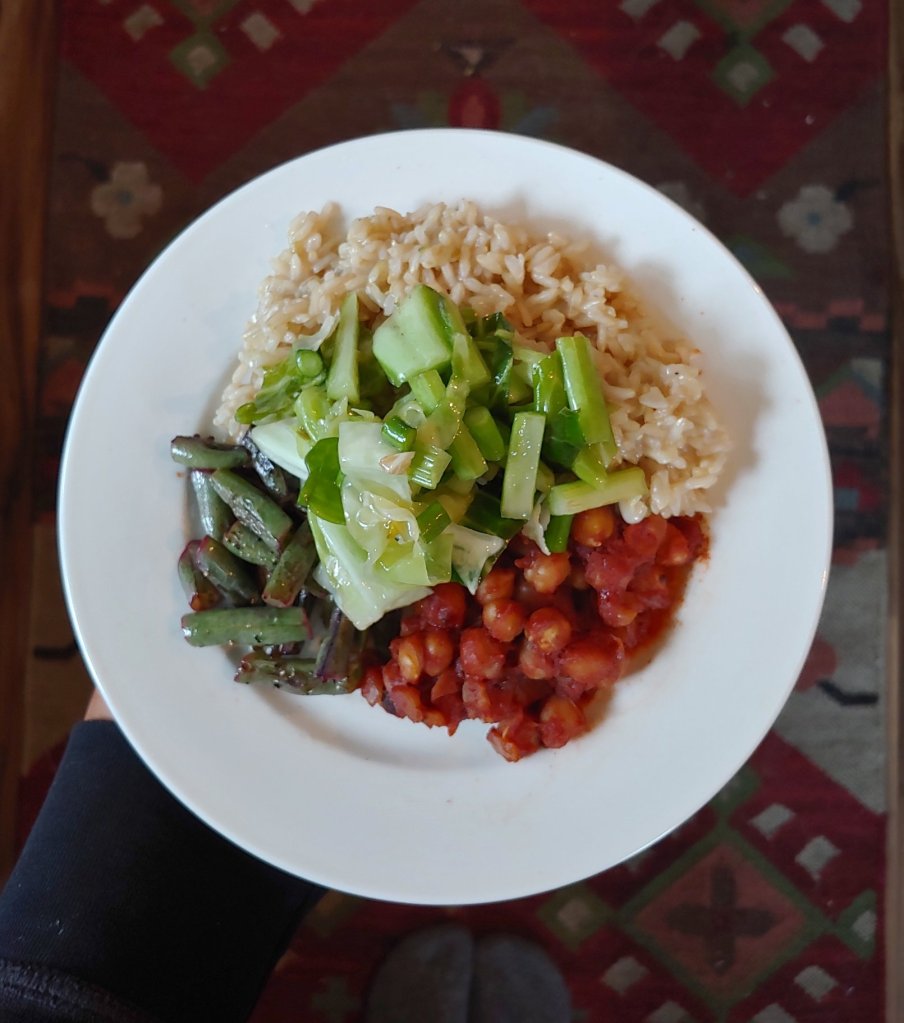
To provide some inspiration: I paired mine this week with a pineapple habanero coleslaw in a chickpea omeletee, on top of rice, as a tostado, and with a cornmeal flatbread. So may options to be had here. I hope you find these as comforting as I have!

Ingredients:

  • 1- 16oz can chickpeas, drained
  • 4 tbsp. tomato paste
  • 1 tbsp. olive oil
  • 1/2 tsp. toasted sesame or sunflower oil
  • 1/2 tsp. liquid smoke
  • 2 tsp. apple cider vinegar
  • 1 – 2 tbsp. maple syrup (depending on how sweet you like it)
  • 1/2 red onion – diced
  • 1/2 tsp. smoked paprika
  • 1/4 tsp. nutmeg
  • 2 tbsp. water (or bean liquid)
  • 1 tbsp. soy sauce
  • salt and pepper to taste

Instructions:

  1. Heat olive oil over medium heat – add in onions and a healthy pinch of salt and cook until translucent and fragrant
  2. Add in soy sauce, sesame oil, liquid smoke, acv, paprika and nutmeg. Sautee onions in this mixture for up to 5 minutes. Stir as needed to avoid burning or charring
  3. Stir in tomato paste, water, and maple syrup to the mixture. Simmer for 5 minutes, again stirring to avoid burning or sticking
  4. Add in the chickpeas and remove from heat. At this point you may choose to bake them like you would most other baked beans or just serve them as is. Totally up to you.

Enjoy!

Sweet Potato and Corn Chili

I have been gunning for fall and soup season since mid-July. So you beat that as soon as it cooled down I jumped on the opportunity to make one of my fall favorites: Chili. Chili is a big time comfort food for me. Any time I see a burgundy stained spoon and smell the mix of onion and chili powder I am transported home. It was a fall staple in our house and no one makes veggie chili quite like my mom. Can you tell Covid has made me homesick?

Anyway, I didn’t want to just make my standard beans and corn chili, I wanted to jazz it up with a little natural sweet and spicy action. Pumpkins unfortunately weren’t an option, they aren’t in season yet. So settled for another sugary favorite: Roasted sweet potatoes.

These tasty tubers provided the perfect level of sweetness and their roasted outer layer pared well the other earthy spices present. My favorite part of chili is that you throw everything in the pot and then just let it sit all day until it has reached perfection. And believe me, you want to let it sit all day. It does amazing things for the flavor – harmonizing the sweet with the spicy and savory. Plus, what is more comforting then a slow cooking pot of chili?

This recipe yields about 4 serving but can easily be doubled. I generally only cook for one so it is enough for me for a few days!

Ingredients:

  • 2 tbsp. olive oil
  • 2 medium sweet potatoes – washed and diced
  • 1 small yellow onion – chopped
  • 2 cloves garlic – minced
  • 1 large carrot – chopped
  • 1 cup chopped fresh tomatoes (or 1 – 16oz can diced tomatoes)
  • 1 red jalapeno – finely chopped (optional and substitutable)
  • 1 large ear of corn – kernels shaved off
  • 1/2 tsp. marjoram*
  • 1 tbsp. chili powder*
  • 1 tsp. cumin*
  • 1/2 tsp. coriander*
  • 2 tsp. paprika*
  • 4 whole cloves (1/2 tsp. ground)*
  • 1/4 tsp. nutmeg*
  • 2 tbsp. Corn starch
  • 4 cups (2 – 16oz cans) of your favorite beans **
  • 6 cups veggie stock
  • salt, pepper, and hot sauce to taste

Instructions:

  1. Preheat oven to 375 F. Toss sweet potatoes with 1 tbsp. olive oil and salt + pepper to taste. Cook for 15 minutes – stir and check for doneness. Cook for another 10 until crispy
  2. Heat oil over medium low heat in a large pot – add in onions with a healthy pin of salt and cook until fragrant and translucent ~ 5 to 7 minutes
  3. Add in garlic and carrots and cook for an additional 3 minutes
  4. Stir tomatoes and spices into the mixture and let simmer until the tomatoes begin to break apart (10 minutes). Add in corn starch, using a whisk as needed to remove clumps
  5. Next add beans, corn, and veggie stock – bring to a boil. Boil for 10 minutes, stirring occasionally to prevent sticking
  6. Remove sweet potatoes from the oven and add immediately to the chili – reduce heat to low and cover. Let stand for at least 30 minutes – I prefer mine to go for hours but this will be sufficient.
  7. Serve with all your favorite chili toppings and maybe even some corn bread!

Enjoy!

Notes:

*can sub spices for your favorite chili seasoning
** I used black turtle and red beans in my chili. I soaked 1 cup of beans in 3 cups of water + 1 tsp. baking soda + 1 tsp. salt. If you are doing it from dry you can add the beans – liquid and all – straight into the pot and reduce the amount of stock to 3 cups. For canned beans it is up to you if you want to use the bean liquid or not!

Folino’s Wood Fired Pizza

The Vegan Supreme

The first two week after moving to Vermont I was required to quarantine per the State’s covid/health guidlines. This meant I couldn’t go to the grocery store, order carryout, or really even leave my apartment. Luckily, I am living on a small farm and source much of my produce from here. However, none of that satisfied my pizza cravings – which felt more pronounced than usual (isolation drives my need for comfort food).

So I began hunting for places I could pick up a pie when I was deemed Covid free and I stumbled across Folino’s Pizza in Shelburne, Vermont. It had come well recommended by some co-workers and seemed to have all the requirements of a Bailey approved pizza place. The variety of topping and specialty pizzas is what really impressed me – everything ranging from sweet potato to asparagus to more classic favorites like onions and olives.

Most importantly though, they had gluten free crust (which they offer to bake in foil for a charge) and house made vegan cashew cheez sauce (+ $1.00 on any pizza). The expansive topping selection also contains vegan sausage crumbles which I don’t usually go for but is generally a good sign. So I was pretty sold. This would be my first real Vermont pizza experience, and I was not disappointed. I have been back once since the first time and was even more impressed the second go round. My two roommates (meat, gluten and dairy eaters) also love it. It is the easy take out go to for all of us, which is nice because it is only 5 minutes away.

Their covid response has also been pretty admirable. They offer take out and dine in by reservation only. Both times I went to pick up pizza it seemed like there was a lot of distance between groups of diners and everyone was taking proper precautions. I am not particularly keen on dining in right now, but I know it is important for some individuals and businesses right now.

But enough about that. Lets talk about the pizza.

The first time I went I got The Vegan Supreme : tomato sauce base, housemade cashew cheese, veggie sausage, bell peppers, red onions (top of page). I subbed the peppers for olives however. The crust had a really nice flavor and chewy texture, but was a bit under done. I also actually enjoyed the vegan meat crumbles. The texture was undetectable and the flavor was subtle yet had a nice ‘Italian Sausage’ (aka fennel heavy) taste. The sauce was sweet yet hearty and the cashew cheez was a nice addition, but there definitely could have been more of it.

The second time I got The Veggie : olive oil base, greens, roasted sweet potatoes, tomatoes, red onions, balsamic, four cheese blend but subbed the cashew cheez and added pineapple (above). This go round I wised up and asked them to make my pizza crispy. This was the trick! My pizza came out perfect. Crust was perfectly crispy and almost browned at the edges but still chewy and soft where it needed to be. This time they also gave me plenty (and I mean PLENTY) of the cashew cheez. It really brought it up a notch. The thin sweet potato slices were a really nice addition but definitely could have been more roasted. Still I thought they paired really well with the balsamic and pineapple (kudos to me).

Overall both times, the pizza really hit the spot. And I am excited to keep going back and see what crazy flavor combinations I can try! So here is my definitive rating:

  • Food: 8/10
  • Service: 8/10
  • Price: 7/10
  • Overall: 8/10

Spiced Blueberry Pie

My housemates birthday was the day following the Lamma’s harvest festival, so we asked if he had an absolute favorite dessert. Keeping within the theme of seasonality, he selected blueberry pie. It was the perfect choice in my opinion – blueberries were in abundance and Meg, the divine pastry chef at the farm we work at, makes the most amazing buckwheat pie crust. So it was settled, we would have a very special blueberry birthday pie.

I, of course, could never settle for a generic blueberry pie so I decided to jazz it up a bit. I am a big fan of warming spices, especially with berries, so I added some ginger, cinnamon, nutmeg, and lemon zest to create a spiced blueberry pie. This ended up pairing perfectly with the homemade cardamom ice cream our neighbor, co-worker, and friend brought along. It was really something special and made the night feel very complete and cozy.

I elected to go for a no-bake pie filling, in part to make it easier on myself but also to limit crust sogginess. That in mind, this came together so easily. I pieced together the recipe from a few other pie filling ones I found in a pinterest search and overall it came together pretty well! I hope you find this to be as special to you as it was to us! I think the filling could also be used as a stand alone, spread on bread or served as a dessert with cream cheese.

Ingredient

  • 1 pie crust (use recipe here or your favorite)
  • 2 pints of blue berries
  • juice of 1 lemon
  • 2 tsp lemon zest
  • 1/2 tsp salt
  • 1 tsp cinnamon
  • 1/2 tsp nutmeg
  • 1/2 cup sugar
  • 2 tbsp. corn starch
  • 1/4 cup water
  • whipped cream or ice cream for topping

Instructions

  1. Combine 2 cups of blue berries with water, lemon zest, and sugar. Bring to a boil
  2. Reduce heat to a simmer and stir continually until the mixture begins to thicken.
  3. Meanwhile, combine remaining blueberries and other ingredients. Fold this this mixture into the thickened blueberry mixture and set aside
  4. Pre-bake your pie crust per the directions. Allow it to cool completely.
  5. Pour the prepared pie filling into the cooled pie crust and allow to set for at least two hours before serving. Best served with friend and ice cream on top!

Enjoy!

Roasted Garlic Vegan Aioli

Recently I was having a conversation with some friends who had family in Massachusetts’s about garlic (my favorite topic). They were telling me about this garlic paste that their family will sometimes bring them – a sort of creamy and oily tangy delight. They made it sound like the worlds fluffiest garlic paste – but honestly I was completely sold at garlic.

I myself am always looking for new dips, spreads, and sauces to try and thought this was the perfect opportunity to do so. The Lammas feast was right around the corner and all that bread certainly needed something to be smeared on it! Originally, I set out to make this completely out of garlic with no cream base. However, when I roasted my single head of garlic it simply was not enough so I improvised…. The leftover cashewmilk yogurt in my fridge was begging to be used *shrug*. Which is how we arrived at this miraculous Roasted Garlic Aioli.

The texture is nice a creamy but also still pungent and spicy with a good garlic taste. I added some dill and garlic scapes for a bit of freshness and the result was heavenly. There was not a drop left at the end of the evening. Thus, I feel it is my duty to impart this recipe upon fellow party hosts and sandwich lovers alike! Here you have it – the dip that keeps on giving! (not really though because it runs out quick). I scaled the recipe up here so it will last a bit longer.

Ingredients

  • 3 medium sized heads of garlic
  • 4 tbsp. high quality olive oil
  • 1/4 cup dairy free yogurt (or veganaise)
  • 1 tsp paprika
  • 1 tsp sea salt plus more to taste
  • 3 garlic scapes (or green onions) chopped
  • 3 tbsp. dill chopped
  • pepper to taste

Instructions

  1. Preheat oven to 375 F
  2. Cut the top 1/2 inch off the garlic bulbs just to expose the cloves inside – this should mostly be papery so you lose only a small amount of the clove itself
  3. Place the garlic cut side up in a small baking tin or cake tin, you may choose to wrap them in foil but I don’t find this entirely necessary. Drizzle 1 tbsp of olive oil carefully over the top of the clove. Do this a little at a time in order to allow the olive oil to trickle down into the garlic head. Sprinkle 1 tsp of salt and paprika over the top, reserve the “to taste” portion for later
  4. Once the oven is preheated, place the garlic in the oven and roast for 20 minutes. Remove from the oven and invert the bulb so it is cut side down and roast for another 10 to 20 minutes or until the cloves have softened
  5. Remove the garlic from the oven and allow it to cool completely to room temperature. Carefully extract each of the cloves and place them in the bowl of a food processor – they should be golden and slightly mushy.
  6. Puree the garlic in the food processor until it begins to take on a smooth consistency. Drizzle in the remaining 3 tbsp. of olive oil and the salt and pepper to taste.
  7. Combine the garlic puree with the 1/4 cup of yogurt, scapes, and dill. Taste and adjust salt and pepper as desired.
  8. I think this is best smeared on bread as a condiment for a sandwich or as a bread dip set out at parties. It is pungent and creamy and delish!

Enjoy!

Grilled Vegetable Pesto Salad

The farm I am working for has had an abundance of basil this July – I’m talking pound upon pound of the stuff. And basil is light! It is in such great abundance that we have started selling in in a quantity called “pesto basil”, which is awesome because it is difficult to find that type of quantity at the grocery store. It is also awesome because any Basil that isn’t deemed “market quality” (i.e. it didn’t sell or has some natural browning) goes into the staff Basil pesto pile. Thus, this abundance has transferred over to me.

Usually I would make pesto and use it in my partners favorite Pesto Grain Salad or smother a pizza with it, but this time I wanted to go for something lighter. Something that captured the freshness that late summer brings while still being hardy enough to be a satisfying post field work lunch. This also was a part of the lammas celebration so it had to have general appeal.

That in mind I decided to go for a mixed green salad – these are universally appealing and a perfect side dish or main course (if done well). But I still needed something to give it the umph… ah ha! Grilled Vegetables! What is more summery than that? We are bursting with Eggplant and Zucchini (Aubergine and Courgette) right now so it seemed opportune. There was also the most perfect little pint of cherry tomatoes in the staff fridge as well. My salad was shaping up pretty nicely!

But it still needed more.. So I threw in some roasted chickpeas for a bit of savory, cucumbers and celery for a nice fresh crunch, and olives for the sake of olives.

This salad definitely had a lot of moving parts so it isn’t exactly quick. It is however a crowd pleaser and totally worth the bit of extra effort. It can also be made the “leftover makeover” way with grilled vegetables from a previous nights dinner. This can probably serve 10 people as a side salad or be 5 lunch servings.

Below you will find the recipe for both the pesto (it’s a big batch) and the salad:

Ingredients:

Vegan Pesto

  • 1 lb basil leaves and stems (destem if you want it very smooth)
  • 2 packed cups arugula
  • 1 packed cup sorrel leaves (or more arugula)*
  • 1/2 cup green onion
  • 1/4 cup lemon juice (or other acid)
  • 1/2 cup olive oil
  • 2 – 3 cloves garlic
  • 1/2 cup sun flower seeds
  • 1/3 cup nutritional yeast
  • 1 tsp salt (plus more to taste)
  • pepper to taste
  • additional fresh herbs you have on hand (thyme, oregano, parsley, etc.)

Salad

  • 1 head of butter lettuce – washed and chopped
  • 2 packed cups of spring greens
  • 2 packed cups of flat leaf kale
  • 2 cups chickpeas – drained **
  • 2 – 3 stalks of celery – diced
  • 1/2 cup olives – sliced
  • 1 medium cucumber – sliced and quartered
  • 1 large or 2 medium eggplant – sliced
  • 2 medium zucchini- sliced
  • 1 pint of cherry tomatoes – quartered
  • 1/3 cup water
  • 1/4 cup lemon juice
  • 1/4 cup + 2 tbsp. olive oil
  • 1 tbsp balsamic vinegar
  • 1 tsp. liquid aminos
  • salt, pepper and paprika to taste

Instructions

  1. Preheat the oven to 375 F
  2. Chop and wash lettuce, kale, and greens. Allow the lettuce to set in the colander while you prep the other things to let the water drain off completely. You can toss it around a bit too
  3. Toss the chickpeas with 1 tbsp. olive oil, salt, pepper and paprika. Place on the bottom rack in the oven and cook for 20 – 25 minutes or until the chickpeas become golden and crispy.
  4. Combine 1 tbsp. pesto with the liquid aminos and 1 tbsp. lemon juice. Pour this over the sliced zucchini and eggplant *** – grill until browned but not burnt. Alternatively you can roast these in the oven but the grill gives them a nice char.
  5. Using the leftover liquid from the veggies, begin to make your dressing by adding 1 cup pesto, the remaining lemon juice and oil, water, and balsamic vinegar to this mixture. Season with salt and pepper to taste.
  6. Pat the lettuce off a bit more with a clean dish towel and transfer to a serving bowl
  7. Prepare your salad by layering the ingredients in a way you find visually appealing. I recommend starting with the grilled veggies (reserving some for the top) then the cucumbers and tomatoes, followed by the olives, chickpeas, and celery. Top with a few extra veggies for good measure and allow guests to dress to their liking
  8. Alternatively if you are storing this for later meals- wrap the lettuce in a clean dish towel and store in an air tight container. Store toppings and dressing separate and add when you are ready to eat/take with you.

Enjoy!

Notes:

*If you plan to use sorrel only use the leaves. I find the stems too stringy for pesto. You can also sub with some of your favorite herbs or more arugula/spinach

** I did these from dry chickpeas. If you want to do that too I recommend combining 1/2 chickpeas with 1 1/2 cups water plus 2 tsp of baking powder and 1 tsp of salt. Let this soak overnight or for at least 8 hours. Drain the liquid and rinse the chickpeas thoroughly. You will then want to boil them with some fresh water for 10 minutes before draining and roasting them.

*** I allowed my veggies to sit overnight in this mixture but it isn’t totally necessary.

El Gato Cantina (VT)

I have been craving Mexican food for a good few weeks now – but was really skeptical of a lot of the places around Burlington (PSA I live in Vermont now). None of them seemed to be owned by individuals of Mexican heritage which is something I try to note when consuming culturally distinct foods. Alas, I settled on El Gato Cantina to satisfy the craving. It had come recommended by a few friend so I figured it was worth a shot.

The menu was generally pretty appealing – lots of variety in the tacos and they even had vegetable (cheese-free) tamales which was a first for me! Still, the menu lacked some familiar favorites like fajitas and spinach enchiladas. I was impressed by the spread of taco’s so I decided to go for it.

I got the hongos y epazote and Aguacate Con Queso taco as well as the vegetable tamales. I, of course, asked them to hold the cheese and decided to suffer through the mushrooms. I also asked for a side of guacamole – which was left out.

I elected to get carryout as I am still uncomfortable dining in at this point. When I arrived I was uncertain how to pick up my food – there were no instructions on the email receipt and they weren’t answering. When I walked up, the sign outside said “abolish ICE” so I felt like that was a good sign.

Generally I felt like the pick up went easy. The server seemed distracted but we all have those days. She accidentally gave me an extra order of tamales which went to my roommate. Overall I was impressed by the presentation – the tamales looked well coates and the tacos had a lot of filling. The corn tortillas however were falling apart, which I was displeased by. This either meant they were stale or poorly prepared.

The flavor of the fillings was also lacking. The mushrooms were rather plain and the black beans could’ve used more spice. I really enjoyed the hominy in the mushroom tacos – it had a nice hearty creamy flavor. Still, the fact that the tortillas couldn’t hold the filling was disappointing at best.

I did enjoy the tamales though. They were nice and dense and the red sauce was nice and spicy. The filling, again, could have been more flavorful and also more abundant. Still I found these to be a delightful novelty that I rarely encounter at Mexican restaurants.

This review wouldn’t be complete without a comment on the chips and salsa: the chips were great and the salsa as well. Very fresh and spicy with a well rounded flavor.

Generally, El Gato wasn’t bad but it wasn’t great either. This is also based only off one visit. It could have been an off night. Still it was pricey so I am unsure if I will go back for another visit.

Here is my ranking – it is lacking the “atmosphere” component as I cannot fully assess that.

  • Food: 6/10
  • Service: 7/10
  • Price: 4/10
  • Overall: 6/10

Lammas: A Celebration of Abundance

While shorter days signify the ending of summer, they also signify one of my seasonal traditions – harvest feasts! Lammas, or Lughnasdah/Lughnasa, is the first harvest season in the wheel of the year and it occurs on August 1 – right in the middle of summer. It is a holiday rooted in Celtic Pagan traditions that is celebrated when the sun is in Leo.

Lammas is a associate with the first grain harvest, with it’s name translating quite literally to “loaf-mass” in Olde English (1). It is a time to celebrate abundance and ripening. We are experiencing the ripening of fruits and grains that will carry us through the winter months. Vegetables are in abundance and our bounties are filled to the brim with variety. For me this has physically manifested as loads of squash, buckwheat, and tomatoes which has made up the bulk of my diet.

In order to honor the first grain harvest, feasts are common to connect with the community and share in abundance and community. Foods traditional to your Lammas feast will depend on what is in season in your region – some sort of grain will be common as well as soft fruits such as berries and grapes. Breads and fermented grain/fruit drinks (such as beer, wine, and cider) are also staples for some people.

Me and my housemates elected to have a small COVID approved gathering with some of our closest friends. It was a potluck of sorts with everyone bringing a dish that felt seasonal to them. At the end of the evening I spent some time reflecting on the abundance with which I have been gifted this seasoning as well as what I hope to accomplish before the summer sun fades away. Some questions I asked myself:

  • What do I want to accomplish before the summer fire fades?
  • How have I received abundance this summer?
  • What do I want to receive in abundance through the rest of the summer?
  • How will I channel my creative efforts and knowledge to grow?
  • What “fruits” have been passively ripening within myself?

To share what I refelcted: Vermont has been filled with so much beauty and I have been so grateful for the way the community surrounding me has welcomed me into the fold. I am also so grateful for the variety of amazing place and people I have known in my life time. As the summer closes I hope to exercise my creative muscle for collective benefit and be open to receiving guidance where it is needed.

You can see the list of dishes and pictures below. All of the dishes I made will be linked to the recipes.

Further reading:

  1. https://www.kajoralovely.com/lovely-blog/2019/7/28/lughnasadh
  2. https://www.theseasonalsoul.com/lammas-meaning/

Herby Tahini Potato Salad

Nothing is quite like potato salad in the summer. Growing up, potato salad was synonymous with cook outs and our weekend spent on the Mississippi River. Still it was never really something I got super into, but a summer picnic feels incomplete without it.

I, of course, would still eat it no matter how adverse I was to the eggs and mayonnaise. I loved the way the powdery potato mixed with the creamy dressing. The subtle crunches of celery mixed in with mustard and dill really won over though.

When I made the switch to mostly dairy free it became increasingly tricky to emulate that same flavor and texture profile. I am also not a huge fan of veganaise – which doubled the challenge. So like any good cook – I gave up. Or at least I stopped trying to force dairy free potato salad to be something it wasn’t. Instead I started to assess other flavor profiles that would work well with potatoes, dill, and celery.

That is when tahini popped into my mind (after coconut milk and avocado?? – what even?). I figured once it mixed with the starchy outsides of the potato it would develop into a nice creamy yet crunchy summer side! Plus tahini, celery and dill create a wonderful flavor trifecta.

The result was as anticipated, except better because I naturally jazzed it up a bit. The sweet carrots, musty mustard, and earthy herbs gave me a new take on potato salad I wasn’t expecting but thoroughly enjoyed.

The recipe is pretty straight forward, really just your run of the mill potato salad with more fix ins. One thing I will emphasize is to NOT by any means overcook those potatoes! You will end up with accidental (yet tasty) mashed potatoes. And with that note I turn you loose on the world of barbeques and kickbacks:

Ingredients:

  • 3 large yellow potatoes or 8 small red potatoes
  • ¼ cup tahini
  • 2 tbsp Dijon mustard
  • 1 tsp ACV
  • 2 tbsp olive oil
  • Juice ½ lemon
  • ¼ cup water
  • 2 stalks celery – diced
  • 1 medium carrot – diced
  • 2 – 3 radishes – diced
  • 2 tsp fresh thyme
  • 1 tbsp fresh oregano
  • 2 tbsp chives – chopped
  • 2 tbsp dill chopped
  • ½ tsp paprika
  • Salt and pepper to taste

Instructions:

  1. Place a large pot on the stove to boil and salt well
  2. Wash or peel potatoes and cut into large cubes – a little larger than you want them in your salad
  3. Once the water has come to a boil reduce the heat to medium-high and drop in the potatoes – cook for 10 minutes or just until fork tender. You do not want your potatoes crumbly and falling apart – the potato salad will basically just turn into mashed potatoes
  4. While the potatoes are cooking mix together the tahini, mustard, acv, lemon juice, olive oil, herbs, and seasonings – set aside
  5. When the potatoes are finished drain them and allow them to cool to near room temperature. Avoid spraying or rinsing them with water, this will risk breaking up the potatoes (aka mashing them).
  6. Combine the cooled potatoes with the dressing and other chopped vegetables and toss to coat
  7. Chill the salad for at least 2 hours before serving

Enjoy!

Gluten Free + Vegan St. Louis Gooey Butter Cake

Both sides of my family have lived in St. Louis for at least 5 generations. I grew up in and around St. Louis – which happens to be a largely underrated food city. I know that I have some strong biases in this matter but we are becoming better known across the midwest US for our unique foods – we even have a Michelin starred restaurant now! St. Louis was also the site of the 1904 world’s fair and we are still super proud of that over 100 years later. That pride mostly stems from the fact that a lot of iconic American food items came out of the fair that year including ice cream cones and hot dogs! This is all to say that St. Louis does have a rich food culture that I think deserves more attention.

Some iconic foods that hail from my beautiful home city include pork steaks, toasted raviolis, and gooey butter cake. The last is what we are going to make here. I have seen iterations of all of these popping up in the mainstream cooking media, which makes me incredibly proud. These are staples of St. Louis that serve as my comfort food when I am away. Despite the interference of being mostly plant based and gluten free, I have found ways to still enjoy my local favorites (or at least the 2 non-meat centric ones).

For those of you who don’t know what gooey butter cake is – first, I am sorry. Second, it has a base that is somewhere between a crumb cake and a short bread with a topping that is effectively a very sugary and buttery custard. It’s kind of like a lemon-less lemon bar.

It took me a long time to figure this recipe out – over a year in fact – but I have finally nailed it and I am beaming. This year I made it for my birthday and it was perfection. That in mind the recipe does have a few caveats:

  • I encourage you to always use softened butter for gooey butter cake. It is the best way to get the proper consistency for the both the base and the custard
  • One 16 oz pack of silken/soft tofu ought to do the trick for this recipe. This will need to be pureed in a blender or food processor.
Pureed silken tofu
  • This takes longer to bake than a non-vegan one as the tofu will take a while to set – you’ll need your oven for ~ 1 to 1.5 hrs
  • You can use a store bought GF cake mix – just make sure it is vegan if you need to
  • Any sort of starch can be used but I find corn to work best
  • You can add fun mixins to change the flavor up a bit. I have done pumpkin and chocolate and have always dreamed of a PBJ version

But enough of the rules, onto the recipe!

Ingredients

Base

  • 1.5 cups GF baking flour
  • 1 cup sugar
  • 1 tbsp. baking powder
  • 1/2 tsp salt
  • 1/4 cup almond flour
  • 1 tbsp. corn starch
  • 1/2 cup pureed silken tofu
  • 1 tbsp. flax seeds
  • 1/2 cup vegan butter – softened
  • 1 tsp. vanilla or almond extract

“Gooey” topping

  • 1 tsp. vanilla or almond extract
  • 1 cup tofu
  • 1 8oz container vegan cream cheese (Tofutti works well)
  • 2 cups powdered sugaar
  • 1/4 cup vegan butter – softened
  • 2 tbsp. corn starch

Instructions

  1. Remove vegan butter from fridge to soften, preheat oven to 350 F, and grease a 9x 13 baking dish
  2. Puree 16oz container of silken tofu in a food processor until creamy. Remove 1/2 cup and combine with 1 tbsp. flaxseed and set aside.
  3. Combine cake mix ingredients (GF flour, sugar, almond flour, baking powder, salt, and corn starch) into a large mixing bowl and whisk to combine
  4. Once the flax/tofu mixture has set add this, the base butter, and vanilla to the cake mix. Use a hand mixer to combine until it comes together like a crumbly cookie dough. Press this mixture into the bottom of the baking dish in an even layer that meets the edge.
  5. Combine all of the topping ingredients into a large mixing bowl and beat with a hand mixer until combined. You should have a thick custard like mixture. Pour this on top of the base and spread evenly
  6. Place the cake in the oven for 40 minute on the bottom rack – then move to the top rack for an additional 20 minutes. If the cake does not seem set after the hour put it back in for an additional 10 to 15 (this is just going to vary between ovens)
  7. Once the cake is set remove it from the oven and allow to cool. Dust with powdered sugar and place in the microwave to chill before serving.
entering the oven!

Enjoy!