This recipe is my cooking crutch. When in doubt I add this to veggies, potatoes, hummus, popcorn, anything and it will come out tasting fantastic. Primarily though I use it to flavor my chickpeas for tacos and for my family’s biweekly (if not weekly) popcorn dinner feast. It’s super easy and the nutritional yeast gives it that nice cheesy flavor. My sister actually first discovered this recipe, so in truth the credit should go to her, but I’ll share it with you here anyway!
Ingredients
1/2 cup nutritional yeast (can sub almond flour is sensitive to yeast)
1 tbsp. onion powder
1 tbsp. garlic powder
1 tbsp. paprika
1 tbsp. chili powder
2 tsp. salt
2 tsp. black pepper
2 tsp. cumin
1 tsp. coriander
1 tsp. ground oregano
1/2 tsp. ground turmeric
1/2 tsp. ground thyme
Instructions
Combine all of the ingredients into a spice grinder or a bowl and stir to combine
Store in a airtight container in a cool, dry place
Our favorite way to use it is on top of fresh popped popcorn with a drizzle of coconut oil, but really the possibilities are endless
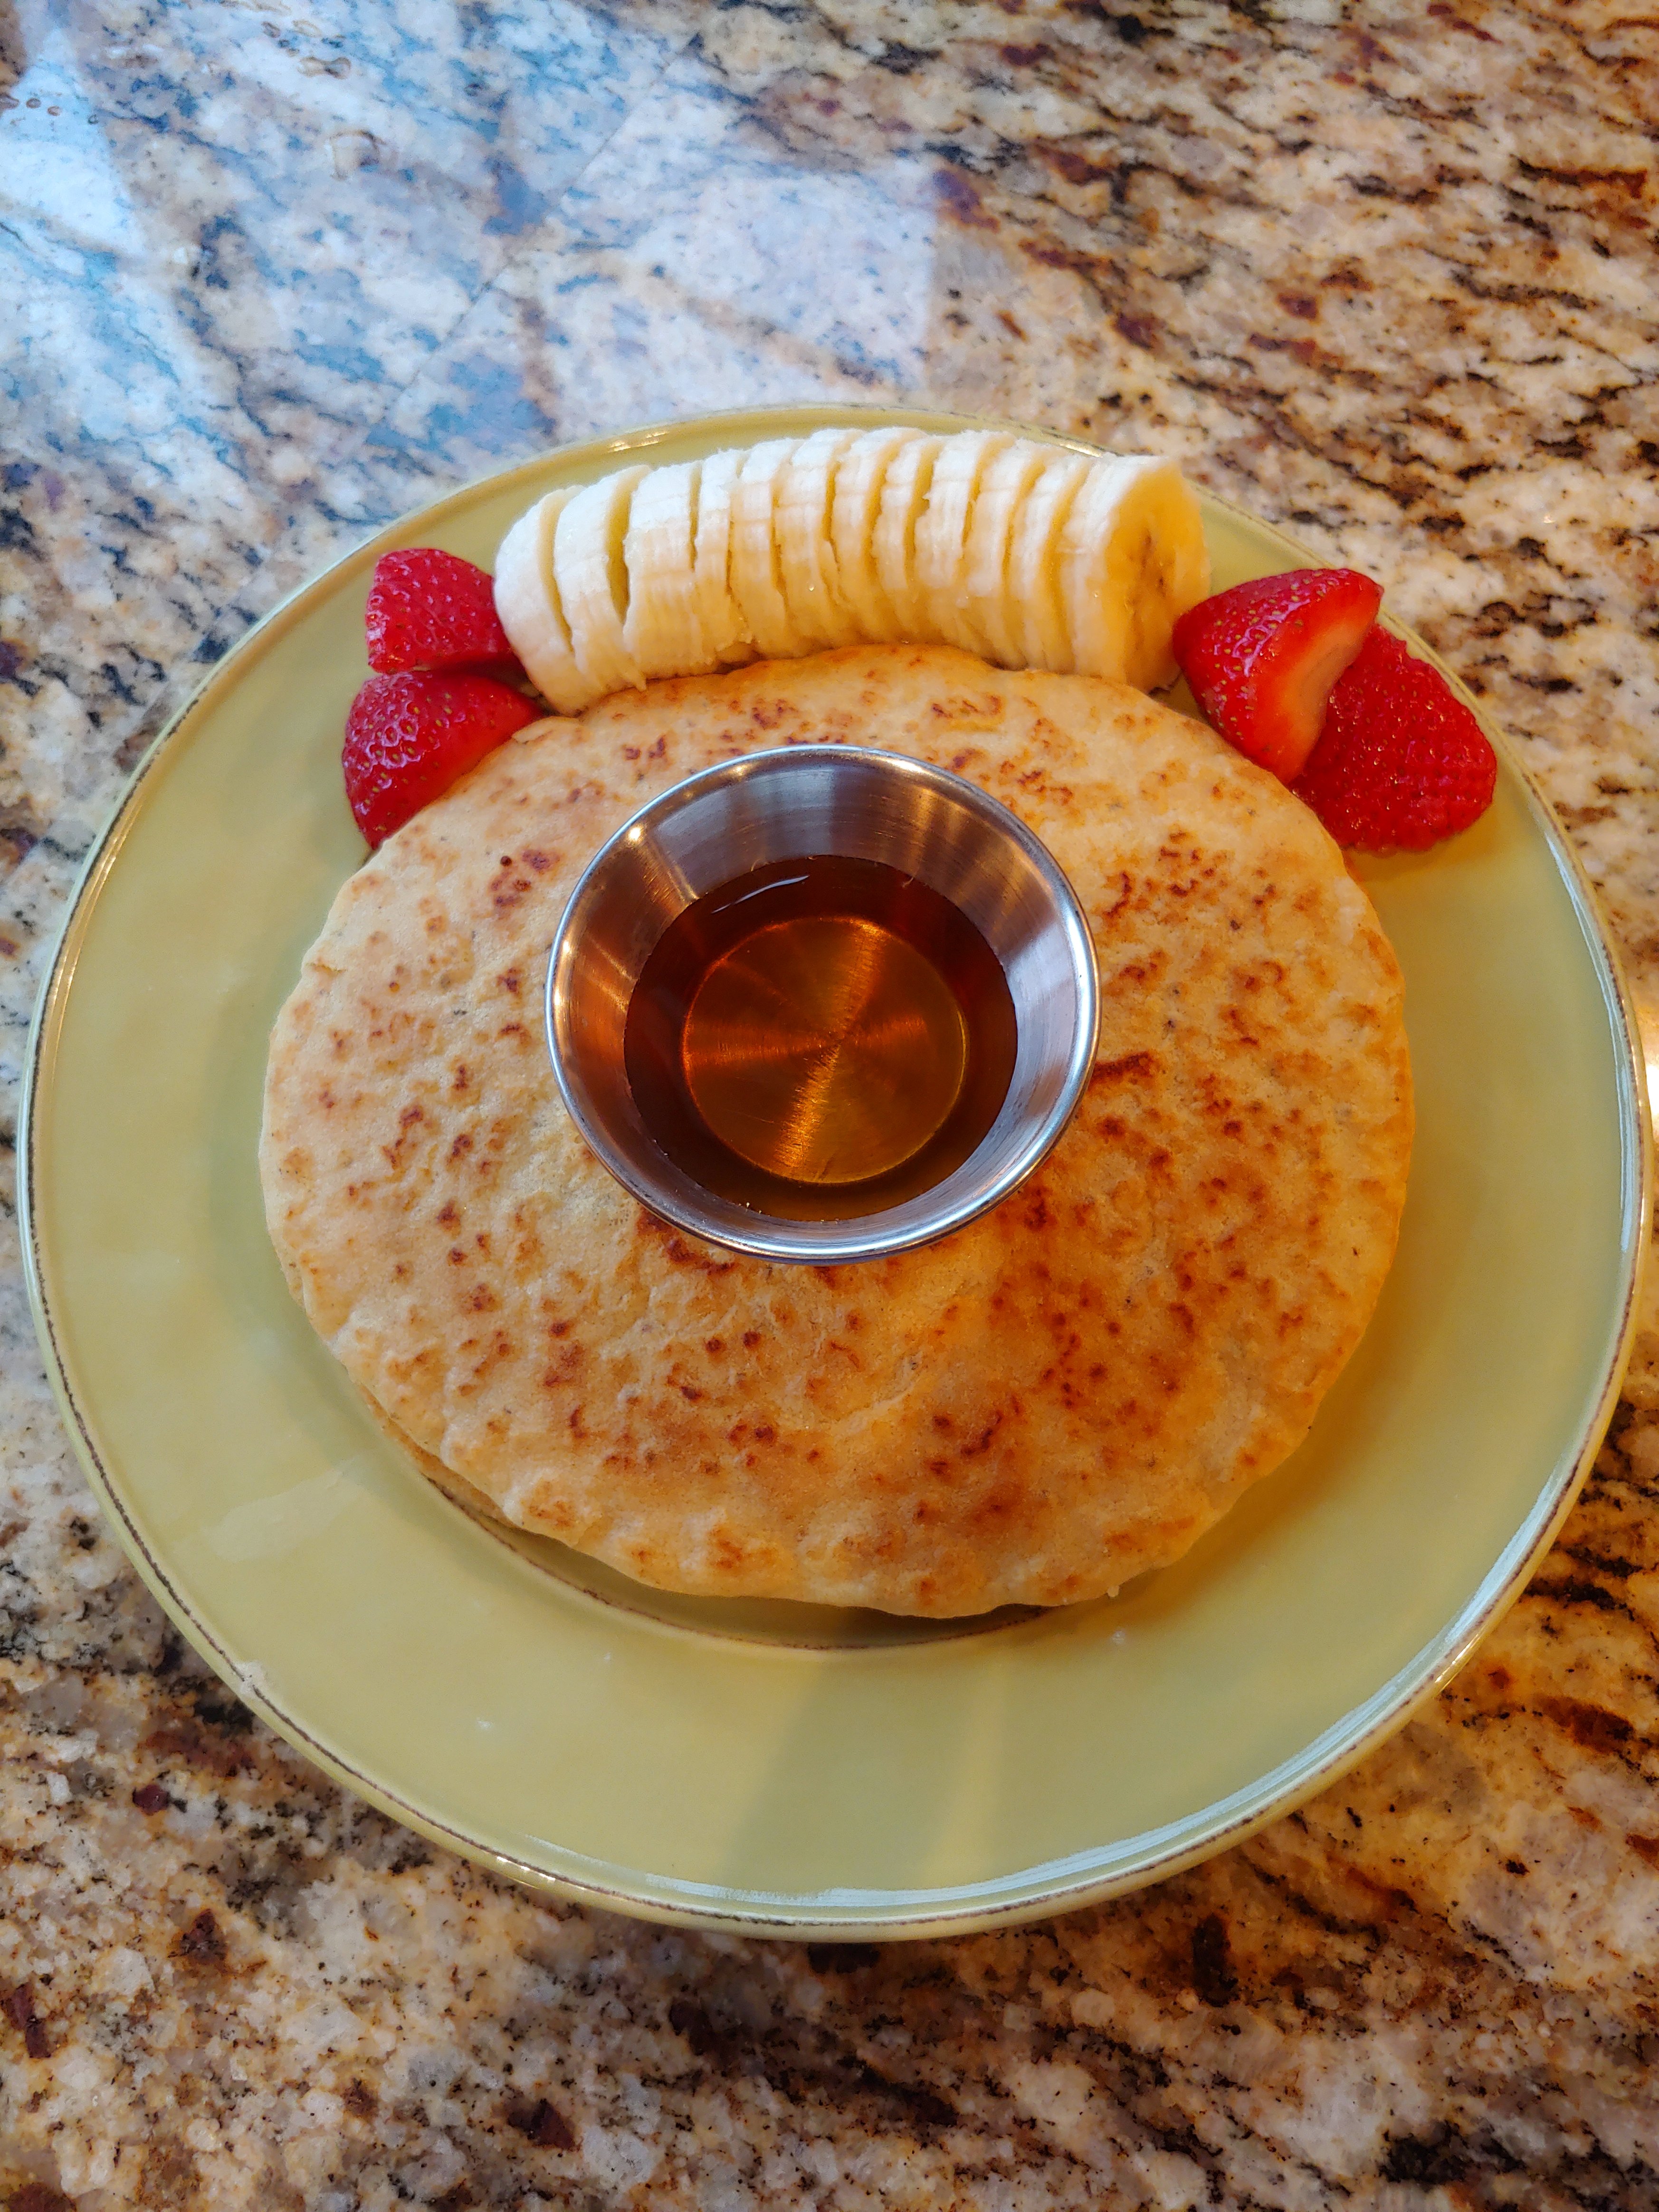
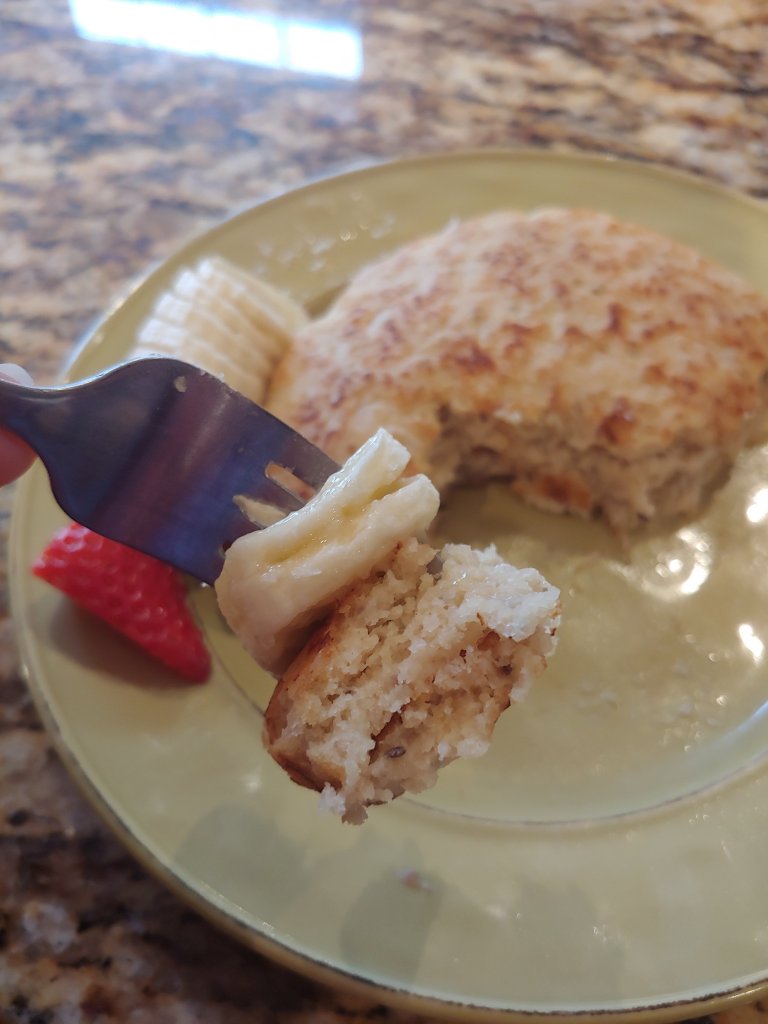
These are a super quick and easy breakfast, I think they took me a total of 30 minutes start to finish. They are refined sugar free and rely on baking soda, coconut milk, and chia seeds to replace the eggs. It makes a perfect portion of cakes, rounding out at 2 cakes per batch. Surprisingly, these are super fluffy for gluten free pancakes, potentially the fluffiest I’ve ever made! They are also plain so can be topped with any of your favorites!
Look how fluffy!
Ingredients
3/4 cup gluten free flour
1 tsp baking powder
1 tsp baking soda
1 tsp corn starch
1/4 tsp salt
2 tsp apple cider vinegar
1 tsp vanilla
1 tbsp. flax or chia seeds
3 tbsp. coconut milk
1/4 to 1/2 cup dairy free milk
1 tbsp. peanut butter
1 tbsp. neutral oil plus more for cooking
maple syrup, bananas, and other toppings
Instructions
Combine chia/flax and coconut mix into a bowl and set aside to gel for 5 to 10 minutes
Combine all of the dry ingredients into a small mixing bowl
Add all of the wet in to the dry and stir until combined
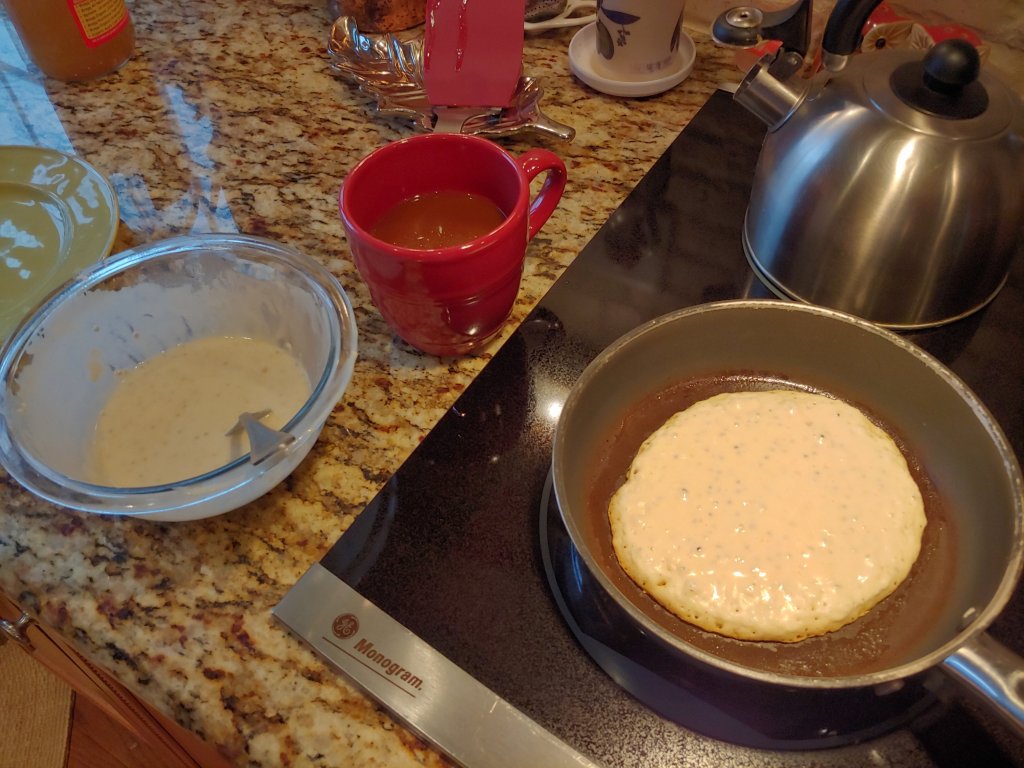
Heat oil or vegan butter in a skillet over medium low heat
Once warm, add half the batter to the pan. Flip once bubbles form in the middle of the cake and the edges look dry
Cook for 1 – 2 additional minute on the other side, or until golden
Repeat with the other half of the batter
Plate cakes with maple syrup, honey, bananas, apples or whatever your favorite pancake topping is
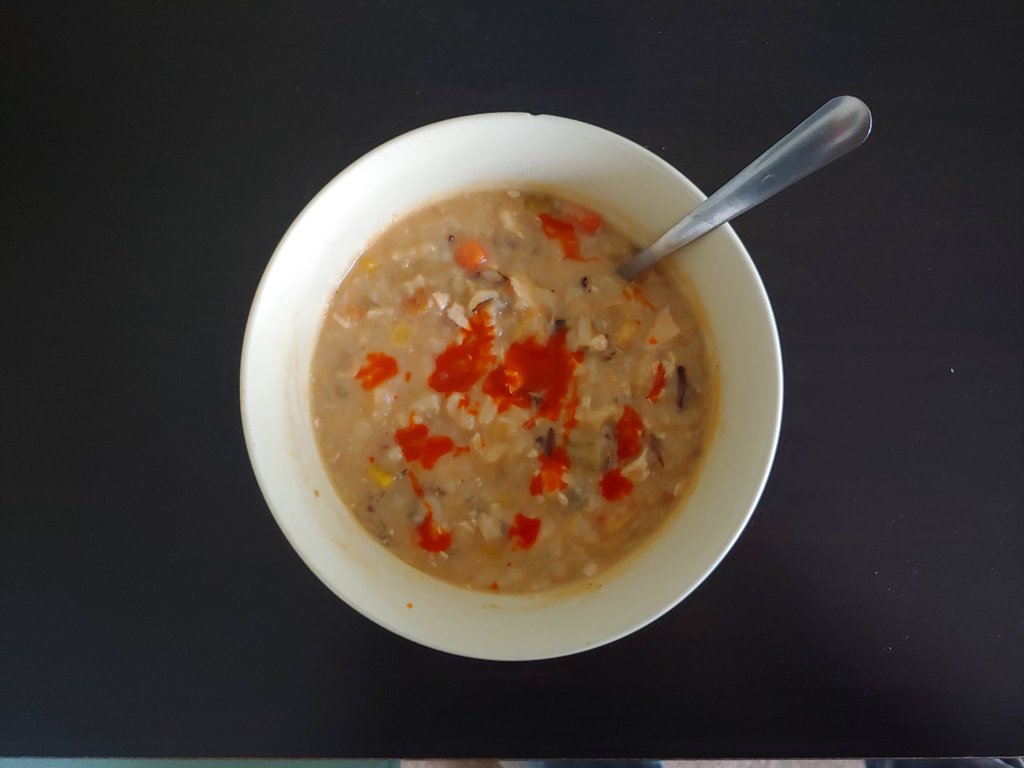
This soup was a part of one of our meal preps. We like to do soup for lunch in the fall and winter because its cozy and easy to take for work.
Traditionally this soup would have chicken and mushrooms, which was a pinch tricky considering both are things i don’t/can’t eat. I needed something that would mimic the chicken’s texture, and also the mushrooms umami. We researched for a bit and settled on jackfruit and tofu. The former provided a sweet taste and a shredded chicken like texture, the later contributed that necessary umami and also some creaminess. It’s important to puree the tofu so that the texture of the soup is more creamy than chunky.
We did this soup in the instant pot so it was really easy and could be made in a pinch on a weeknight. The flavor is nice and hearty and the soup is pretty filling, so it really makes for a nice lunch or dinner option!
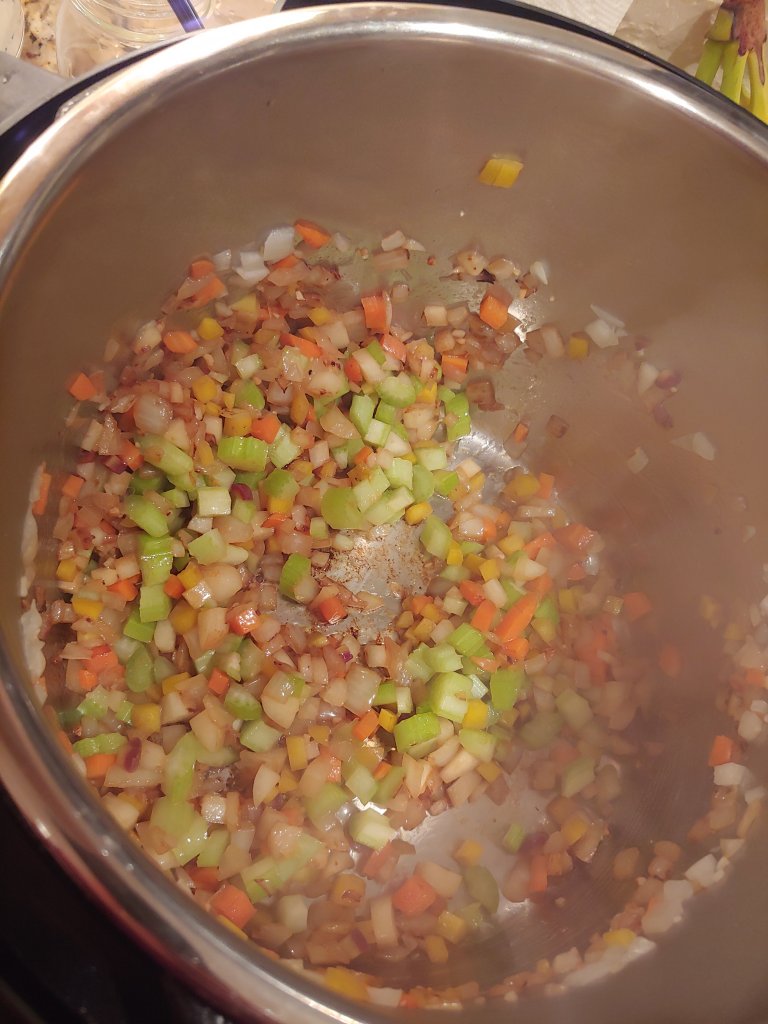
Sautee first then add everything else on top!
Ingredients
6 cups veggie stock (I used veggie bouillon mixed in water)
1 14 oz pack of tofu – pureed in a food processor
1 20 oz can of jackfruit ( can sub for mushrooms if your tum can tolerate them!)
2 cups unsweetened cashew (or other ND) milk
3 medium carrots chopped
1/2 yellow onion chopped
2 cloves of garlic minced
2 to 3 celery stalks chopped
2 tbsp. olive oil
1 1/2 cups brown rice and wild rice blend (I buy mine at Fresh Thyme in bulk)
Salt and Pepper to taste
Instructions
Puree tofu in a food processor until it becomes a smooth ricotta like paste
Add 2 tbsp. oil, onions, and garlic to the instant pot and set to Sautee
Cook until onions become translucent then add in celery and carrots and Sautee for 2 more minutes
Dump the remainder of the ingredients into the instant pot, lock on the lid and set to pressure cook for 25 minutes
Once the time is up, press cancel and release the pressure through the vent
Remove the jackfruit and shred with two forks and stir back into the soup
Adjust flavor as needed
Serve in a bowl with any desired toppings, I like hot sauce!
I love, love, love curry. That was something that was definitely a bummer about leaving the UK. In the town I lived in, which was quite small, there were numerous Indian Restaurants to choose from, so I always had my fill of curry. I even learned how to make pretty good curry because the necessary spices were more readily available.
That being said, I somehow have not been able to perfect any of my curries since I have been home. Was it the spices? The environment? Something in the water? Who knows!? Regardless, I finally did it, and the result was this wonderful aggregate of flavors.
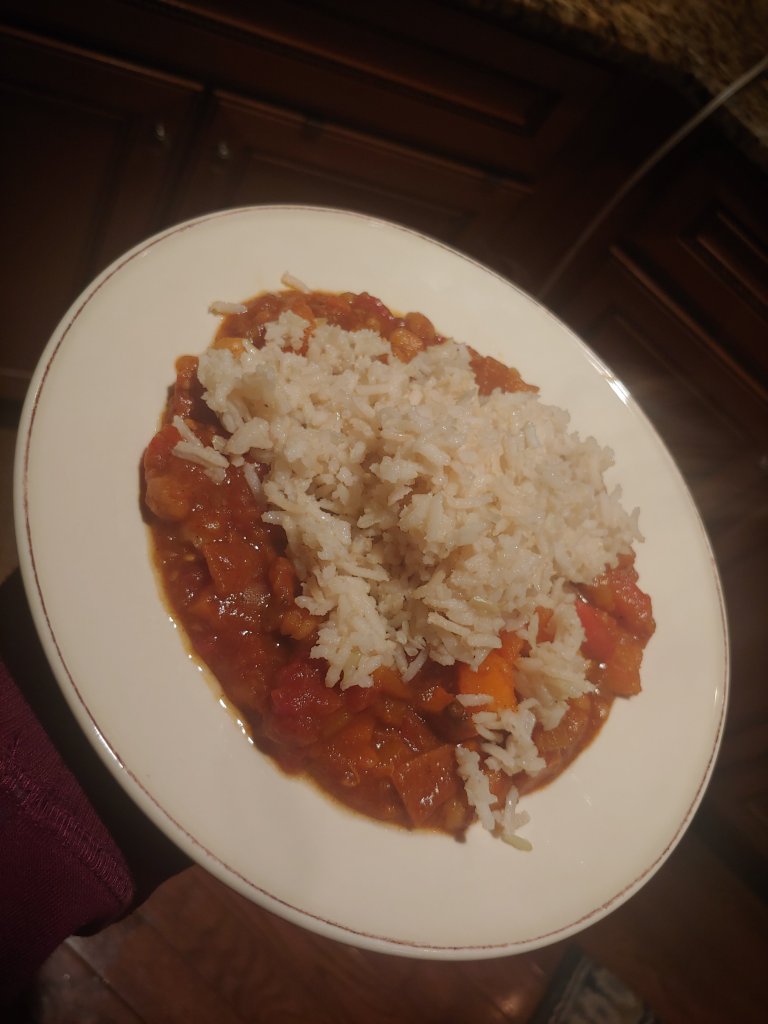
This curry has a tomato based sauce with a chana masala spice mix I get from the Indian Spice Bazar up the road (pictured above). The carrots and pineapple juice gave it a nice sweetness that was almost reminiscent of vegetable dansak (my absolute favorite curry). Meanwhile roasted red peppers and sweet potatoes added a nice smokiness to the dish that really rounded out the flavor.
I also used dry chickpeas which I cooked in a crock pot all day then added 1.5 teaspoons of baking soda about an hour before cooking the curry. This is crucial if you want soft chickpeas and not crunchy starch balls. I recommend ALWAYS cooking them this way with the exception of falafel, they simply have a better texture.
Ok one last note on rice, then I’ll let you have the recipe. Use basmati, rinse it before using it, and add a tablespoon of coconut oil in once it is completely cooked. This recipe basically requires you to dump a bunch of stuff in a pot and the result is delicious, so I hope you enjoy!
Ingredients
1 cup dried chickpeas
2 1/2 cups water
1 tbsp. coconut oil
1 1/2 tsp. baking soda
3/4 cups Basmati rice rinsed
1 3/4 cups water
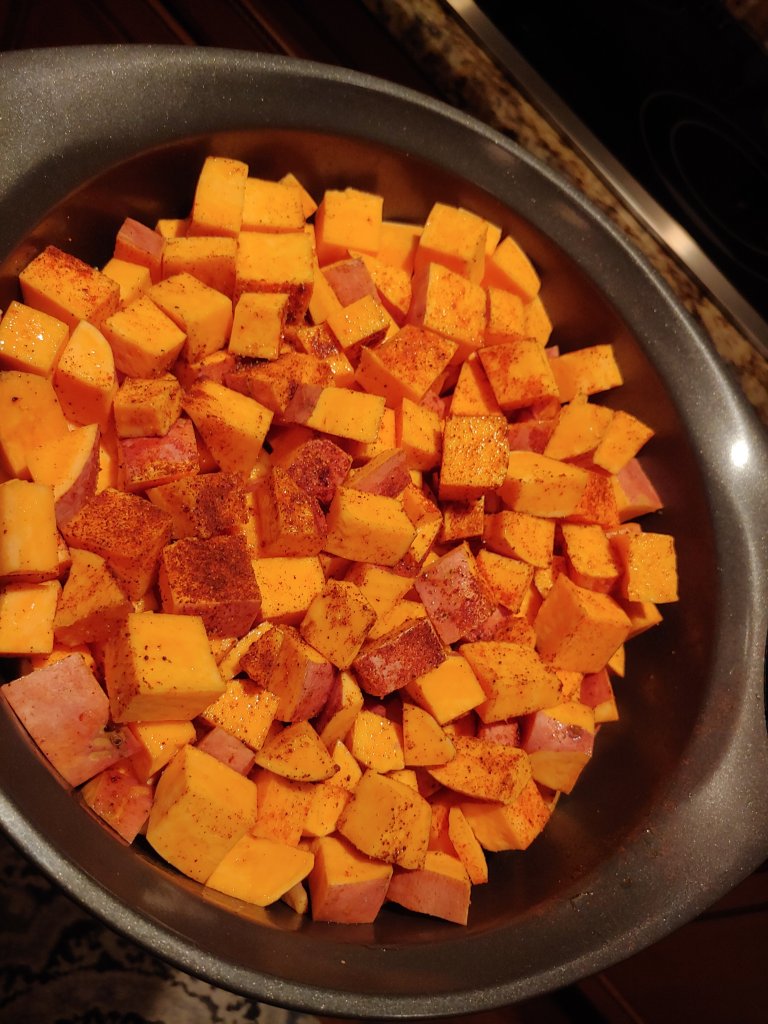
2 large sweet potatoes diced
1/2 tsp smoke paprika
1/2 tsp chili powder
2 red peppers, de-seeded and halved
1/2 yellow onion chopped
2 garlic cloves minced
3 medium carrots chopped
2 bay leaves
1 piece star anise
1 14.5 oz can of petite diced tomatoes
1 6 oz can tomato paste
4 tbsp. chana masala seasoning
1 tsp fresh turmeric (about 1 inch of a thin turmeric root)
1/3 cup pineapple juice
4 tbsp. olive or canola oil divided
salt and pepper to taste
Instructions
8 hours before cooking the curry place the chickpeas and 2.5 cups of water in a small crock pot wit a pinch of salt. Set on low.
Add 1.5 tsp. baking soda to chickpeas 1 hour before cooking
Preheat oven to 375 F
Place rinsed rice and water into a rice cooker, set to cook until all liquid is absorbed then set to warm. Stir occasionally to prevent sticking.
Toss diced sweet potato with 1 tbsp. of oil, salt, pepper, paprika, and chili powder. Place in a metal baking dish cook on the ovens top rack for 20 -25 minutes or until softened and browning
Place red pepper halves in a metal baking dish. Drizzle with 1 tbsp. olive oil and season with salt and pepper. Place on bottom rack of the oven and bake for 20 to 25 minutes, until soft and browning
Heat 2 tbsp. of oil in a large pot over medium heat, add onions and garlic and cook until translucent
Add bay leaves, star anise, and carrot and cook until fragrant, about 2 minutes
Stir in tomatoes, tomato paste, turmeric, chickpeas with all liquid, and chana masala seasoning, cover and let simmer for 10 minutes
Remove sweet potatoes and pepper from the oven, allow peppers to cool then dice. Add both to the curry along with the pineapple juice.
Add coconut oil to rice and stir in
Serve curry over or under rice depending on your preference, gluten free naan also makes a great companion!
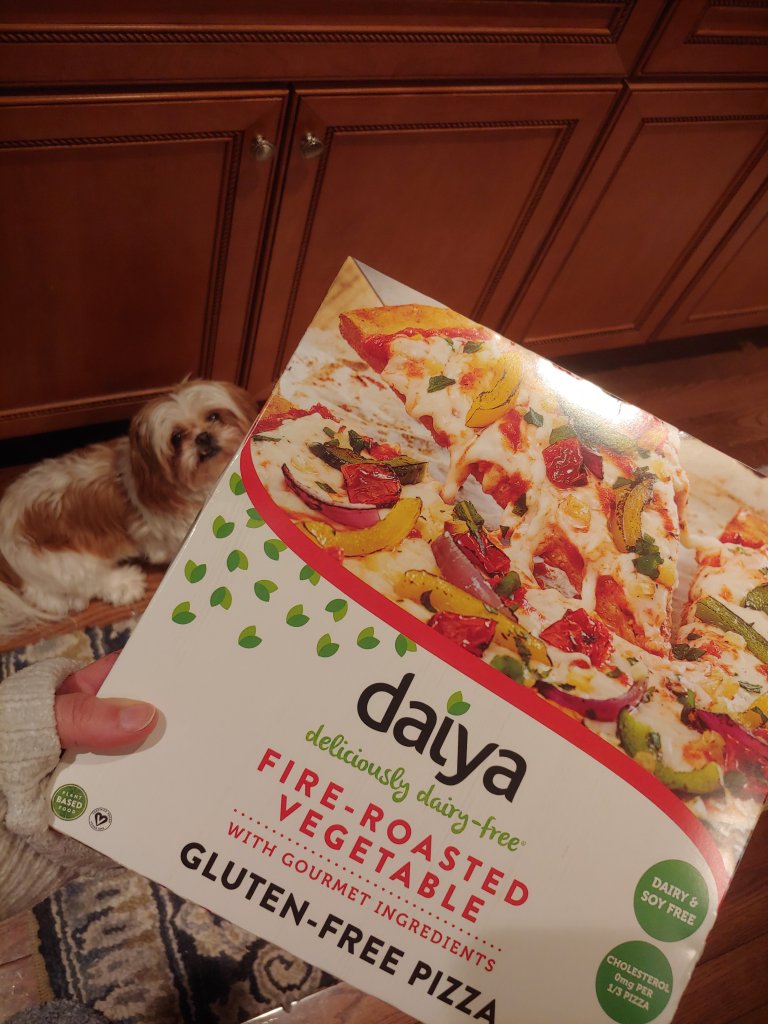
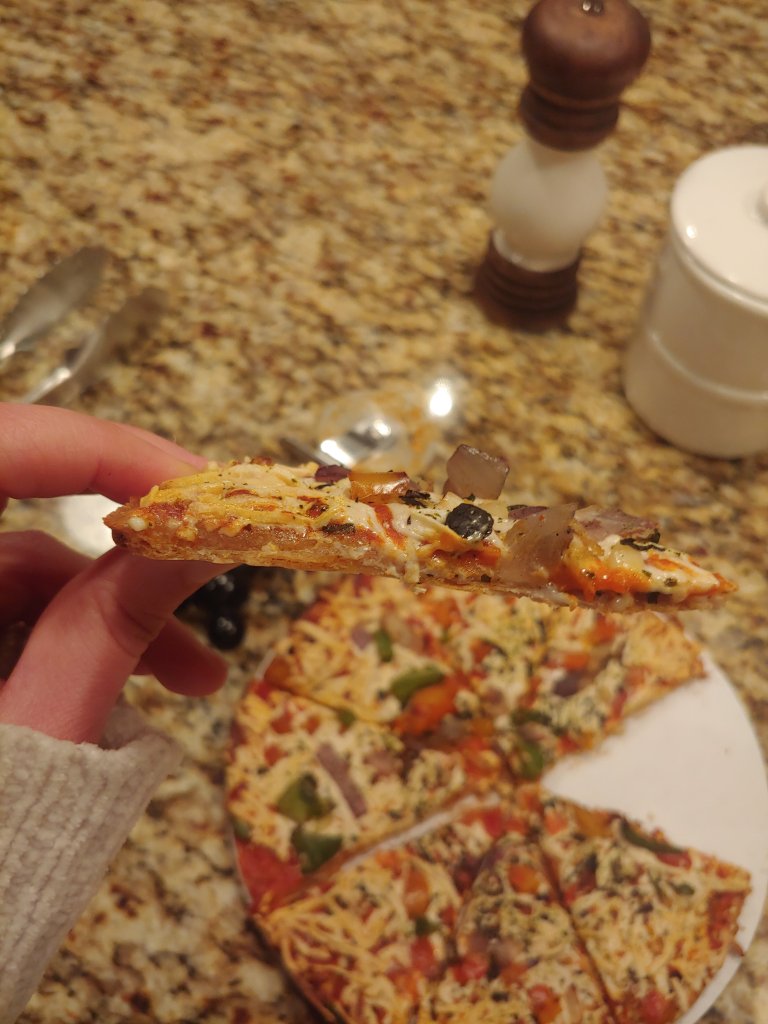
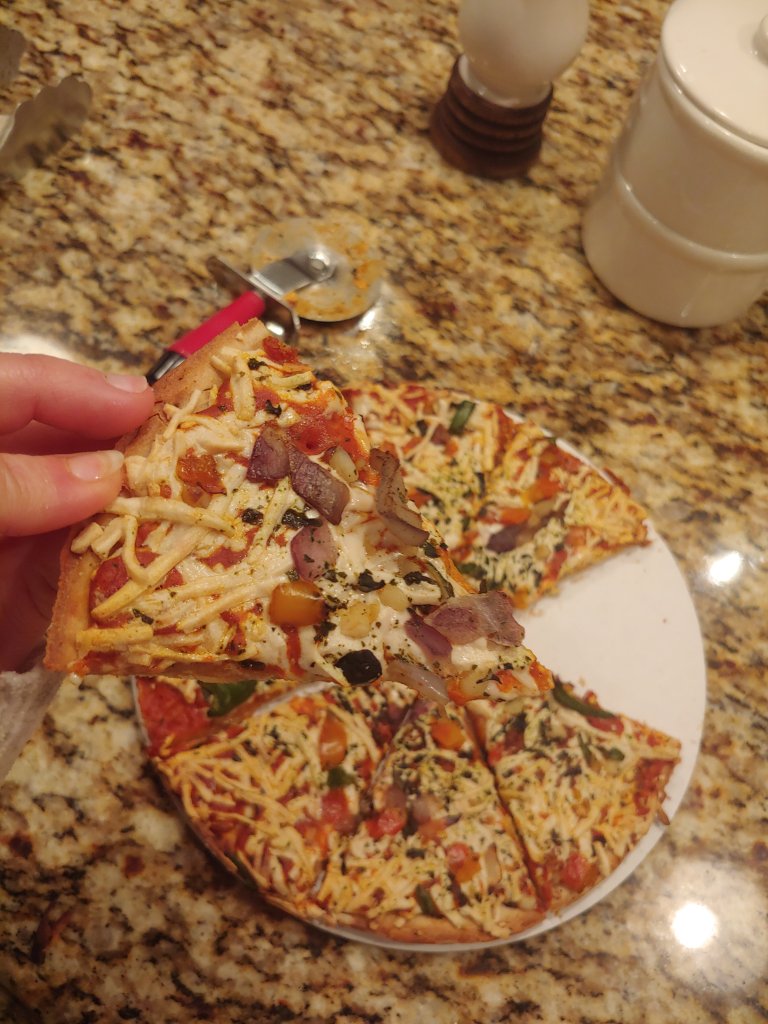
Peep Georgia in the background, as curious as I am about this pizza
Hurray for product reviews! I am starting out with something from the well known vegan brand Daiya, and it’s a pizza! Usually, the Daiya products aren’t something I am crazy about or really any dairy free cheeses. Still, I thought this was worth trying.
The packaging was really pretty and based on the first review it seem like it would be tasty. Although when I removed it from the pack the veggies looked more like the freeze dried ones that wouldn’t cook up well. It took a while to cook and I wasn’t surprised that the cheese didn’t melt all that much, as Daiya cheese rarely does.
The crust was really good, and was pretty crisp on the bottom while still having some spongey texture to it. The sauce was sweet and tasty but was a bit scarce, I definitely would have liked to see more of it. The cheese melted enough to be gooey in the center of the pizza and crisped up a bit around the edges, which actually added a nice texture to the crust. The veggies were a bit wimpy though, they didn’t get very plump and didn’t add much depth to the pizza. The flavor was definitely there, and it had the “fire roasted” flavor in the pizza name but the texture just wasn’t there.
It kinda tasted like the tostinos party pizzas I ate as a kid, so it did have a nostalgic component to it. Overall I rate it as follows:
Time for my first restaurant review! I decided to start off with a vegan/vegetarian restaurant so I would have plenty of dishes to talk about. I had been dying to try Lulu’s since I moved back to Saint Louis, and finally got to after me and some friends went to the STL women’s march (which was also amazing and supportive and inspiring). Lulu’s brands itself as all plant based and sustainable, which I found very refreshing.
It is located off South Grand, the food hub of south city where many of my other favorite restaurants are. It’s fairly accessible and a good spot for brunch, a lunch date with friends or even dinner before catching a show. When we went (around 12:30 on a Saturday) it was packed. We got there right before the rush and the line was nearly our the door after we ordered.
Just to start off, I loved Lulu’s and can see why everyone has repeatedly recommended it. It’s delicious and has so many options, which was weird for me! For once I actually had to choose a menu item instead of selecting the default GF and vegan option. The whole menu is very well labeled indicating items that are gluten-less, nut-less, and soy-less. I went with my sister and she recommended a few menu items which was super helpful in narrowing my decision.
The three of us split the Loaded Nacho tater tots, as my sister insisted that the tater tots were amazing. They were. The tots were topped with carnitas jackfruit, their house made butternut squash cheese sauce, salsa, sour cream, jalapeños, cilantro, and green onion. The tots themselves have a nice zest Cajun seasoning on them and are ultra crispy on the outside but soft and potato-y on the inside, which served as an excellent base that held up well under the sauce. The jackfruit carnitas was the perfect mix of spicy and sweet from the seasoning and sour from the jackfruit which balance well with the cheese sauce. The texture was pretty similar to that of pulled pork, and had the perfect amount of mush and crisp. Butternut squash is such an ingenious base for a cheese sauce, providing the umami, body, and creaminess. It genuinely tasted cheesy which was a welcomed surprise. The additional toppings really rounded out the vibe of the dish. We got the large order and that would have been enough to fill me up. The price was good for all you got, coming in around $10.
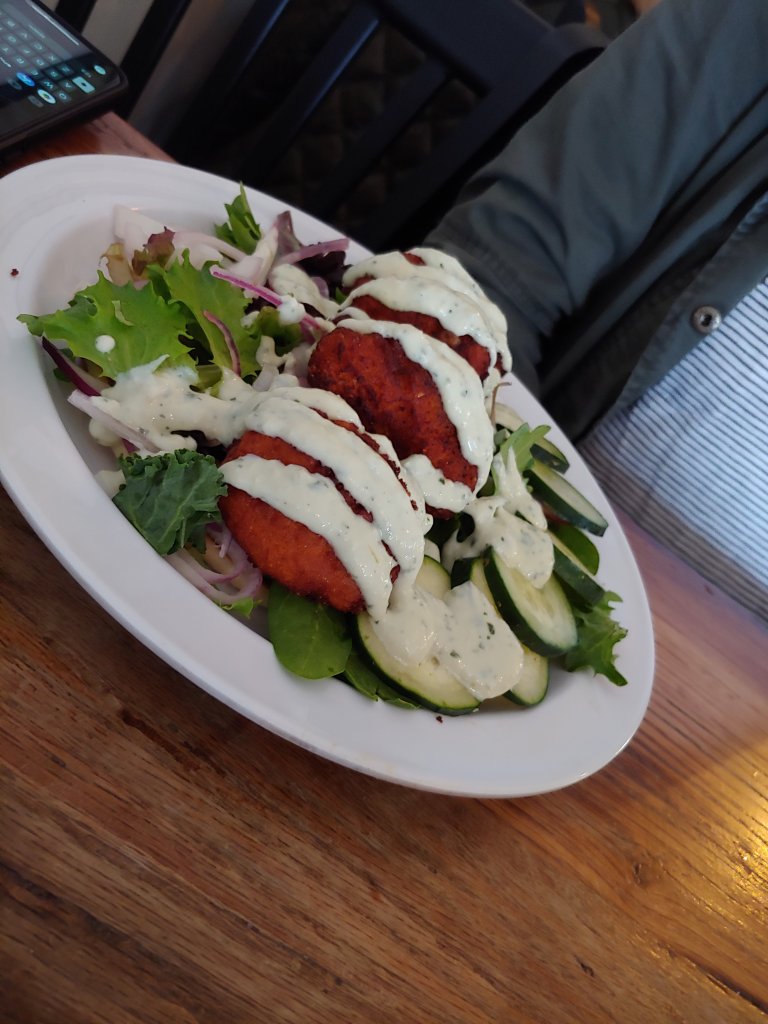
My friend got the sweet potato falafel, and my sister got the buffalo cauliflower. Neither items were gluten free but the said both were fantastic, and my sister insists that the cauliflower is consistently of high quality. My friend really enjoyed her falafel, which came as a wrap on a pita. It was a bit over stuffed with lots of cucumber and lettuce, but the tzatziki was really tasty.
I got the mac and cheese with pesto sauce, at the encouragement of the till operator and I was not sorry. It was the same cheese sauce that came on the Nacho tots which I was delighted to have more of. In addition, it was topped with a walnut parmesan that was honestly pretty damn close to the real thing and added a nice crunch. As the till operator suggested, the pesto mixed in so well with the cheese sauce and resulted in more of a creamy pesto type dish. I would absolutely have this again and would love to try it with the other sauces on top (they will add chili, pesto, buffalo, or nacho sauce for no extra charge). I suspect it would also be delicious with carnitas jackfruit, mmm. Another dish I would definitely order again.
Overall I really liked Lulu’s. The atmosphere was pleasant even when it was busy, and the staff was polite and helpful. I liked that it was partially self service, where you order at the till and food was brought. They also had water and condiments openly available and it was self-bussing. There is also a ping pong bar upstairs! So I give the following rating
Food: 8.5/10
Atmosphere: 7/10
Service: 9/10
Price: 8/10
Overall: 8.5/10
NOTE: I rate a 10/10 as above and beyond anything I have ever had so this is pretty good in my book! And I suspect the rating will improve as I try more menu items!
This was another treat I made for my step fathers birthday. We all try to eat ~relatively~ healthy (save our frequent popcorn dinners) so I wanted to do something refined sugar free and mostly grain free. The crust I used here is one I have used in other pies before so I had a good idea of how it would turn out. The cheesecake on the other hand was totally new to me and I was VERY nervous (find both of those original recipes here and here). I did some tweaking (naturally) to make both recipes completely vegan and compatible, but they are generally pretty similar to the originals. So, feel free to use either!
The crust is made from only 4 ingredients, with the main dry ingredient being coconut flour. It is important that the oil you use in the pie dough is cold in order to obtain the desired flakiness. I have used both chia and flax as egg substitutes in this recipe and both work great! They just have different textures. The cheese cake is also mostly coconut based and sweetened with meaning the recipe is filled with loads of healthy fats! The recipe relies upon a starch to give it the cheesecake like texture. What starch you use doesn’t much matter, but you may need to adjust depending on the source. This was a pretty big hit among my family members who are usually skeptical about vegan items. It really did taste just like a cannoli in my opinion, so if that is a flavor you like I highly encourage you to try this!
Ingredients
Coconut Flour Crust
3/4 cup of coconut flour
8 Tbsp. cold vegan butter or coconut oil or butter
2 Tbsp. Flax or Chia Seed
5 Tbsp. warm water
pinch of salt
Cannoli Cheesecake
1 cup of vegan yogurt – Vanilla flavor
1/2 cup coconut cream*
1/2 cup maple syrup
4 Tbsp. corn starch
1/2 cup vegan chocolate chips
* if you place a can of coconut milk in the fridge, it will separate. The liquid that remains on top can substitute coconut cream if you cannot find any.
Instruction
Preheat the oven to 350 F
Combine Flax or Chia with water and set aside to gel (this will take 5 to 10 minutes)
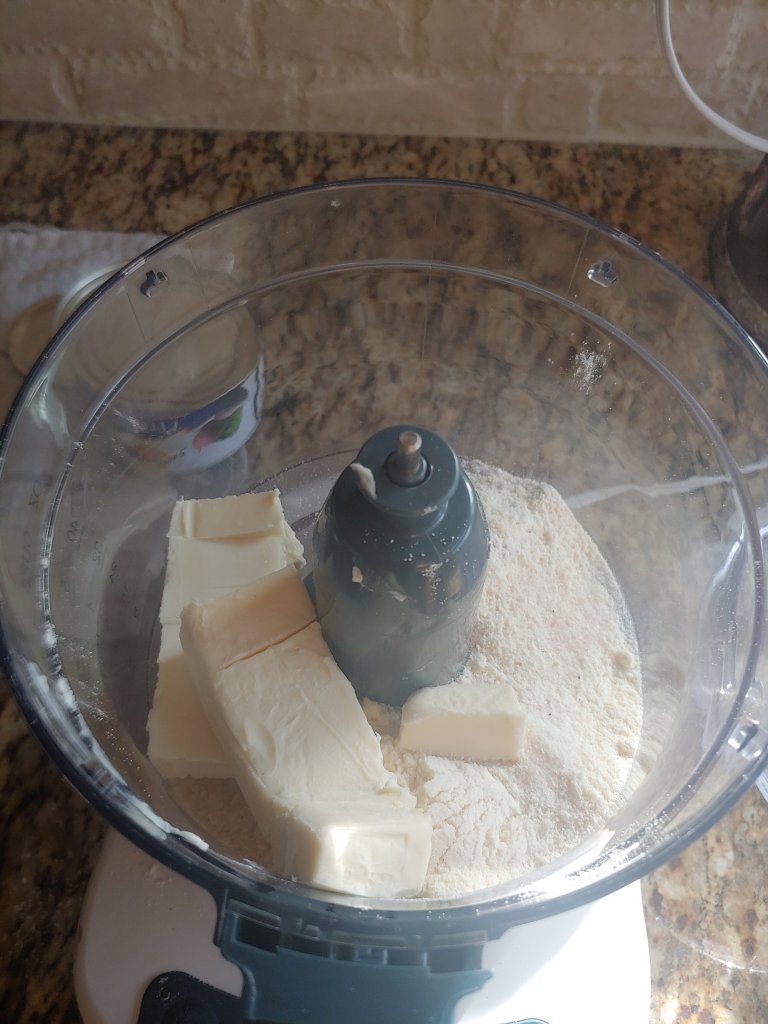
If you have a food processor: Place all of the ingredients for the pie crust into the bowl of a food processor. I suggest cutting the butter into pats before processing. Mix until the dough comes together into a ball
If you do not have a food processor: Combine the flour and salt into a bowl. Cut the butter into the flour with a pastry blender or fork until it resembles a rough crumble. Add in the chia/flax egg and stir to combine until a ball forms.
Place the dough ball in the freezer for 5 minutes.
Remove the dough and press into an oiled pan 9 inch cake pan. It is ok if the dough doesn’t come all the way up the sides. Puncture the dough with a fork around the base and edges to prevent bubbles from forming.
Pre-Bake the dough in the oven for 15 minutes
Turn oven up to 375 F after the crust is done baking
Meanwhile in a mixing bowl, combine all of the cheese cake ingredients minus the chocolate and beat for 5 minutes. Stir in chocolate chips.
Pour the batter into the pre-baked crust and bake again for 15 to 20 minutes. The outside should be set and the inside should be jiggly but not wet. If the interior still looks soupy, bake for an addition 3 to 5 minutes.
Remove the cheesecake from the oven and let cool. Once cool place in the fridge to chill. When ready to serve you may decorate the cake with a chocolate drizzle, some vegan whip cream, or powdered sugar!
I made these little bites of deliciousness for my step fathers birthday. He had been raving about the ‘everything but the bagel’ seasoning we get from Trader Joes. He also LOVES pretzel bites (and frankly don’t we all?), so these were really the perfect birthday treat. I adapted this recipe from one I found online, which originally produced roughly a billion pretzel bites (more like 48 but whatever). You can find the recipe here, or follow the one that I have adapted. The one I have adapted is gluten free and makes around 12 pretzel bites. The way you can increase the recipe if you are feeding guest, or just make some for yourself as a snack!
I found the recipe to be fairly straight forward, and the longest step was the proofing. The dough is a bit drier and less tacky than gluteny pretzels, but still plumps up the same. They are even a bit more dense, which my family all really liked. That said it does require a bit of adjustment and I HIGHLY recommend using a gluten free flour blend with xanthan gum or adding some in yourself. The xanthan gum is important in high gluten breads as it helps to build the tacky texture. I like the brand that we get form our local Costco, but am unsure if this is available universally. You can find it here!
I also increased the maple syrup and oil in this recipe as I personally though it would benefit from more sweetness and moisture.
The dough doesn’t exactly rise like a traditional yeasted bread, so don’t worry if you dough ball doesn’t significantly increase in size. It is completely normal! I hope you enjoy this recipe!
Ingredients
1/3 Cup + 1 Tbsp. warm water
1/2 Tsp yeast
1 Tbsp. Maple Syrup
1 Cup GF flour containing xanthan gum
1 Tsp xanthan gum (if using flour without)
1 Tsp. salt
1 Tbsp. Oil (olive, canola, and grapeseed all work)
2 Tbsp. Vegan butter or more oil
5 Cups of water
1/3 Cup baking soda
Everything Bagel Seasoning (I like the one from Trader Joes, but you can also make your own)
Instructions
Prepare the yeast mixture by combining the warm water with the yeast and maple syrup. The warmth and sugar provide a place for the yeast to bloom. Set aside for at lest 10 minutes or until the surface looks foamy.
Meanwhile, combine the flour, salt, and xanthan gum (if necessary) in a bowl
Add the yeast mixture to the flour along with the oil and stir to combine. The mixture will be rather stiff and dry.
Turn the dough onto a floured surface and knead for 5 to 10 minutes. The dough should become more tacky.
Place the kneaded dough into an oil bowl, cover with a dry cloth and let rise in a warm dry place for 1 hour. Note the dough is very heavy and will not rise a great deal. Preheat the oven to 450 a few minutes before the hour is up.
Place the water and baking soda in a large pot to boil and prepare a pan with either parchment paper or oil
Knead the dough a few more times, then pull off tablespoon sized pieces and roll into balls
Place the dough balls into the boiling water for about 1 to 1.5 minutes, remove and place on baking sheet
Sprinkle everything bagel seasoning over top and place in oven for 10 to 12 minutes, or until dark golden brown
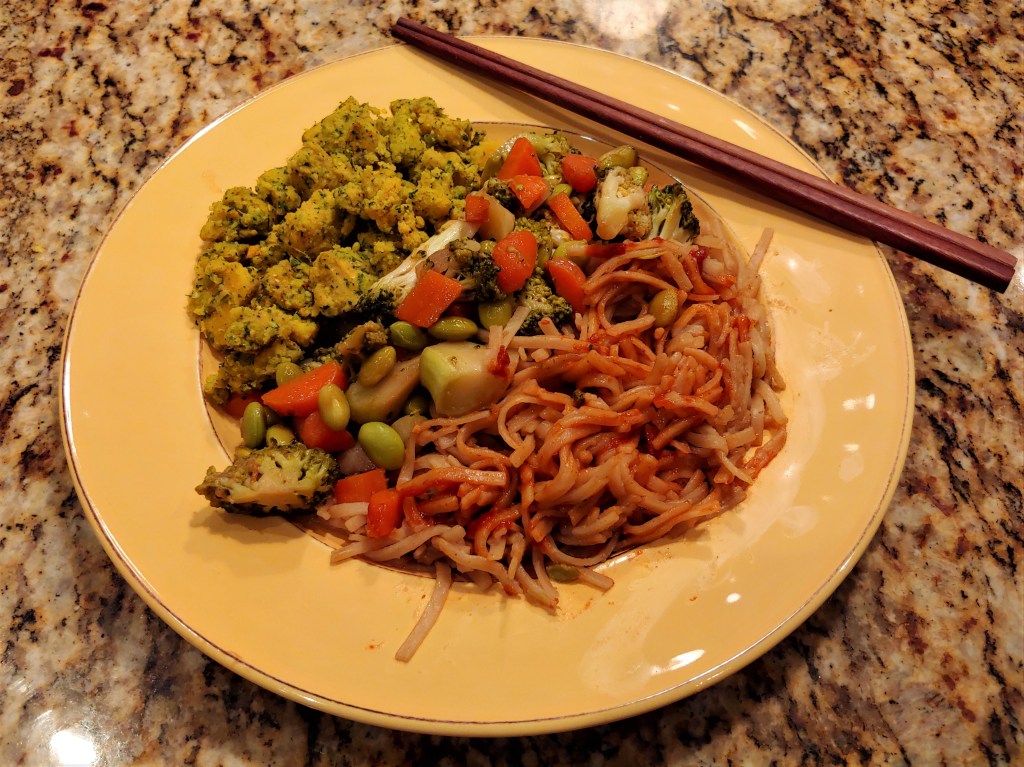
We made these noodles as a part of a meal prep to curb a soba craving. While it didn’t really do the trick, they were still delicious! It was pretty impossible to find gluten free soba noodles at the grocery store so I settled for brown rice noodles and dressed them up with a creamy sesame dressing. “The secret behind the creaminess?” You may ask, Tahini!
I pared the noodles with some lemon ginger veggies and some chickpea eggs with chimichurri. (The only sensible reasoning for using the chimichurri was because it was in my fridge and was delicious). I prepped the veggies ahead of time and cooked the noodles when I was ready to eat just to streamline the cooking process without compromising freshness. Both components were stir fried using a wok, which I HIGHLY recommend investing in. Stir fry turns out so much better in a wok due to the even heat distribution, and honestly they are pretty multi-functional!
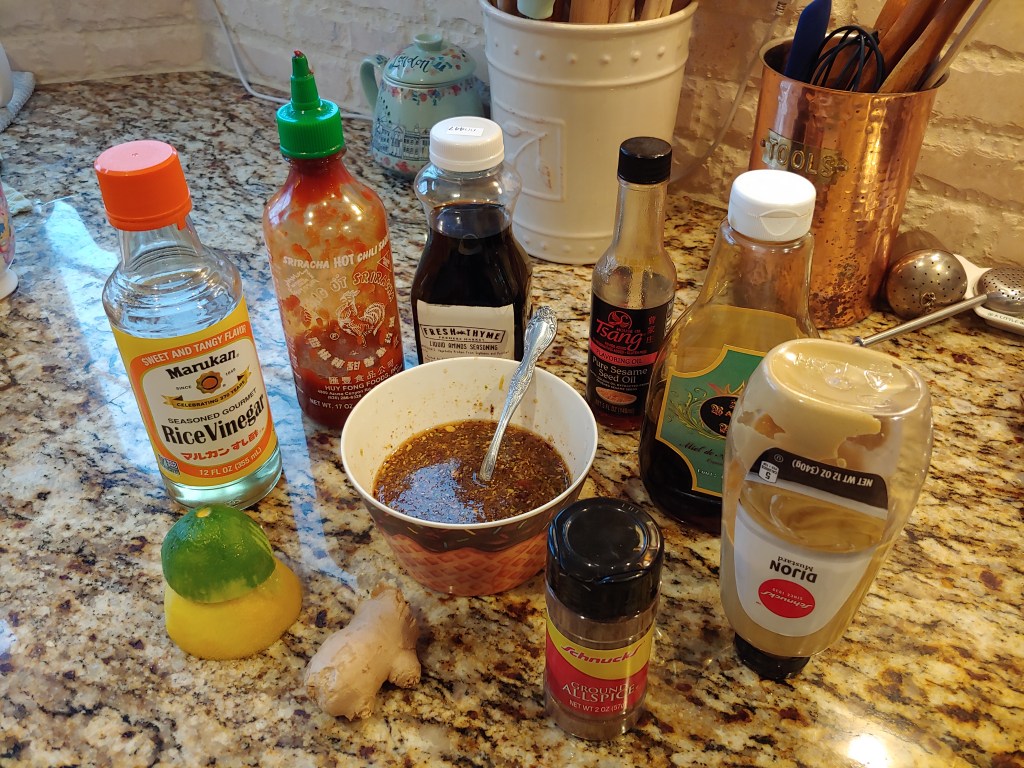
The recipe requires two sauces: One for the veggies and one for the noodles. They use most of the same ingredients however so there isn’t too much fuss as far as ingredients are concerned. The lemon zest in the veggie sauce really enhances the flavor so do not skip that part. The picture below shows the core ingredients for the sauces.
Ingredients
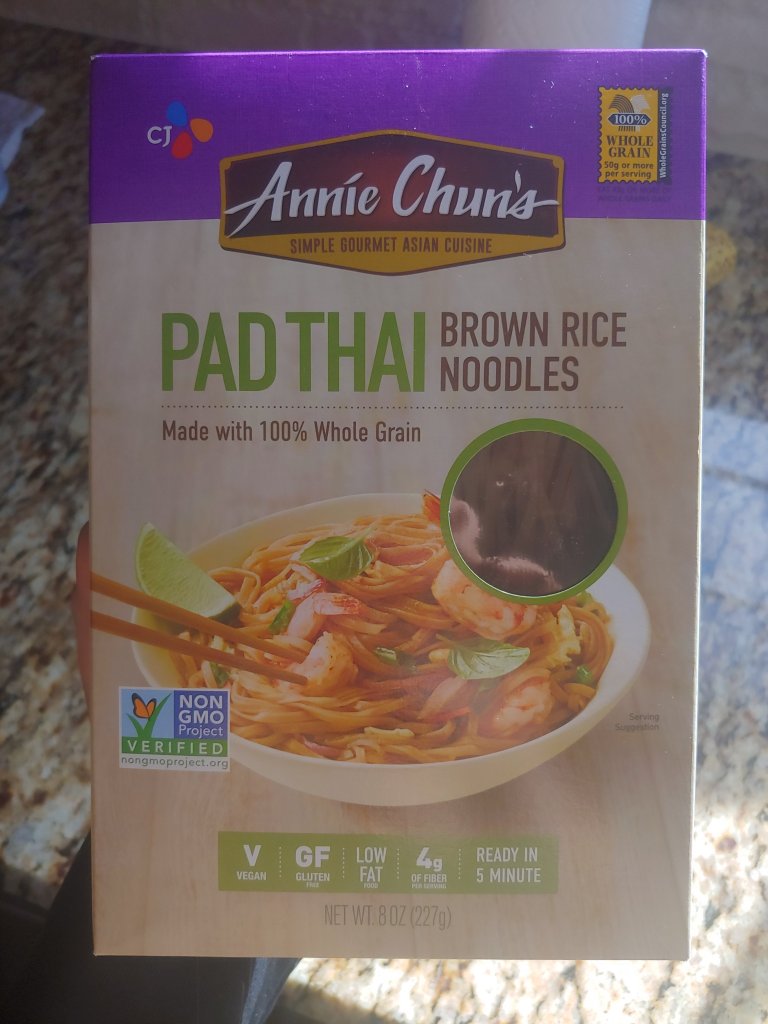
8 oz pack of GF rice or soba noodles (see picture below for the brand I used)
3 cups (1 head) broccoli – chopped
1.5 cups (2-3 big) carrots – chopped
1 shallot – minced
2 cloves garlic – minced
1 can sliced water chestnuts
1/2 tbsp. neutral oil (peanut, canola, or vegetable)
Veggie Sauce – Lemon ginger
Juice of 1 lemon (about 1/3 cup)
Juice of 1 lime (about 1.5 tbsp.)
1 tsp. lemon zest
1 tbsp. liquid Aminos
1 tsp. grated ginger
1 tbsp. rice vinegar
1/2 tsp. Dijon mustard (optional – but it gives it a nice kick)
1/4 tsp. allspice
1 tbsp. neutral oil (peanut or canola work great)
2 tsp. agave or maple syrup
Noodle Sauce – sesame sriracha
1/2 cup liquid aminos
2 tbsp. tahini
2 tbsp. agave or maple syrup
1/2 tsp. sesame oil
1/2 tsp. grated ginger
1 tsp. Dijon mustard (again optional – but I like the kick)
1/4 cup rice vinegar
1 tbsp. sriracha or chili sauce of preference
1 tsp. sesame seeds
Instructions
Prepare both of the sauces by mixing all of the ingredients together with chop sticks or a whisk and set aside
Heat neutral oil over medium-high heat in Wok, add shallot and cook until translucent (Note: High heat is important in order for water to evaporate off veggies)
Add broccoli and carrots, stir to combine then cover and let steam for 3-4 minutes
meanwhile, cook noodles according to package directions – strain and set aside
Uncover veggies and add water chestnuts and lemon ginger sauce, cook for another 3 – 4 minutes until sauce has cooked down. Remove veggies from wok (if I were prepping these, I would place veggie in a Tupperware for storage)
Add noodles to wok along sesame sriracha sauce. If cooking all noodles at once add all of the sauce. If not, I recommend 2 – 3 tbsp. sauce per every 2 oz. of noodles
Stir fry noodles for 5 to 7 minutes, just until the sauce begins to thicken and the noodles get a bit of a crisp on them
Remove noodles from pan and plate with veggies
If you choose to do the chickpea eggs as well, see the recipe here. The only difference is that I add chimichurri in addition to the extra milk.
This is the rice noodle brand I used. About 1/4 of the box is 1 serving.
Breakfast is the meal that I find the most challenging, given my dietary restrictions. In honesty, this is a great tragedy, because breakfast is my FAVORITE meal. I have even been known to request it for dinner in my household. That being said, I am always trying to come up with Bailey-Friendly twists on some of my favorite classics. And as it turns out, breakfast tacos are pretty easy to make vegan and gluten free!
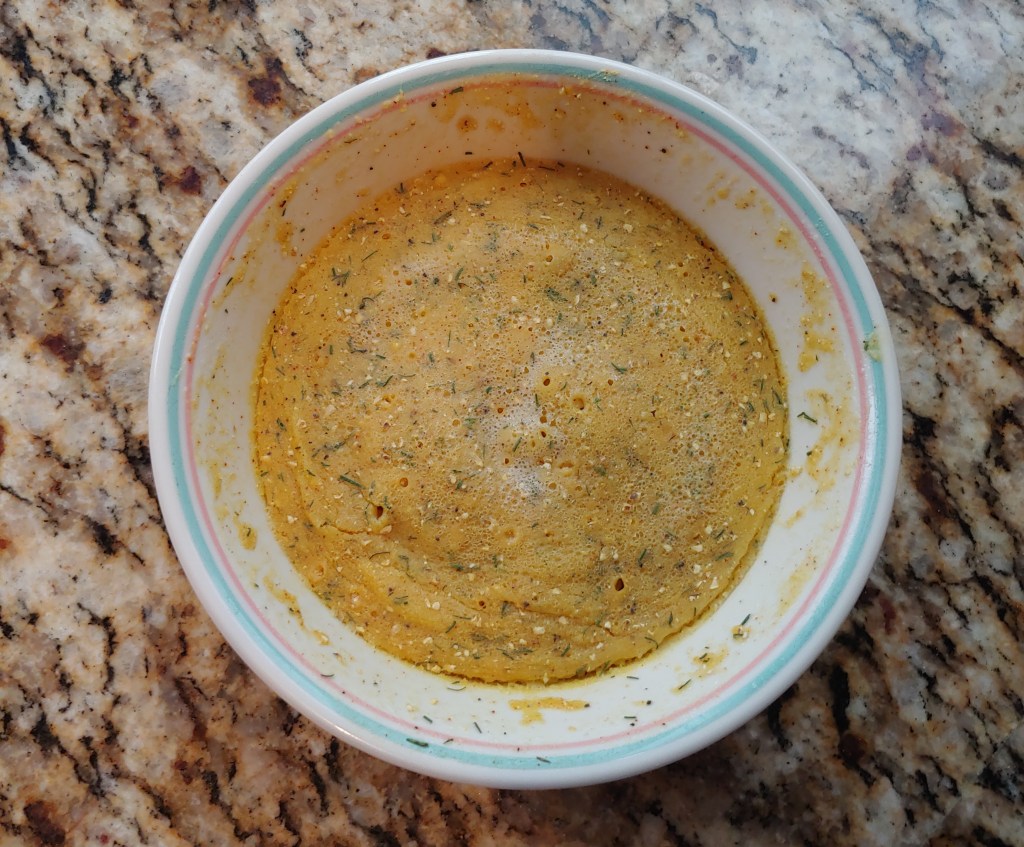
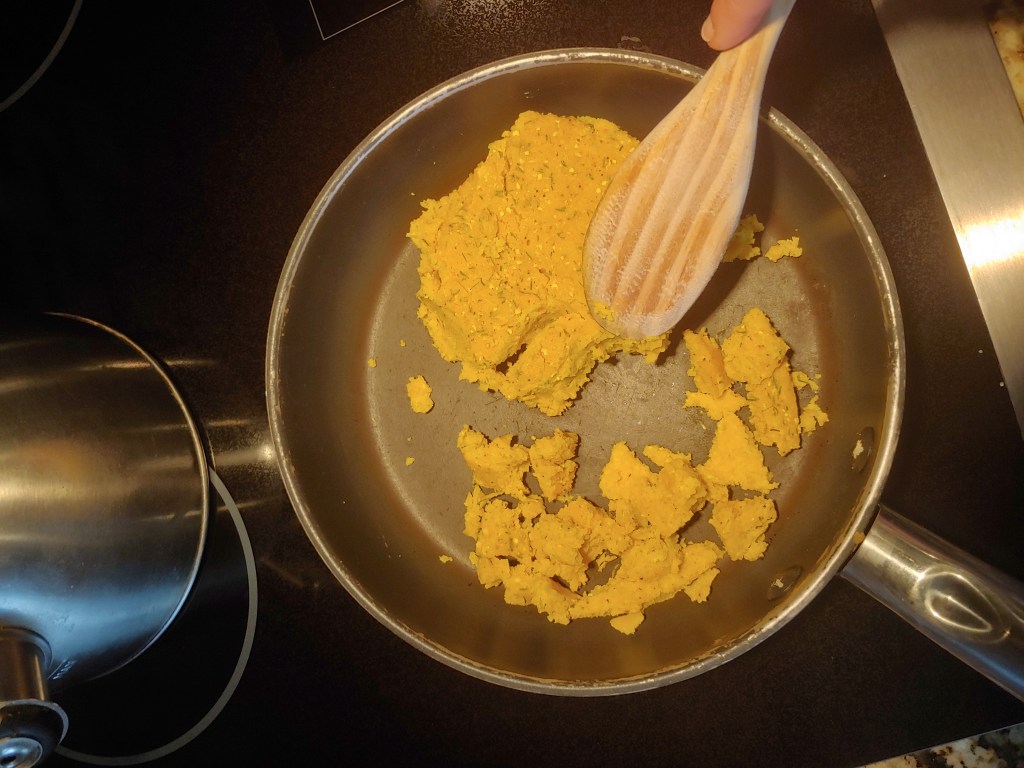
The most difficult component was mimicking the eggs, as I am not fond of tofu scrambles. Nonetheless, I achieved a very scrambled eggy texture with chickpea flour and corn meal! They were pretty fluffy and surprisingly easy to make. The corn meal gave them a nice texture and the chickpea flour helped hold the shape and provide density. The flavor needs some adjustment to get that “eggy” flavor but that was easy achieved through some mindful seasoning. To achieve the proper texture you essentially have to double cook the batter. The first round causes the batter to firm up and the second helps to add back moisture and heat them up
The first cooking to firmThe second cooking to break up and add moisture
To accompany the “eggs” I made some hash browns, sautéed veggies, and refried beans then topped them all with chopped tomato and avocado. I used my favorite homemade vegan nacho cheese seasoning in the beans (recipe to come) which really jazz the tacos up.
These certainly weren’t one of my quicker breakfasts. We made them the morning after we got back from the Smokey Mountains, which was perfect for the slow day we had in mind. They would be ideal for having folks over for brunch as you can easily increase the batch size and set them out as a taco bar. Most of the ingredients were things I keep stocked in my pantry with some exception, so they shouldn’t be too much of a hassle to whip up!
Ingredients
8 White Corn tortillas or other GF tortilla
3 cups of frozen or fresh hasbrowns
1 avocado diced
1 tomato diced
refried black beans
1 bell pepper diced
1/2 yellow onion diced
1 cup spinach, kale, or other veggie
2 tbsp. “nacho cheese” seasoning
3 tbsp. neutral oil
salt, pepper, and paprika to taste
hot sauce, lemon slices, salsa, cilantro, or other toppings
Chickpea “eggs”
1/2 cup Chickpea (or garbanzo bean) flour
1/4 cup fine ground corn meal or polenta
1/2 cup + 1 tbsp water or dairy free milk
1/4 tsp turmeric
1/2 tsp paprika
1/2 tsp corriander
1 pinch of dill
salt and pepper to taste
Instructions
Heat a skillet over medium heat with 2 tbsp of neutral oil, add in hash browns and cover. Cook covered for 5 to 7 minutes, flip, cook covered for 5 more minutes. Uncover and cook until crisp
Combine all ingredients for the chickpea eggs (except the extra tbsp. of water) into a microwave safe bowl. Heat for a 1.5 minutes or until the batter no longer looks wet. Place in the refrigerator while you prep everything else
Heat onions and peppers in a skillet with 1 tbsp neutral oil over medium high heat with salt and pepper, cook until the start to soften
Add additional veggies and cook until softened
Combine refried black beans and nacho cheese seasoning in a microwave safe bowl and heat until warm
Remove the chickpeas batter from the fridge and place in a pan on medium high heat. Break apart with a spatula into a crumbled texture and add extra tbsp of water. Cook for 5 minutes to reheat and cook off water
heat the tortillas in the microwave with a glass of water for 30 seconds to ensure they don’t dry out
To assemble tortillas add beans first, the hash browns, veggies, chickpea eggs and additional topping.